
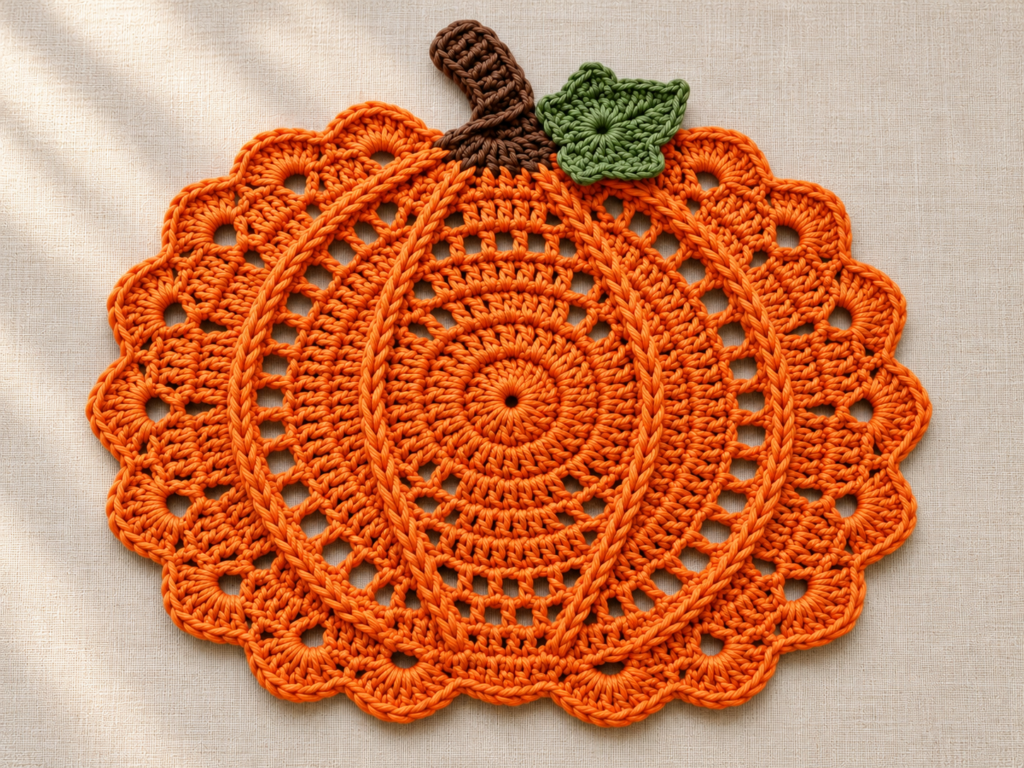
This crochet pumpkin placemat combines orange lace, raised ribs, scalloped edges, a brown stem, and a green leaf for an autumn table setting. The body is worked in joined rounds; the stem and leaf are made separately and sewn on.
This is an original, image-inspired pattern draft that has not been physically tested. The AI-generated illustrations show the intended appearance and making stages; they are not real process photographs or evidence of exact stitch counts. Follow the written instructions for counts. Individual ribs, leaf details, and proportions may differ from the illustrations.
Project at a Glance
| Detail | Proposed specification |
|---|---|
| Skill level | Intermediate: joined rounds, front-post stitches, lace spaces, shaped edging, and sewing |
| Finished width | Approximately 30–34 cm / 11.8–13.4 in |
| Total height, including stem | Approximately 34–38 cm / 13.4–15 in |
| Making time | Approximately 6–9 hours, depending on experience |
| Construction | Orange body in joined rounds; brown stem in rows; green leaf in joined rounds |
| Proposed gauge | Approximately 20 dc and 11 rows per 10 cm / 4 in in a flat dc swatch |
| Gauge status | An assumed planning gauge, not a measured result |
The photograph does not establish yarn weight, hook size, or actual dimensions. This draft uses light cotton yarn and a moderately firm fabric as proposed choices. Gauge changes the finished size and may affect how the lace lies flat.
Materials
- Pumpkin orange: approximately 80–100 g of category 3 / light / DK cotton yarn.
- Chocolate brown: approximately 3–5 g of the same yarn for the stem.
- Olive or leaf green: approximately 3–5 g of the same yarn for the leaf.
- 4.0 mm crochet hook as the starting project choice; adjust after making a swatch.
- Blunt yarn needle, scissors, and stitch markers.
- Flat blocking surface and rustproof pins.
Quantities are estimates for one placemat. Keep all three yarns the same weight. The yarn-weight classification follows the Craft Yarn Council Standard Yarn Weight System. Its general hook ranges are guidelines; the hook and gauge proposed here belong to this untested draft.
Crochet Abbreviations and Pattern Notes
This pattern uses US terminology, consistent with the Craft Yarn Council crochet abbreviation list.
| Abbreviation | Meaning |
|---|---|
| ch | Chain |
| sc | Single crochet |
| hdc | Half double crochet |
| dc | Double crochet |
| FPdc | Front-post double crochet |
| sl st | Slip stitch |
| st / sts | Stitch / stitches |
| ch-sp | Chain space |
Front-post double crochet: yarn over, insert the hook from front to back and back to front around the post of the indicated stitch, yarn over and pull up a loop. Yarn over and pull through two loops twice. The stitch’s post is worked instead of its top; do not also work into that top.
Magic ring: form an adjustable yarn loop, crochet the first round into it, then pull the tail to close the center.
Counting rules
- Starting ch 2 in body Rounds 1–14 does not count as a stitch.
- Join these rounds with a sl st into the first dc or first FPdc. Joining sl sts are not included in the round totals.
- Do not turn the body or leaf.
- FPdc is included in the stated dc total.
- Chain spaces are counted separately from solid stitches.
- A group such as (dc, ch 2, dc) is worked entirely into the indicated space.
- Brown-stem turning ch 1 does not count as a stitch.
Step 1: Crochet the Center
Use orange. Make a magic ring.
Round 1: Ch 2, work 12 dc into the ring, close the ring, and join to the first dc. (12 dc)
Round 2: Ch 2, work 2 dc into every stitch, and join to the first dc. (24 dc)
Round 3: Ch 2, work (dc in the next stitch, 2 dc in the next stitch) 12 times, and join to the first dc. (36 dc)
Round 4: Ch 2, work (dc in each of the next 2 stitches, 2 dc in the next stitch) 12 times, and join to the first dc. (48 dc)
Round 5: Ch 2, work (dc in each of the next 3 stitches, 2 dc in the next stitch) 12 times, and join to the first dc. (60 dc)
The center should form a small disk. Check the counts before adding lace; do not rely on the generated image to count stitches.

Orange crochet center with working yarn and hook
Step 2: Build the Raised Ribs and Lace
The following rounds create 12 repeating sectors, each beginning with an FPdc. Mark the first FPdc of each sector in Round 6. The joining line will become the top center of the pumpkin.
Round 6: Ch 2. Work (FPdc around the next stitch, dc in each of the next 3 stitches, 2 dc in the next stitch) 12 times. Join to the first FPdc. (72 dc, including 12 FPdc)
Each repeat consumes 5 stitches and produces 6. At the proposed gauge, the disk may measure roughly 10–12 cm / 4–4.7 in across; this is an estimated checkpoint.
Round 7: Ch 2. Work (FPdc around the next FPdc, dc in the next 2 stitches, ch 1, skip the next stitch, dc in the next 2 stitches) 12 times. Join to the first FPdc. (60 dc and 12 ch-1 spaces)
Round 8: Ch 2. Work (FPdc around the next FPdc, dc in the next 2 stitches, [dc, ch 1, dc] in the next ch-1 space, dc in the next 2 stitches) 12 times. Join to the first FPdc. (84 dc and 12 ch-1 spaces)
Round 9: Ch 2. Work (FPdc around the next FPdc, dc in the next 3 stitches, ch 2, skip the next ch-1 space, dc in the next 3 stitches) 12 times. Join to the first FPdc. (84 dc and 12 ch-2 spaces)
Round 10: Ch 2. Work (FPdc around the next FPdc, dc in the next 3 stitches, [dc, ch 2, dc] in the next ch-2 space, dc in the next 3 stitches) 12 times. Join to the first FPdc. (108 dc and 12 ch-2 spaces)
Round 11: Ch 2. Work (FPdc around the next FPdc, dc in the next 4 stitches, ch 2, skip the next ch-2 space, dc in the next 4 stitches) 12 times. Join to the first FPdc. (108 dc and 12 ch-2 spaces)
Round 12: Ch 2. Work (FPdc around the next FPdc, dc in the next 4 stitches, [dc, ch 2, dc] in the next ch-2 space, dc in the next 4 stitches) 12 times. Join to the first FPdc. (132 dc and 12 ch-2 spaces)
Round 13: Ch 2. Work (FPdc around the next FPdc, dc in the next 5 stitches, ch 3, skip the next ch-2 space, dc in the next 5 stitches) 12 times. Join to the first FPdc. (132 dc and 12 ch-3 spaces)
Round 14: Ch 2. Work (FPdc around the next FPdc, dc in the next 5 stitches, [dc, ch 3, dc] in the next ch-3 space, dc in the next 5 stitches) 12 times. Join to the first FPdc. (156 dc and 12 ch-3 spaces)
Each finished sector now contains 1 FPdc, 6 ordinary dc, one ch-3 space, and 6 ordinary dc. This arrangement is essential for the border.
The panel should show a dense center, 12 raised ribs, and expanding lace sections. Lay it flat before proceeding. Strong cupping or ruffling calls for a count and tension check.
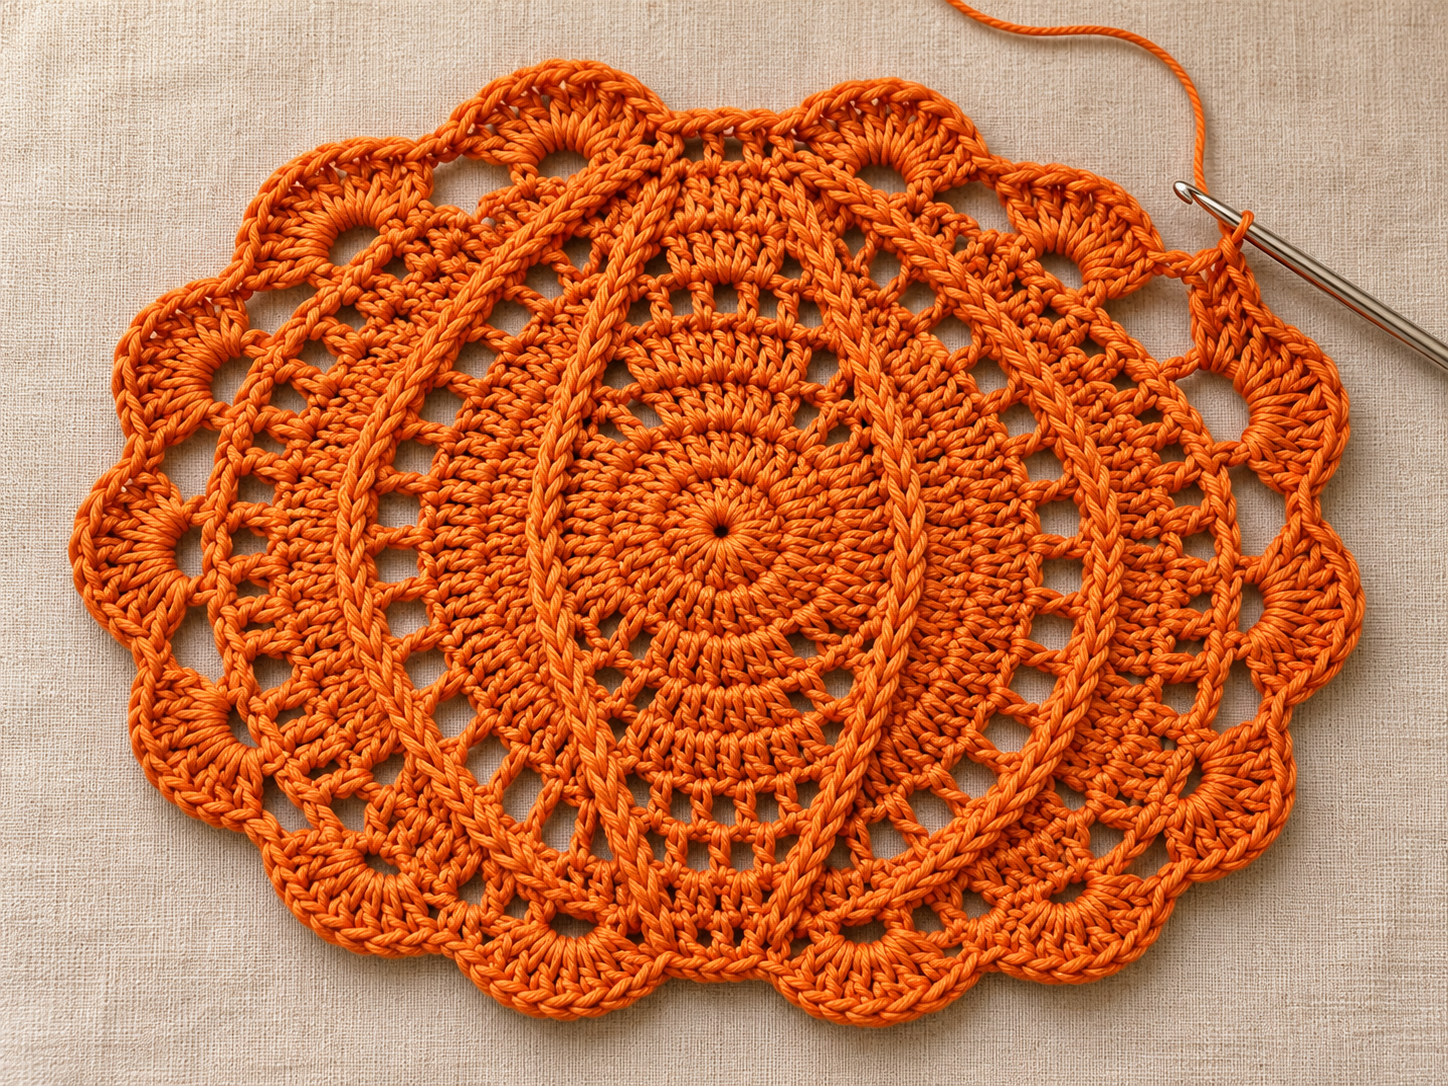
Orange body near completion with raised ribs, lace, and working hook; the illustration also shows edging in progress
Step 3: Add the Scalloped Border
Continue in orange.
Round 15: Ch 1; it does not count as a stitch. Work (sc into the top of the next FPdc, ch 5, skip the next 6 dc, sc into the next ch-3 space, ch 5, skip the next 6 dc) 12 times. Join to the first sc. (24 sc and 24 ch-5 arches)
Each repeat consumes one complete Round 14 sector. Number the arches 1–24 clockwise, beginning with the arch immediately after the first sc. Place temporary markers in arches 1, 12, 13, and 24.
Round 16: Do not turn. Ch 1; it does not count as a stitch. Work through the arches in this exact order:
- Arch 1: 5 hdc into the arch; sl st into the next sc.
- Arches 2–11: 7 dc into each arch; sl st into the next sc after each shell.
- Arch 12: 5 hdc into the arch; sl st into the next sc.
- Arch 13: 5 hdc into the arch; sl st into the next sc.
- Arches 14–23: 7 dc into each arch; sl st into the next sc after each shell.
- Arch 24: 5 hdc into the arch; sl st into the first sc of Round 15.
Round total: 140 dc, 20 hdc, and 24 anchoring sl sts.
Fasten off, leaving approximately 15 cm / 6 in for weaving in. The four shorter shells create shallower areas at the top and bottom. Blocking will emphasize the broad pumpkin outline.
Finished orange scalloped body before attaching the stem and leaf
Step 4: Make the Stem and Leaf
Brown Stem — Make 1
Use brown. Work back and forth in rows.
Foundation: Ch 11.
Row 1: Sc into the second chain from the hook and each remaining chain. (10 sc)
Row 2: Ch 1, turn. Sc in the next 4 stitches, hdc in the next 3 stitches, and dc in the final 3 stitches. (10 sts)
Row 3: Ch 1, turn. Sc in all 10 stitches. (10 sc)
Fasten off, leaving a 30 cm / 12 in sewing tail. The end above Row 2’s four sc is the narrower base. The taller end above its three dc forms the wider tip. Gently arrange the strip into a slight curve.
Green Leaf — Make 1
Use green. The leaf is worked in joined rounds and has three pointed lobes.
Round 1: Make a magic ring. Ch 1; it does not count as a stitch. Work 10 sc into the ring, close the ring, and join to the first sc. (10 sc)
Round 2: Ch 1. Work 2 sc into each stitch; join to the first sc. (20 sc)
Round 3: Ch 1. Sl st into the first stitch, then hdc in the next 3 stitches. Work the following group 3 times: sl st into the next stitch, skip the next stitch, work (2 dc, ch 2, 2 dc) into the next stitch, skip the next stitch. Sl st into the next stitch and hdc in the final 3 stitches. Join to the first sl st.
Round total: 12 dc, 6 hdc, 5 worked sl sts, and 3 ch-2 spaces. The final joining sl st is excluded.
Each lobe group consumes 4 of Round 2’s stitches. The two groups of 3 hdc form the lower sides of the leaf; the middle lobe forms its upper point.
Fasten off, leaving a 30 cm / 12 in sewing tail. Weave in the magic-ring tail.

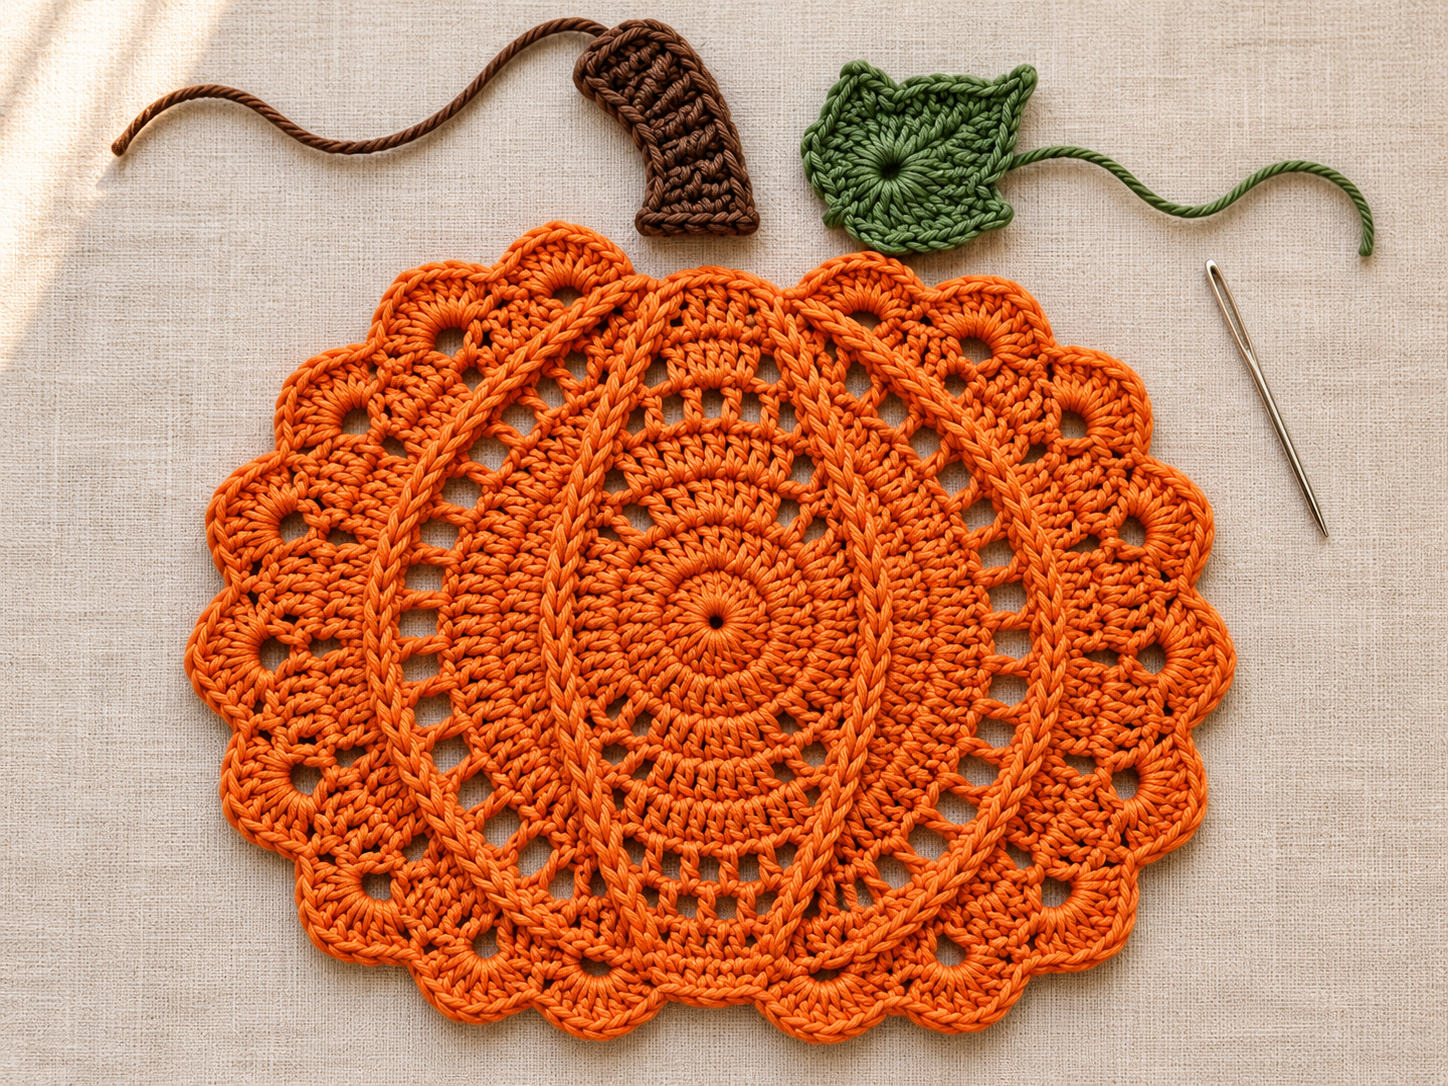
Orange body, brown stem, and green leaf laid out separately
Step 5: Attach the Decorations
Place the orange body right side up with the joining line at 12 o’clock. The first sc of Round 15 sits between shorter shells 24 and 1; this is the top-center attachment point.
- Pin the brown stem’s narrow base over that point, overlapping the orange fabric by approximately 1 cm / 0.4 in. Angle the tip gently toward the left.
- Use the brown tail to sew the base through the top-center sc of Round 15 and the nearby first FPdc of Round 14. Make several small stitches across the overlap; avoid pulling the lace tight.
- Place the green leaf immediately to the right of the stem. Point its middle lobe upward and slightly right.
- Pin the leaf’s lower edge against the stem base and orange body. Sew a short section of that lower edge with the green tail, taking small stitches into the nearby orange Round 14 stitches and, where they overlap, the brown stem base.
- Leave the leaf’s pointed lobes free. Check the front before securing the tails on the back.
Both separate crocheted components are now attached.

Close-up of the brown stem and green leaf attachment
Step 6: Shape and Finish
Weave in the remaining orange, brown, and green ends through nearby stitches on the back, following the same color wherever practical. Remove all markers.
Dampen and block according to the yarn label. Spread the orange body gently into a broad pumpkin outline, with the joining line at the top. Pin the scallops evenly, keep the top and bottom shallow areas distinct, and arrange the stem and leaf.
Avoid stretching individual chain spaces hard enough to distort their neighboring ribs. Allow the piece to dry completely on the flat surface. Record its actual finished measurements; the dimensions above remain estimates until the draft is made.

Completed pumpkin placemat with all ends hidden and decorations attached
Tips and Fixes
The body cups upward. Check for missed increases in Rounds 2–6, 8, 10, 12, and 14. Also check that an FPdc replaces the stitch beneath it rather than being followed by another stitch into that same top. If the counts are correct, tight chains or post stitches may be restricting the lace; undo the affected section and work those stitches more loosely.
The edge forms heavy ruffles. First verify the sector counts and check for accidental extra stitches in chain spaces. If the counts are correct and gentle blocking does not resolve it, the draft may need adjustment for your yarn and tension; do not force it flat by excessive stretching.
A raised rib disappears or shifts sideways. Every sector must begin with an FPdc around the previous sector’s FPdc. Keep the markers in place and avoid working a normal dc into the FPdc’s top during Rounds 7–14.
The scallops look uneven. Count 24 arches before Round 16. Only arches 1, 12, 13, and 24 receive 5 hdc; the other 20 arches each receive 7 dc. Keep the anchoring sl sts relaxed.
The stem or leaf curls away from the body. Check that sewing stitches are not pulling the orange lace inward. Re-pin the bases, loosen tight sewing, and block the separate shapes gently according to the yarn label.
Questions about a step?
If a stitch count or assembly detail is unclear, send us the post link and step number. For more practice with small projects, explore our beginner crochet accessories guide.