
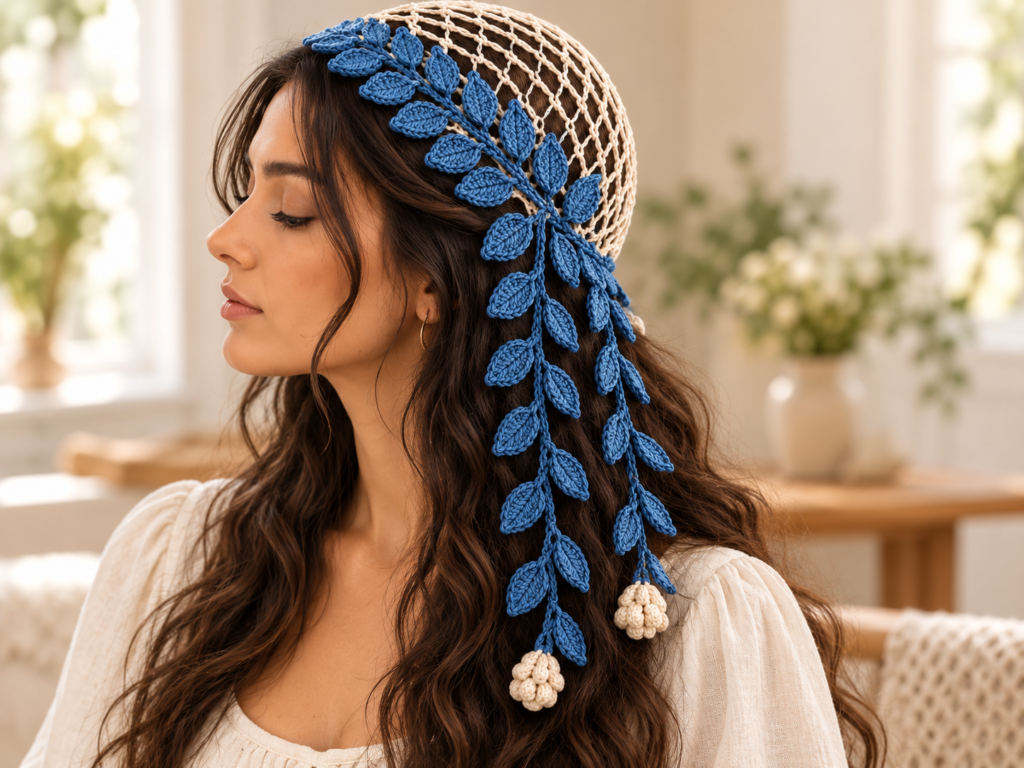
This crochet headscarf combines an ivory diamond-mesh cap with denim-blue leaves, trailing vines, and small cream bud tassels. The following construction is an original, image-inspired pattern draft that has not been physically tested. The AI-generated illustrations show the proposed stages; they are not real process photographs or evidence of exact stitch counts.
Project at a Glance
| Detail | Proposed specification |
|---|---|
| Skill level | Intermediate: joined mesh rounds, increases in chain spaces, crochet around both sides of a foundation chain, popcorn stitches, decreases, and sewing small parts |
| Cap size | Approximately 53–55 cm / 21–21.7 in around the edge, with gentle stretch; proposed for a measured head circumference of roughly 55–57 cm / 21.7–22.4 in |
| Cap depth | Approximately 16–18 cm / 6.3–7.1 in |
| Leaf size | Approximately 3.5–4 cm / 1.4–1.6 in long |
| Hanging vines | Approximately 20–28 cm / 7.9–11 in including the bud; actual length depends on chain tension |
| Making time | Approximately 5–8 hours; an estimate rather than a timed result |
| Construction | An ivory cap in joined rounds, 21 separate blue leaves, three stems worked along chains, and three small buds |
Fitting assumption: the cap is shaped by increasing from 8 to 32 mesh arches. A proposed starting gauge is approximately 6 chain-5 arches across 10 cm / 4 in and 8 mesh rounds over 10 cm / 4 in, measured with the mesh gently opened. This gauge has not been measured on a physical sample.
At that horizontal gauge, 32 arches give roughly 53 cm / 21 in around the cap before the edging. Check the actual fit after Round 8 and after the edge. Adjust the cap hook size and remake the cap if necessary; the listed stitch counts remain unchanged. Do not rely on the illustrations for sizing.
Materials
- Smooth, plied sport-weight cotton, preferably the same yarn range in both colors.
- Ivory: approximately 40–50 g for the cap, drawstring, and three buds.
- Denim blue: approximately 35–50 g for the 21 leaves and three stems.
- 4 mm crochet hook as a starting choice for the open mesh cap and drawstring.
- 3.5 mm crochet hook as a starting choice for leaves, stems, and buds.
- Tapestry needle, scissors, removable stitch markers, measuring tape, and sewing pins.
- A towel and optional blocking pins for gentle shaping.
Quantities and hook choices are proposed starting points. No yarn length is inferred from the photograph. Sport yarn belongs to the Craft Yarn Council’s Fine category; its general crochet-hook guidance is 3.5–4.5 mm, which supports the starting hook choices here. The yarn label and your actual fabric take priority.
Crochet Abbreviations
The terminology is US crochet terminology. The general abbreviations follow the Craft Yarn Council Crochet Abbreviations Master List; that source does not validate this original pattern.
| Abbreviation | Meaning |
|---|---|
| ch | Chain |
| sl st | Slip stitch |
| sc | Single crochet |
| hdc | Half double crochet |
| dc | Double crochet |
| tr | Treble crochet |
| st / sts | Stitch / stitches |
| ch-sp | Chain space |
| sc2tog | Decrease two stitches into one |
| sc3tog | Decrease three stitches into one |
Pattern conventions: beginning ch-1 stitches and joining slip stitches do not count as stitches. Do not turn any cap or bud round. Mesh-round counts list both the sc anchors and the chain-5 spaces; the individual chains are not included in the sc count. Work into the spaces under entire arches rather than into individual chains, unless instructed otherwise.
Mesh increase: work (sc, ch 5, sc, ch 5) into one existing chain-5 space. This consumes one old arch and creates two new arches.
sc2tog: insert the hook into the first indicated stitch and draw up a loop; insert into the next indicated stitch and draw up a loop. Yarn over and draw through all three loops.
sc3tog: draw up one loop through each of the three indicated stitches, then yarn over and draw through all four loops.
Step 1: Start the Mesh Crown
Use ivory yarn and the 4 mm hook. Begin with a magic ring.
Round 1: ch 1, work 8 sc into the ring. Tighten the ring and join with a sl st to the first sc. (8 sc)
Round 2: ch 1, work (sc in the next sc, ch 5) eight times. The first sc goes into the same stitch as the join. Join to the first sc. (8 sc, 8 chain-5 spaces)
Round 3: sl st into the first chain-5 space to position the hook; ch 1. Work (sc in the next chain-5 space, ch 5) eight times, starting in that first space. Join to the first sc. (8 sc, 8 chain-5 spaces)
Round 4: sl st into the first chain-5 space; ch 1. Work (sc, ch 5, sc, ch 5) into each of the eight spaces. Join to the first sc. (16 sc, 16 chain-5 spaces)
Place a marker at the beginning of each round. The mesh should remain open, with a small gathered center and a gently expanding outline. The illustration below shows the appearance of partially worked mesh rather than the exact arrangement of these rounds.
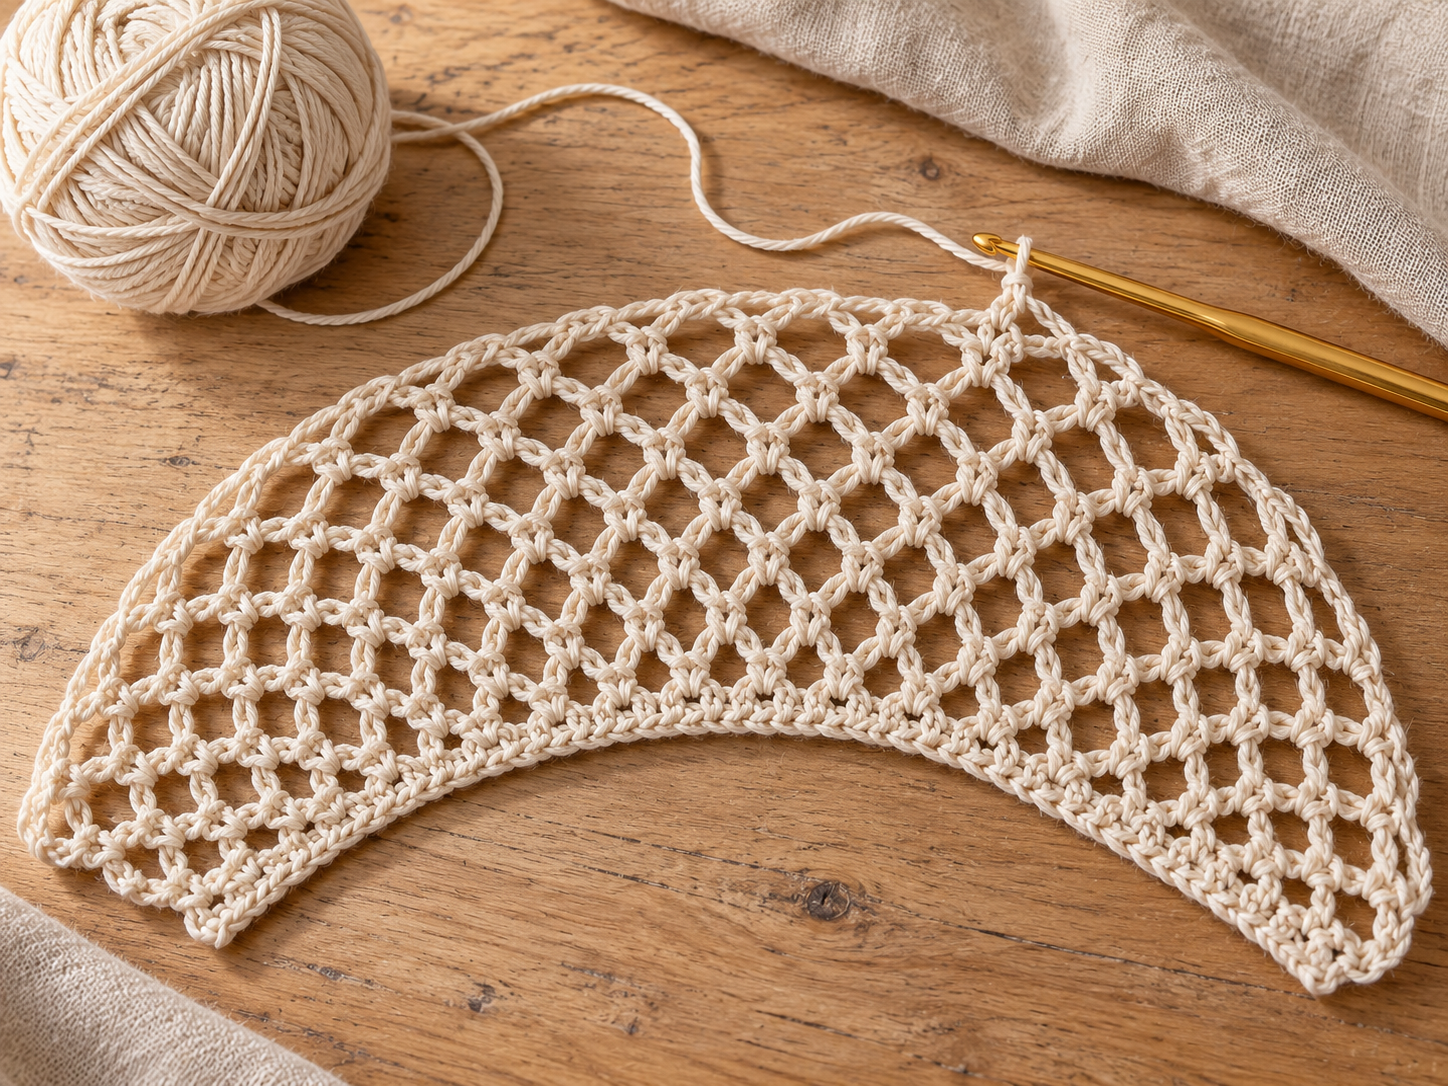
Partially worked ivory mesh with the working yarn and hook
Step 2: Shape the Cap and Work the Edge
For each of Rounds 5–14, first sl st into the first chain-5 space and ch 1. Begin the listed instruction in that same space. Join every round to its first sc.
| Round | Instructions after positioning the hook | Result |
|---|---|---|
| 5 | (sc in the next space, ch 5) sixteen times | 16 sc, 16 chain-5 spaces |
| 6 | Work a mesh increase in the first space, then (sc, ch 5) in the next space. Work this two-space sequence eight times. | 24 sc, 24 chain-5 spaces |
| 7 | (sc in the next space, ch 5) twenty-four times | 24 sc, 24 chain-5 spaces |
| 8 | Work a mesh increase in the first space, then (sc, ch 5) in each of the next two spaces. Work this three-space sequence eight times. | 32 sc, 32 chain-5 spaces |
| 9 | (sc in the next space, ch 5) thirty-two times | 32 sc, 32 chain-5 spaces |
| 10 | (sc in the next space, ch 5) thirty-two times | 32 sc, 32 chain-5 spaces |
| 11 | (sc in the next space, ch 5) thirty-two times | 32 sc, 32 chain-5 spaces |
| 12 | (sc in the next space, ch 5) thirty-two times | 32 sc, 32 chain-5 spaces |
| 13 | (sc in the next space, ch 5) thirty-two times | 32 sc, 32 chain-5 spaces |
| 14 | (sc in the next space, ch 5) thirty-two times | 32 sc, 32 chain-5 spaces |
After Round 8, open the mesh gently and check the circumference. After Round 14, try the cap on or place it on a form matching the intended head measurement. Its edge should reach the intended hairline and back of the head without needing to stretch the mesh sharply.
Round 15 — edge: remain at the Round 14 join; do not slip into an arch. Ch 1. Work (1 sc in the next sc anchor, 3 sc in the following chain-5 space) thirty-two times, starting in the sc containing the join. Join to the first sc. (128 sc: 32 anchor stitches + 96 stitches in spaces)
Fasten off, leaving a 15 cm / 6 in tail.
Drawstring: with ivory yarn and the 4 mm hook, ch 301. Work 1 sl st into the second chain from the hook and 1 sl st into each of the remaining 299 chains. (300 sl sts; one initial chain is skipped) Fasten off and weave in both tails.
The proposed cord length is approximately 75–90 cm / 29.5–35.4 in, but chains vary considerably. If the finished cord measures less than 75 cm / 29.5 in, replace it with the longer option: ch 361, then 360 sl sts, starting in the second chain. Keep the drawstring separate until finishing.
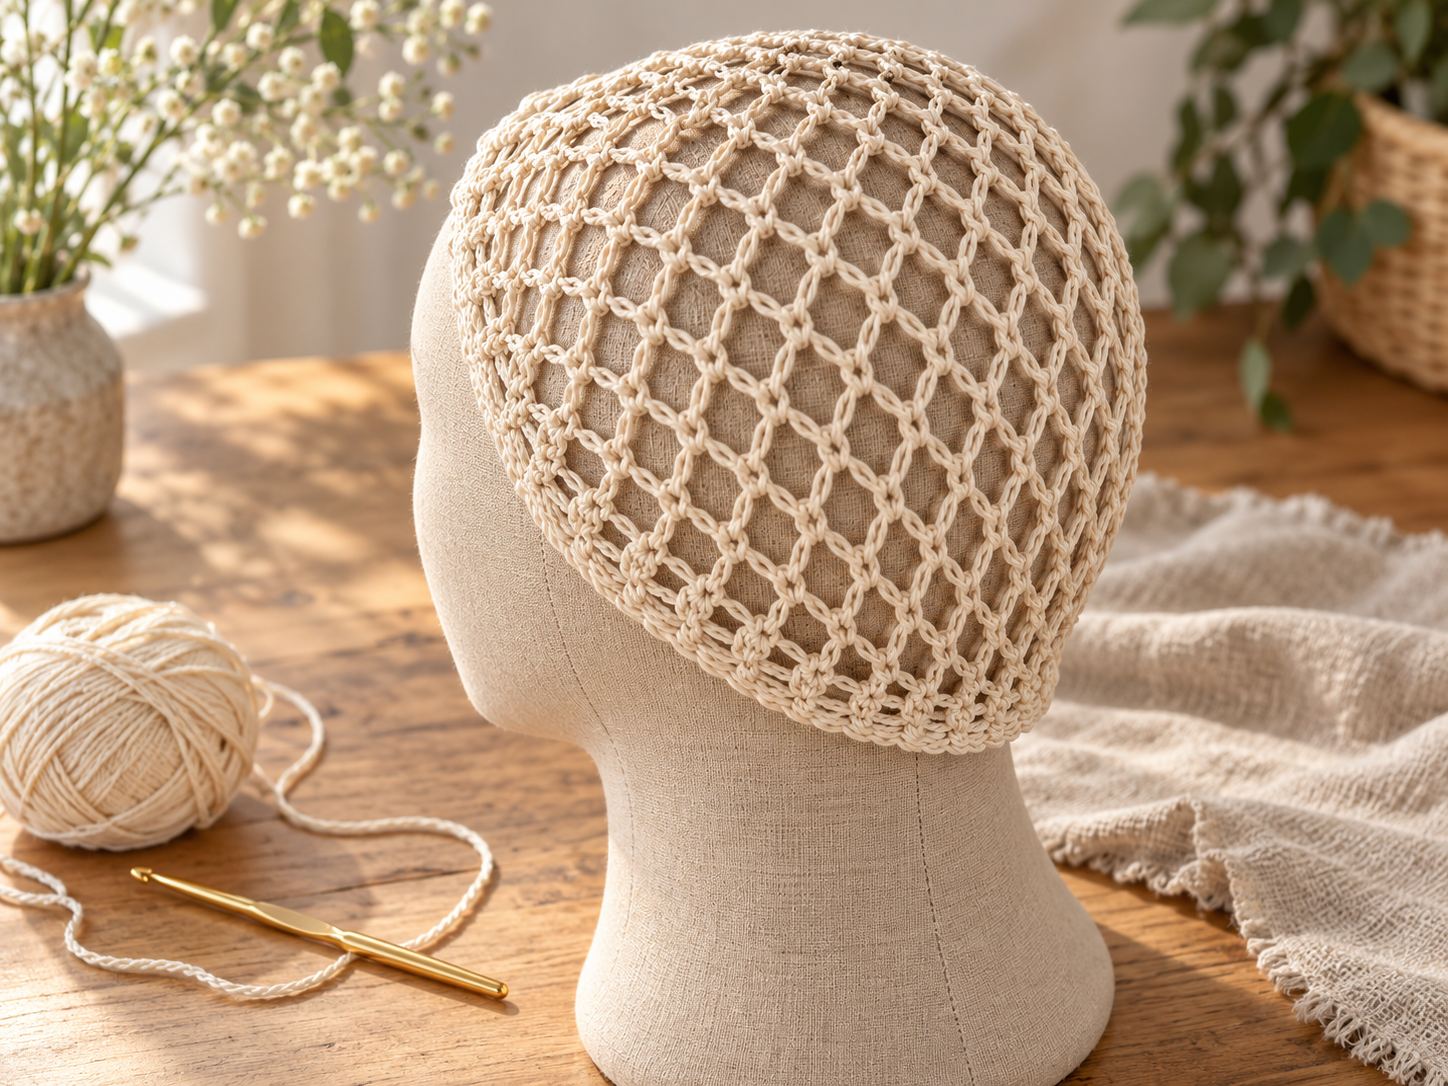
Undecorated ivory mesh cap on a fabric head form
Step 3: Crochet the Blue Leaves
Make 21: six for the side border and five for each of the three vines.
Use denim-blue yarn and the 3.5 mm hook. Leave a 15 cm / 6 in starting tail and ch 10.
Leaf Round 1: begin in the second chain from the hook. Work:
- 1 sc in the next chain.
- 1 hdc in the next chain.
- 1 dc in each of the next two chains.
- 1 tr in the next chain.
- 1 dc in each of the next two chains.
- 1 hdc in the next chain.
- In the final chain, work
(sc, ch 2, sc)to form the tip. - Rotate the work without turning it over. Along the unused underside loops of the preceding eight foundation chains, work: hdc, dc, dc, tr, dc, dc, hdc, sc, one stitch into each chain.
- Join to the first sc with a sl st. (18 stitches around the leaf and one chain-2 tip space)
The first side consumes eight chains before the tip; the tip uses the ninth worked chain. The return side uses the underside of those first eight chains. The skipped starting chain is not worked.
Fasten off, leaving a 20 cm / 8 in sewing tail. The leaf should be an elongated oval with a pointed chain-2 end.
Center rib: using the starting tail and a tapestry needle, make three short straight embroidery stitches along the original foundation chain: one across its first three worked chains, one across its next three, and one across its last three. Keep them loose enough to avoid puckering. Weave in this starting tail, retaining the separate sewing tail at the leaf base.
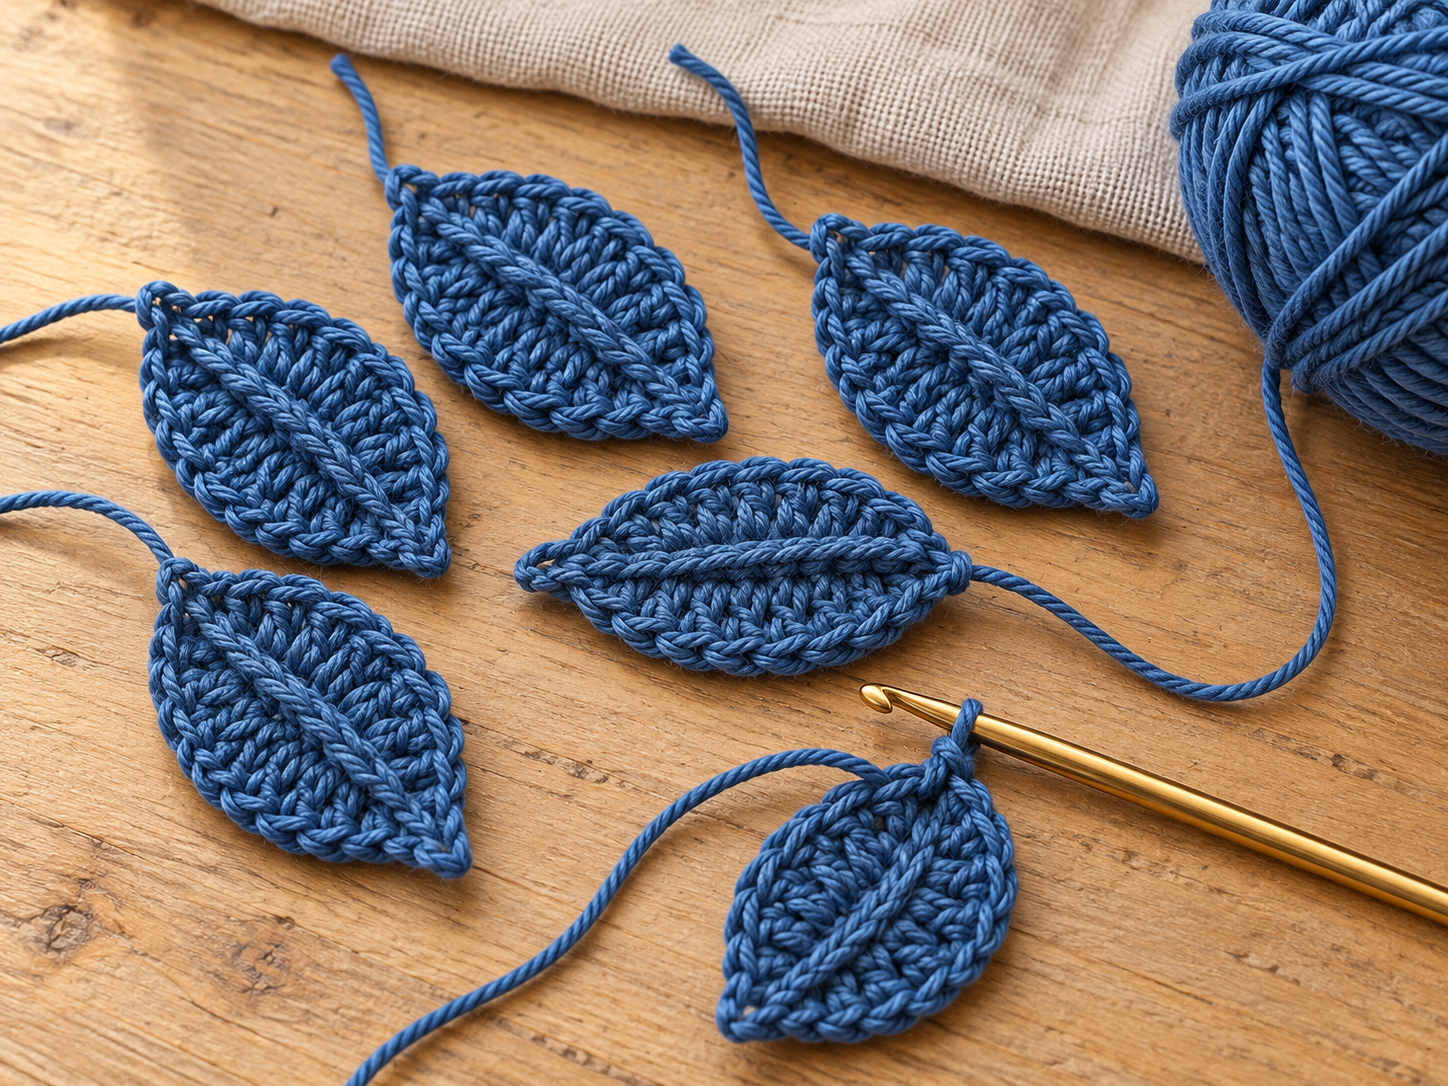
Separate denim-blue leaves and a leaf beside the crochet hook
Step 4: Make the Three Vine Stems
Use denim-blue yarn and the 3.5 mm hook. Work each stem separately; do not join the three stems together.
| Stem | Foundation and working instructions | Result |
|---|---|---|
| Short | Ch 61; sl st into the second chain and each remaining chain | 60 sl sts |
| Medium | Ch 71; sl st into the second chain and each remaining chain | 70 sl sts |
| Long | Ch 81; sl st into the second chain and each remaining chain | 80 sl sts |
Leave a 20 cm / 8 in fastening-off tail on each stem. The end holding this tail is the top. Number the slip stitches from this top downward; the last slip stitch crocheted is position 1 in this assembly numbering.
Sew five leaves to each stem at the positions below. Attach only the leaf base with two small sewing stitches around the stem, keeping the pointed end free. Alternate the leaves to either side of the stem.
| Stem | Leaf-base positions counted from the top |
|---|---|
| Short | 10, 20, 30, 40, 50 |
| Medium | 10, 23, 36, 49, 62 |
| Long | 10, 25, 40, 55, 70 |
Let the first leaf point right on the short and long stems and left on the medium stem when all three are laid face up. Weave the leaf tails along the backs of the leaves and stems. Leave the upper stem tails available for attachment and the lower ends free for the buds.
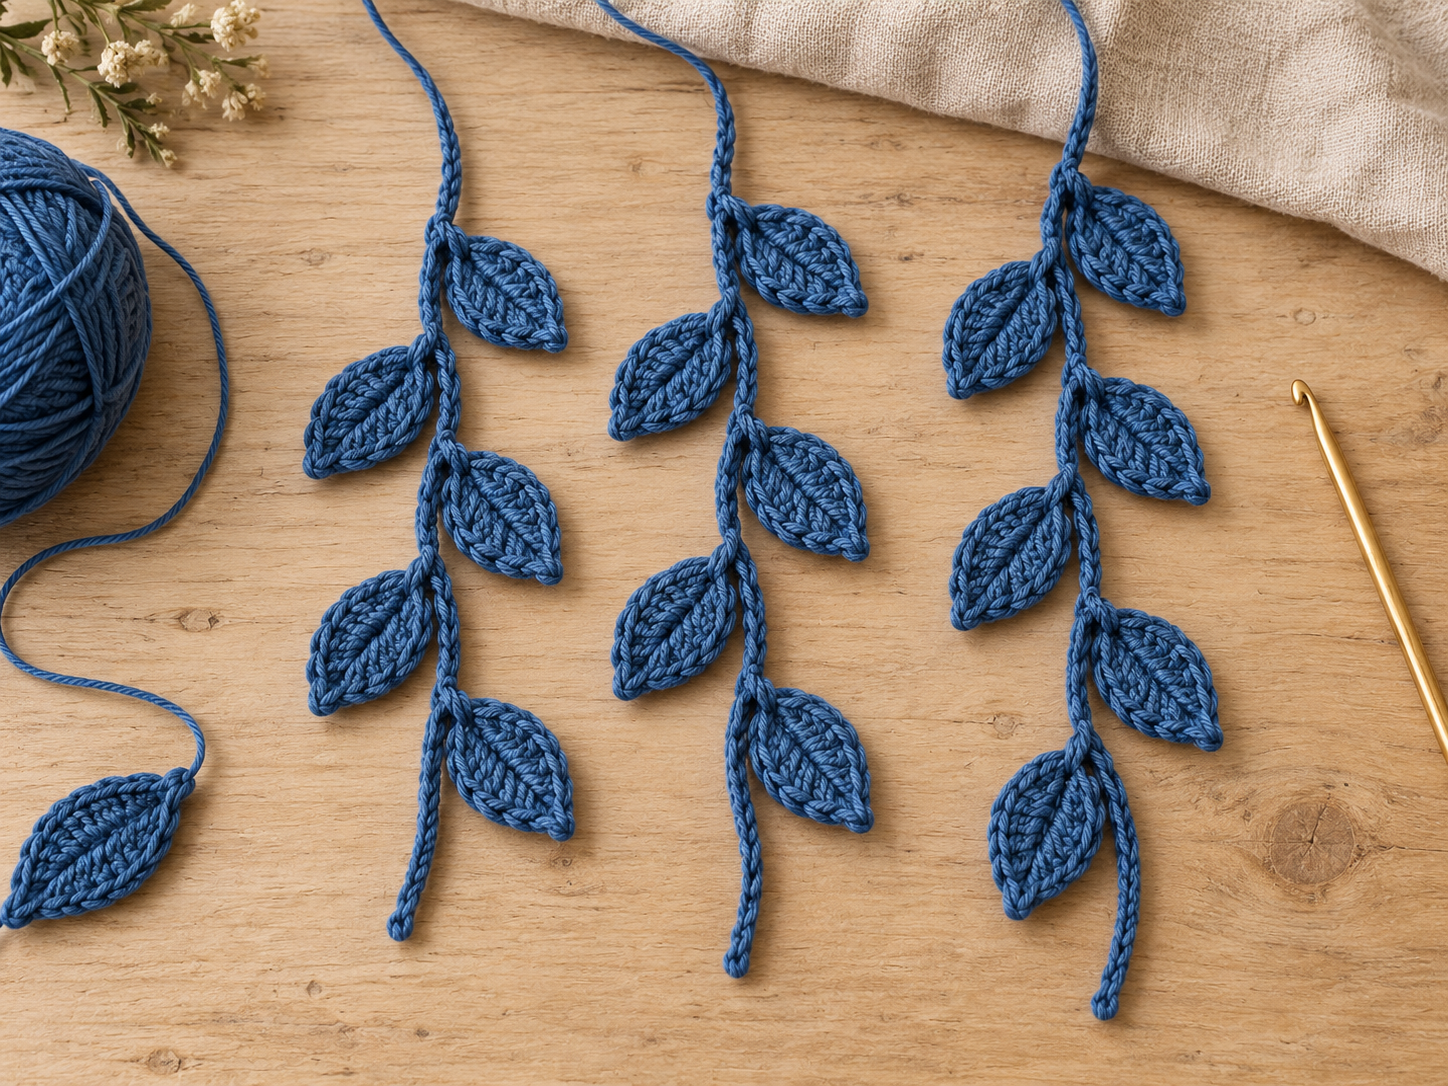
Three separate blue leaf vines before attachment
Step 5: Crochet the Ivory Bud Tassels
Make 3, using ivory yarn and the 3.5 mm hook. These small hollow buds need no stuffing.
Popcorn stitch for this pattern: work 5 dc into the indicated stitch. Remove the hook from the live loop, insert it through the top of the first of those five dc, return the live loop to the hook, and pull it through the first dc. This forms one popcorn. Do not add a closing chain inside the popcorn definition; the following chain is written separately in Round 2.
Round 1: make a magic ring. Ch 1, work 5 sc into the ring, tighten, and join to the first sc. (5 sc)
Round 2: ch 1. Work (1 popcorn in the next sc, ch 1) five times, beginning in the sc containing the join. Join to the top of the first popcorn. (5 popcorns and 5 chain-1 spaces)
Round 3: ch 1. Work sc2tog over the first two popcorn tops, sc2tog over the next two popcorn tops, and 1 sc into the final popcorn top. Skip all five chain-1 spaces. Join to the first decrease. (3 sc)
Round 4: ch 1, work sc3tog over the three stitches. (1 sc) Fasten off through the remaining loop, leaving a 20 cm / 8 in attachment tail. Weave in the magic-ring tail.
The five popcorns create a compact cluster resembling a small flower bud. The intended size is approximately 2–2.5 cm / 0.8–1 in. Keep the closure end at the top when attaching it to a vine.
Assembly: Attach the Leaves and Vines
Place the undecorated cap on a correctly sized head form or on the intended wearer before pinning. Set the round join at the center back. Treat its first edging stitch as stitch 1.
Viewed from above, number the 128 edging stitches clockwise. Mark stitch 65 as the center front. In this orientation, stitches 1–65 run along the wearer’s left side from back to front.
Side border: pin the six remaining blue leaves with their bases at edging stitches 41, 45, 49, 53, 57, and 61. Angle their tips toward the crown and slightly toward the next leaf, creating a curved band along the left side. Keep the ivory crown largely uncovered.
Check the placement before sewing. Attach each leaf base to the edging and make one small stabilizing stitch through the center rib and the nearest mesh sc anchor. Do not sew across an empty mesh opening or pull two sides of an opening together.
Trailing vines: pin the short stem to edging stitch 35, the medium stem to stitch 23, and the long stem to stitch 11. Use the retained blue upper tails to sew each stem top around its edging stitch and the nearby mesh anchor, distributing the load over both points. Allow all three strands to hang independently along the left side and back.
Remove every pin after sewing. Check that 21 leaves are accounted for: six border leaves plus fifteen on the vines.

Blue border and trailing vines being attached to the ivory cap
Finishing: Add the Buds and Adjust the Fit
Sew one ivory bud to the bottom slip stitch of each vine, using the bud’s retained tail. Make three securing passes through the bud’s closed top and the stem end, then weave the tail into the bud. All three buds should hang freely.
Thread the ivory drawstring through the 32 chain-5 spaces of Round 14, immediately above the edging. Begin and end at the center-back join, alternating the cord over and under successive arches. Leave similar cord lengths at both ends. Adjust gently and tie a small bow at the back; tuck the ends beneath the vines if desired.
Weave in the cap and remaining stem tails. Shape the mesh on a head-sized form without stretching it beyond the intended circumference. Lightly dampen the leaves, lay them flat on a towel, and smooth their points. Follow the yarn label for washing and drying; allow everything to dry completely before wearing.
The final illustration shows the bud-attachment stage. It contains two hanging buds and another bud beside the needle; attach the remaining bud to the third vine as described above. Its visual details are illustrative rather than an exact record of the written stitch counts.

Ivory bud tassels on the blue vines, with a loose bud beside the needle
Tips and Fixes
| Issue | Likely cause | Practical correction |
|---|---|---|
| The cap is too small or too large | Actual arch width differs from the proposed gauge | Recheck the circumference after Round 8. Remake the cap with a larger or smaller hook while retaining its round counts. Use the drawstring only for a modest fit adjustment. |
| The crown has strong ripples | Loose chains or extra mesh increases | Count 8, 8, 16, 16, 24, 24, and 32 spaces through Rounds 2–8. Remove the affected round if its count is wrong; if the counts are correct, try firmer chain tension in a new sample. |
| A leaf cups or twists | Uneven tension around the foundation chain or a tight center rib | Confirm that both long sides use eight foundation positions. Relax or redo the embroidered rib and gently damp-shape the leaf. |
| A vine pulls the cap downward | Its attachment is concentrated on a loose chain arch | Move its securing stitches onto the edging stitch and nearby mesh sc anchor. Keep the buds compact and redistribute the three stems if necessary. |
| The buds look flat or too large | Loose popcorn stitches or an incomplete closure | Check five popcorns, then three sc, then one closing stitch. Use firmer tension or a smaller bud hook and secure the top without adding stuff |
Questions about a step?
If a stitch count or assembly detail is unclear, send us the post link and step number. For more practice with small projects, explore our beginner crochet accessories guide.