
This little ghost coaster combines a rounded cream crochet body, a playful scalloped lower edge, and a simple black embroidered face. The pattern below is an original image-inspired construction draft based only on the visible crochet object, not on any written pattern shown in the source image. It has not been physically test-crocheted.
The generated visuals supplied with this tutorial are AI-generated illustrations of the proposed construction. They are not genuine process photographs and should not be used as proof of exact stitch counts.
Project at a Glance
Skill level: Confident beginner / advanced beginner. You should be comfortable with a magic ring, single crochet increases, joined rounds, double crochet shells, slip stitches, and simple embroidery.
Proposed finished size: approximately 11.5 cm wide × 10.5 cm high / 4.5 × 4.1 in, depending on yarn, hook, and tension.
Approximate making time: 45–75 minutes per coaster.
Construction: a flat circle worked in joined rounds, followed by a shaped lower border that creates the ghost’s side and bottom waves.
Gauge assumption: approximately 16 sc × 17 rows = 10 cm / 4 in in firm single crochet using the suggested yarn and hook. This is a planning estimate, not a measured test gauge.
For a coaster, the fabric should feel firm rather than loose. The Craft Yarn Council places worsted/aran yarn in Category 4 Medium and lists larger general hook ranges for that category, but it explicitly describes those ranges as guidelines; a smaller hook can be chosen here to create a denser fabric.
Materials
| Item | Suggested choice |
|---|---|
| Main yarn | 100% cotton, Category 4 Medium / worsted weight, cream or warm white |
| Main yarn quantity | About 18–22 g per coaster |
| Face yarn | Small amount of black cotton yarn or embroidery thread |
| Hook | 4.0 mm crochet hook for a firm coaster fabric |
| Needle | Tapestry/yarn needle |
| Other tools | Scissors, 2 stitch markers, blocking mat and rustproof pins if available |
Cotton is recommended because it gives the coaster a firm surface, shows stitch definition well, and is suitable for an absorbent drink coaster.
Crochet Abbreviations
The abbreviations below use standard US crochet terminology. The Craft Yarn Council lists ch, sc, dc, sl st, st, inc, and rep among standard crochet abbreviations.
| Abbreviation | Meaning |
|---|---|
| ch | chain |
| sc | single crochet |
| dc | double crochet |
| sl st | slip stitch |
| st / sts | stitch / stitches |
| inc | work 2 sc in the same stitch |
| rep | repeat |
Shell used in this pattern: work 5 dc into the same base stitch.
Joined-round rule: Ch 1 at the beginning of a round does not count as a stitch. Do not turn. Join each round with a sl st to the first sc.
Step 1 — Start the Center
Using cream cotton yarn, make a magic ring.
Round 1: Ch 1, work 8 sc into the ring. Pull the ring closed. Join to the first sc with a sl st. (8 sts)
Round 2: Ch 1, inc in each stitch around. Join. (16 sts)
Round 3: Ch 1, (1 sc, inc) around. Join. (24 sts)
Round 4: Ch 1, (2 sc, inc) around. Join. (32 sts)
The piece should now be a small, flat circular disk. If it is already cupping noticeably, your tension is likely tighter than the proposed gauge.
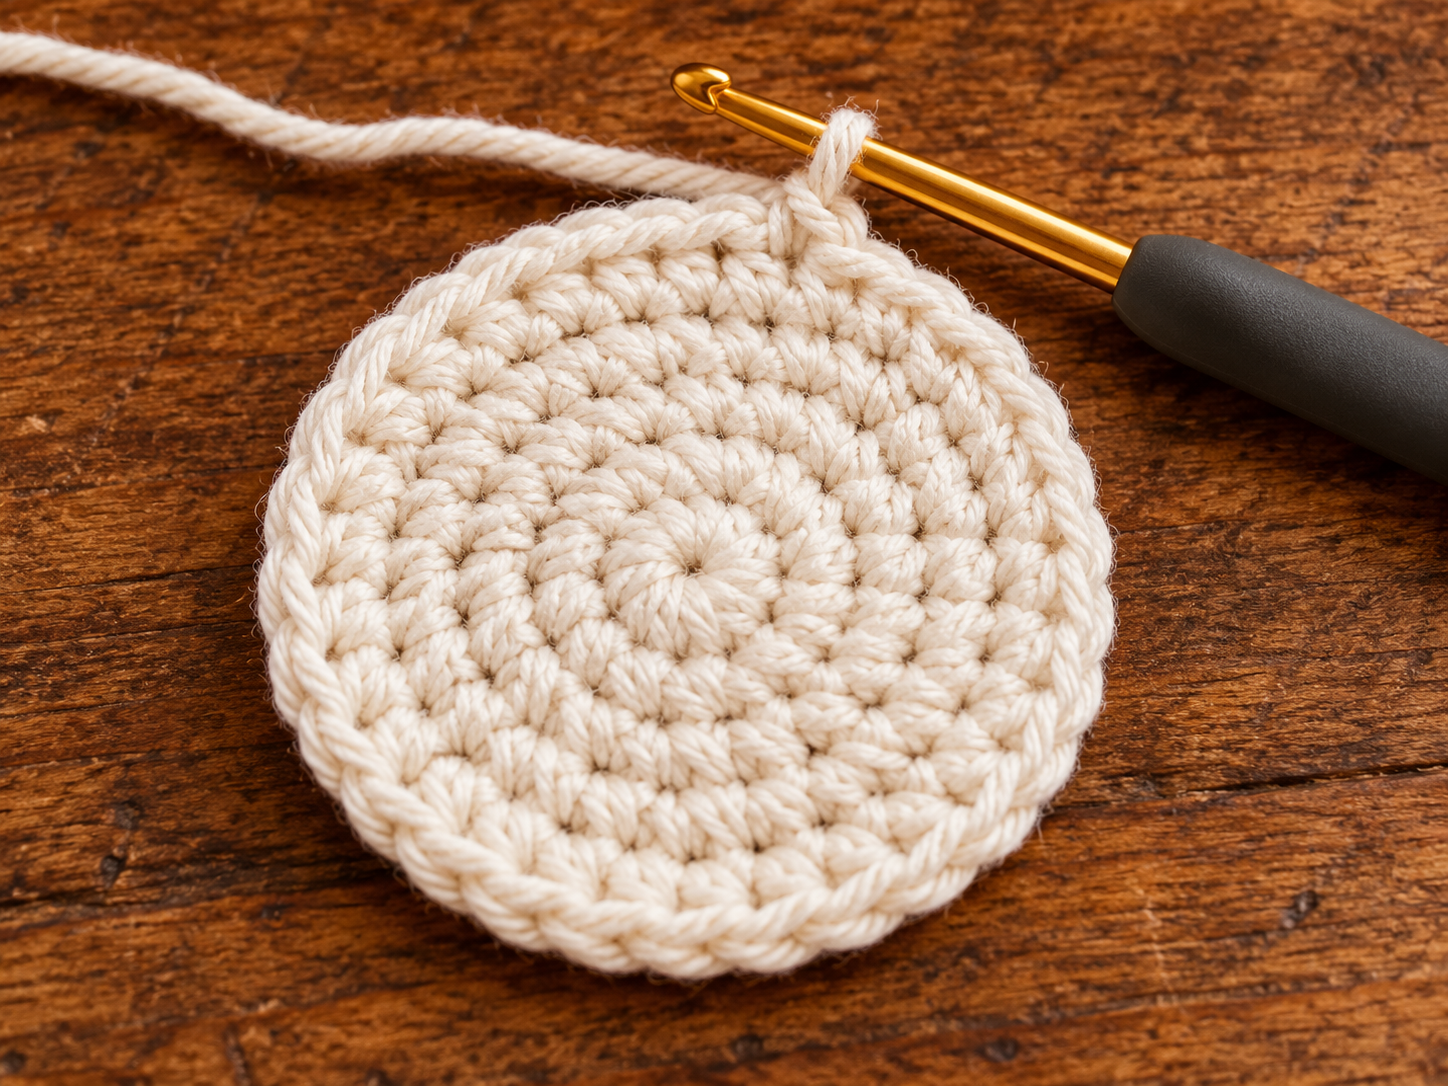
Small cream circular disk after Round 4, with hook and working yarn visible
Step 2 — Expand the Ghost Body
Continue in joined rounds.
Round 5: Ch 1, (3 sc, inc) around. Join. (40 sts)
Round 6: Ch 1, (4 sc, inc) around. Join. (48 sts)
Round 7: Ch 1, (5 sc, inc) around. Join. (56 sts)
Fasten off and weave the end into the back of the fabric.
At this stage the piece should lie mostly flat and measure roughly 9.5–10.5 cm / 3.7–4.1 in across before the decorative lower edge is added.
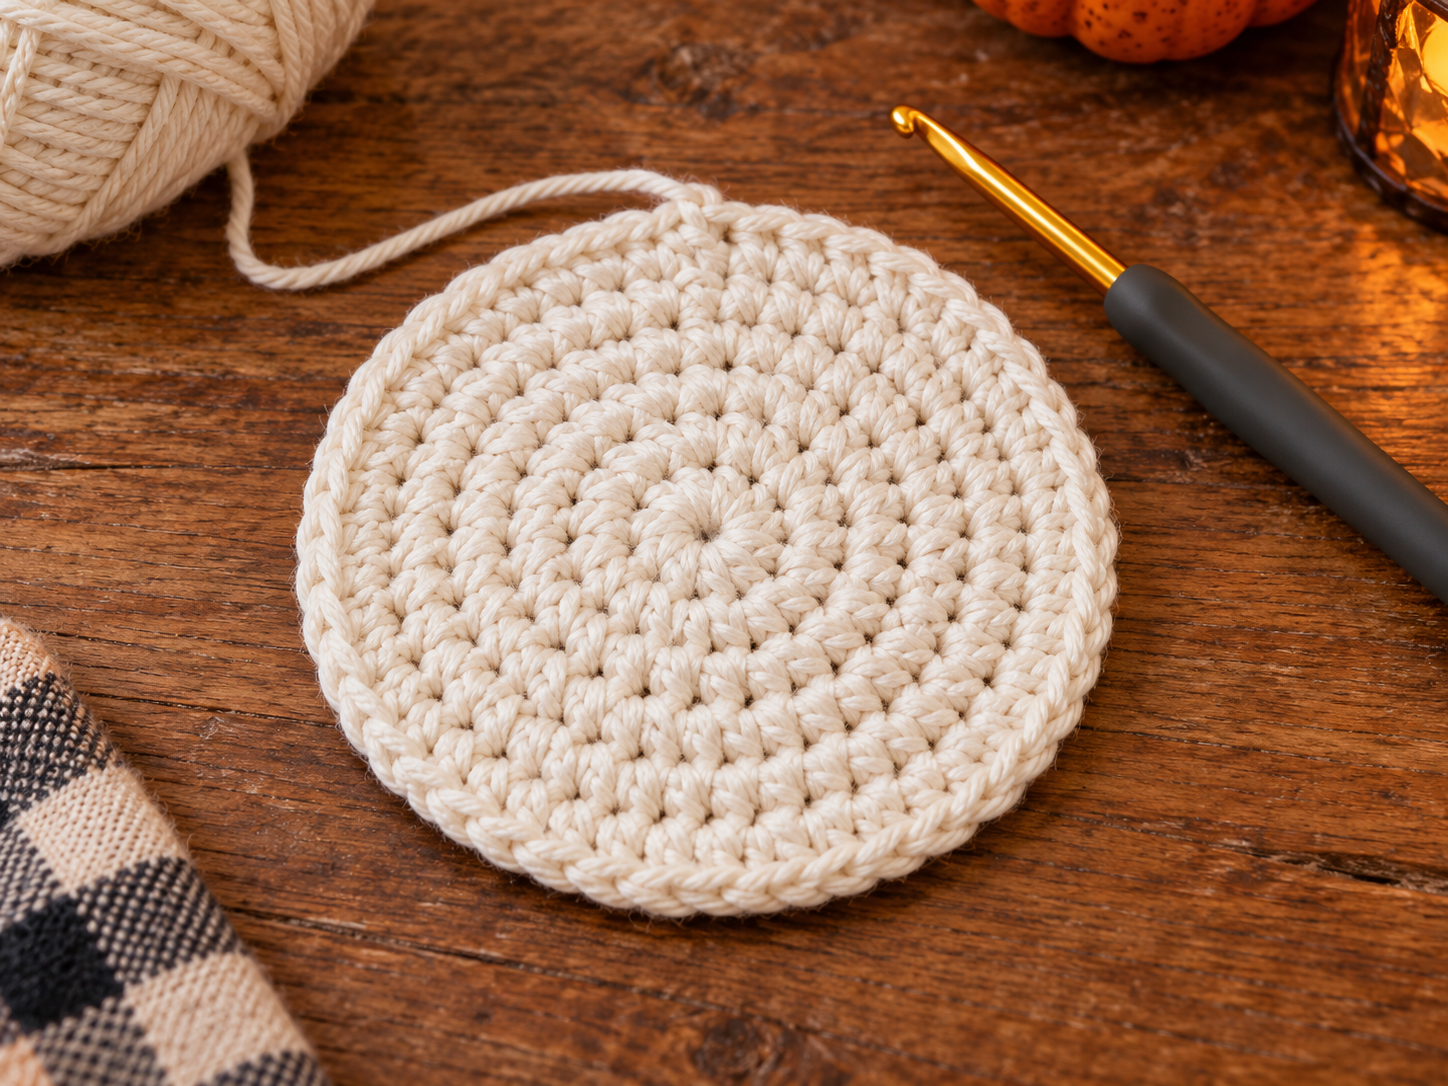
Flat circular body after Round 7, before the scalloped ghost edge
Step 3 — Add the Scalloped Lower Edge
Lay the circle flat. Choose one stitch to act as the top-center stitch of the ghost and place a marker in it. Rejoin the cream yarn in that marked stitch.
The first 16 stitches and final 16 stitches of this round form the smooth upper outline. The middle 24 base stitches form the six lower waves.
Round 8: Ch 1.
Work 1 sc in the marked stitch and in the next 15 sts. (16 sc)
Over the next 24 base stitches, repeat the following 6 times:
sl st in next st, skip next st, 5 dc in next st, sl st in next st.
Then work 1 sc in each of the remaining 16 sts.
Join to the first sc with a sl st.
Result: 74 border stitches total: 32 sc, 12 sl st, and 30 dc. The round consumes all 56 stitches from Round 7, with six base stitches intentionally skipped inside the scallop sequence.
Fasten off, leaving a 10–12 cm tail, and weave it securely into the back.
The first and last scallops naturally read as the ghost’s side bumps, while the center shells create the wavy lower edge.

Ghost silhouette with all six lower shell waves complete, before facial embroidery
Step 4 — Embroider the Face
Thread a yarn needle with black cotton yarn or black embroidery thread.
Place the face in the upper-middle area of the coaster. As a practical starting point, position the eye centers approximately 2.5 cm / 1 in apart and about 4–4.5 cm / 1.6–1.8 in below the top edge.
For each eye, make a small vertical oval using several short satin stitches. Keep both eyes similar in height and width.
For the mouth, place a small curved smile approximately 8–10 mm / 0.3–0.4 in below the eye line. Use two or three short backstitches or a tiny curved satin-stitch shape.
Do not pull the embroidery yarn tightly enough to pucker the coaster.
Secure the yarn on the back by weaving it through several crochet stitches rather than making a bulky knot.
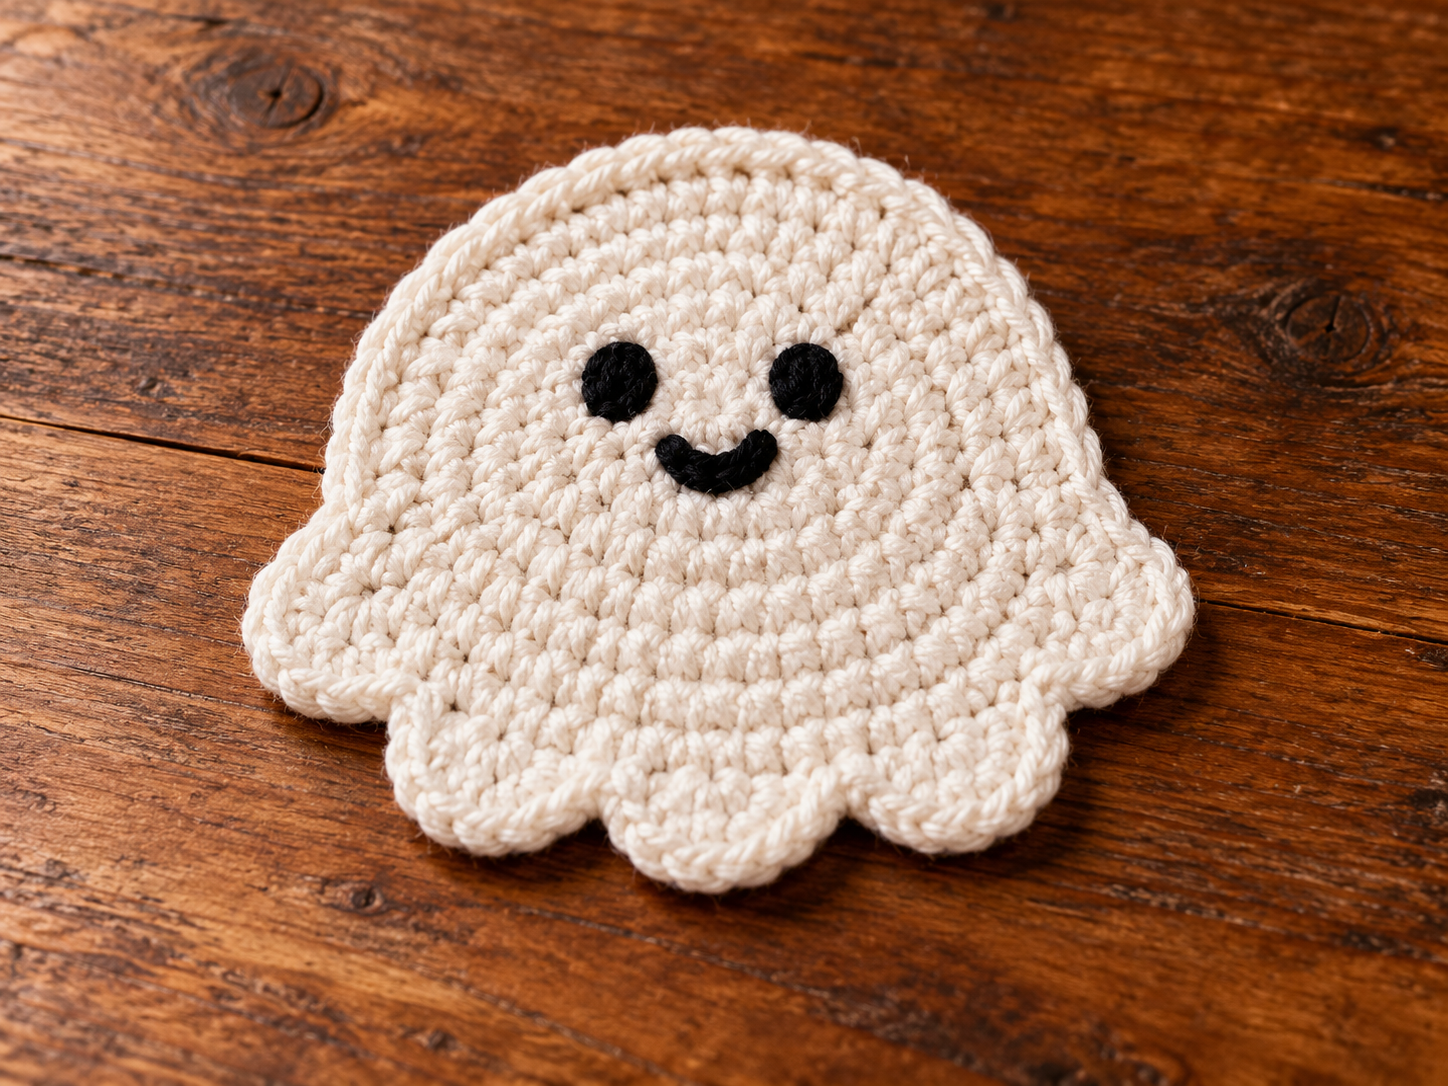
Finished embroidery stage showing the two black oval eyes and small smiling mouth
Finishing
Wet-block the coaster lightly in cool or lukewarm water. Press out excess water in a towel without twisting.
Lay it flat on a blocking mat. Smooth the rounded top and gently fan out all six lower scallops. Pin only if necessary.
Allow it to dry completely before use.
After drying, trim any remaining yarn tails close to the fabric.

Fully blocked finished ghost coaster with smooth upper curve and evenly spread scallops
Tips and Fixes
The center cups upward: Your stitches are probably tighter than the assumed gauge. Try a 4.5 mm hook or consciously loosen your tension before remaking the affected rounds.
The center starts to ripple before the edging: Your tension may be too loose for the increase rate. Try a 3.5–4.0 mm hook and keep the sc fabric firm.
The shell edge curls upward: Wet-block the finished coaster and spread each shell flat. If the shells remain very loose or floppy, your dc tension is probably significantly looser than your sc tension.
The face puckers: Remove the embroidery and restitch it with less tension. Embroidery should sit on the surface without drawing the crochet fabric inward.
The scallops look uneven: Count all 24 lower-edge base stitches before starting the repeat. Each shell repeat consumes exactly 4 base stitches, so six repeats require 24 stitches.
Questions about a step?
If a stitch count or assembly detail is unclear, send us the post link and step number. For more practice with small projects, explore our crochet accessories patterns.