

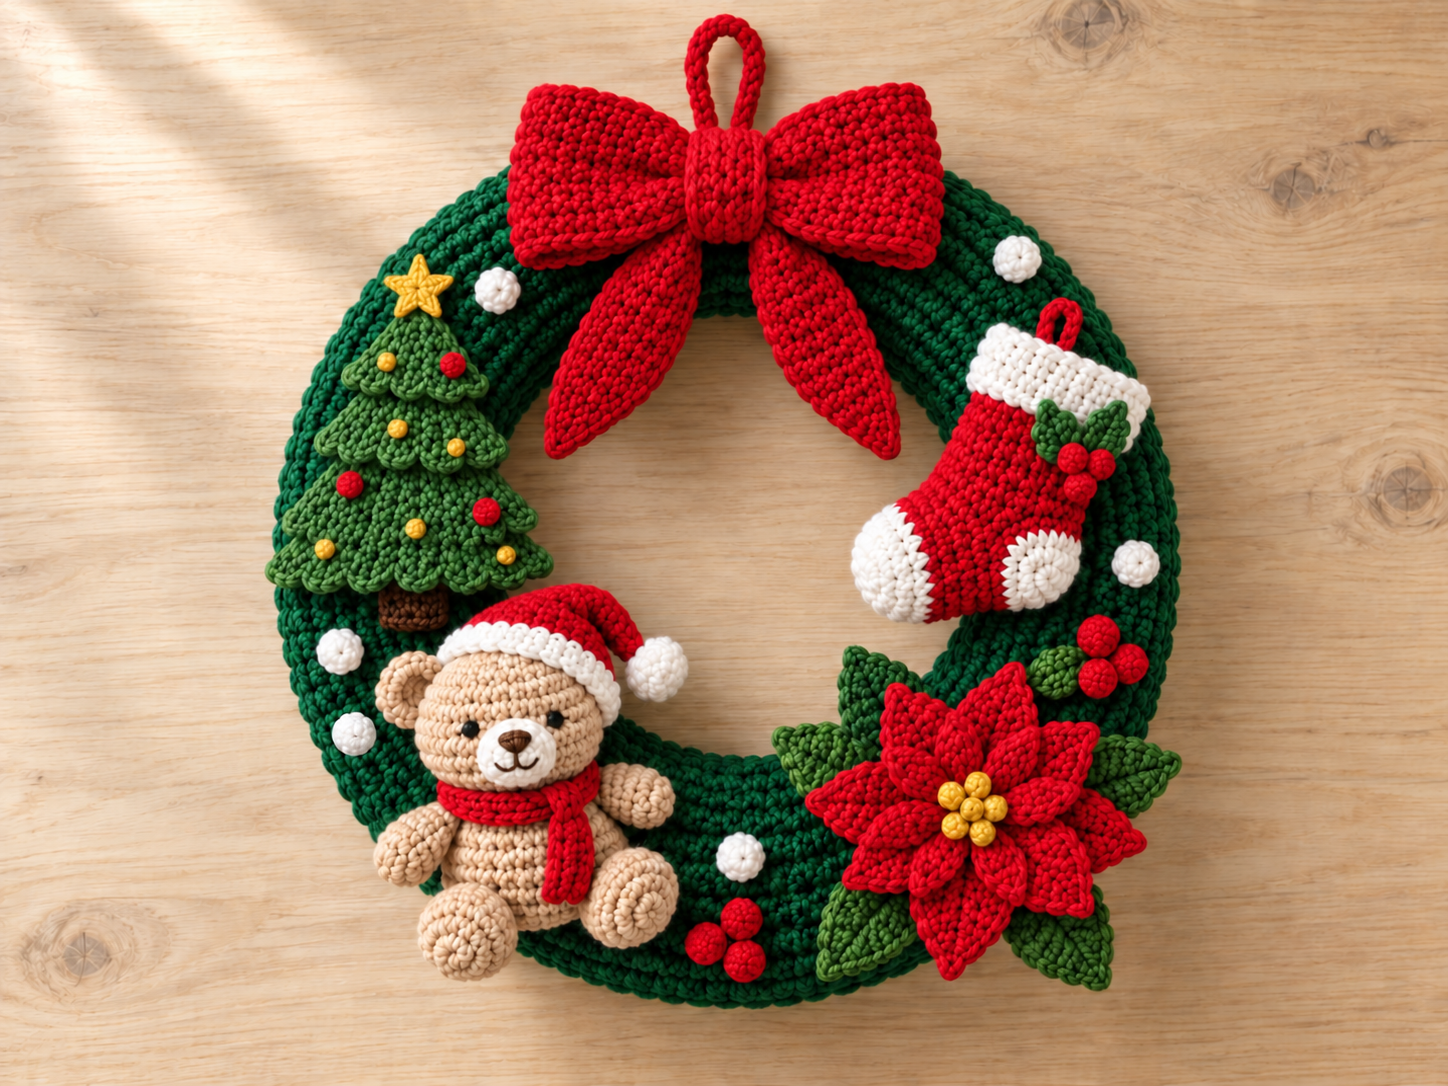
This green crochet Christmas wreath combines a red bow, a Santa teddy bear, a layered tree, a miniature stocking and a red poinsettia. The following original, image-inspired pattern draft has not been physically tested; dimensions, yarn quantities and making time are estimates. The AI-generated illustrations show the proposed construction rather than real making-stage photographs. Use the written instructions as the stitch-count reference.
Project at a Glance
| Detail | Proposed specification |
|---|---|
| Skill level | Intermediate: shaped rows, small amigurumi pieces, color changes, embroidery and sewing |
| Covered ring | Approximately 26 cm / 10.2 in across, with an 18 cm / 7.1 in opening |
| Ring cross-section | Approximately 4 cm / 1.6 in in diameter |
| Overall hanging height | Approximately 31–33 cm / 12.2–13 in, depending on motif placement |
| Bow | Approximately 13 cm / 5.1 in wide |
| Teddy with hat | Approximately 12–14 cm / 4.7–5.5 in tall |
| Tree | Approximately 7–8 cm / 2.8–3.1 in tall |
| Stocking | Approximately 8 cm / 3.1 in tall |
| Poinsettia | Approximately 7–8 cm / 2.8–3.1 in across |
| Estimated making time | Approximately 12–18 hours; not physically timed |
| Construction | A cover worked in rows around a ready-made ring; flat appliqués; stuffed teddy pieces worked in continuous rounds |
| Assumed cover gauge | 19 hdc and 14 rows per 10 cm / 4 in |
| Assumed motif gauge | 24 sc and approximately 26 rows or rounds per 10 cm / 4 in |
These gauges are planning assumptions, not measured results. Make and measure swatches before starting. At the proposed cover gauge, the rectangle should measure approximately 69.5 × 12.9 cm / 27.4 × 5.1 in.
The photograph establishes the visible green ring and its decorations. The foam core, rectangular cover, flat stocking panels and embroidered details are construction choices for this draft.
Materials
Use soft, matte medium-weight yarn, category 4, with similar thickness across all colors. Acrylic is a practical proposed choice for the ring cover and decorations. The Craft Yarn Council includes worsted and aran yarns in this category; its hook recommendations are general guidelines. The smaller hooks below are deliberate choices for denser decorative fabric. Welcome to the Craft Yarn Council
| Color | Approximate quantity | Main use |
|---|---|---|
| Forest green | 150 g | Ring cover, tree and leaves |
| Christmas red | 80 g | Bow, stocking, hat, scarf, petals and berries |
| Warm beige | 35 g | Teddy |
| Ivory white | 20 g | Muzzle, stocking details, hat trim, pompom and dots |
| Brown | 5 g | Tree trunk and teddy nose |
| Golden yellow | 5 g | Tree star and embroidered details |
| Black | Small scrap of embroidery yarn | Teddy eyes |
These are estimated yarn weights, not verified consumption figures. Allow extra yarn for gauge adjustments.
You will also need:
- One round foam wreath form with approximately 26 cm outer diameter, 18 cm inner diameter and a 4 cm round cross-section.
- A 4.5 mm hook for the cover.
- A 3.5 mm hook for all other crocheted pieces.
- Approximately 15 g of fiberfill for the teddy and its pompom.
- A blunt yarn needle, an embroidery needle, scissors and stitch markers.
- Sewing pins, a measuring tape and a towel for shaping flat pieces.
Abbreviations
US stitch names follow the Craft Yarn Council’s crochet abbreviations. The increase and decrease instructions below define how those operations are used in this pattern; the source does not validate this original construction. Welcome to the Craft Yarn Council
| Abbreviation | Meaning in this pattern |
|---|---|
| ch | Chain |
| sc | Single crochet |
| hdc | Half double crochet |
| dc | Double crochet |
| sl st | Slip stitch |
| st / sts | Stitch / stitches |
| inc | Work 2 sc into one stitch |
| sc2tog | Single crochet 2 stitches together; consumes 2 sts and produces 1 |
| sc3tog | Single crochet 3 stitches together; consumes 3 sts and produces 1 |
| MR | Magic ring |
Working rules
- For every sc row after Row 1, ch 1 and turn before working the stated stitches.
- For every hdc row after Row 1, ch 2 and turn.
- Turning chains do not count as stitches. Do not work into them.
- Unless a join is expressly stated, rounds are continuous: do not join or turn. Mark the first sc of each round.
- Parentheses followed by × indicate the exact number of repeats.
- Leave a 20 cm / 8 in sewing tail when fastening off a small piece, unless another length is specified.
For sc2tog, insert the hook into each of the next two stitches and pull up a loop, then yarn over and draw through all three loops.
For sc3tog, pull up a loop in each of the next three stitches, then yarn over and draw through all four loops.
Step 1
Crochet the Ring Cover
Use forest green and the 4.5 mm hook. Ch 134.
For Row 1, start in the third chain from the hook. The two skipped chains do not count as a stitch.
| Row | Instructions | Count |
|---|---|---|
| 1 | Hdc in each of the remaining 132 chains. | 132 |
| 2 | Hdc in each stitch. | 132 |
| 3 | Hdc in each stitch. | 132 |
| 4 | Hdc in each stitch. | 132 |
| 5 | Hdc in each stitch. | 132 |
| 6 | Hdc in each stitch. | 132 |
| 7 | Hdc in each stitch. | 132 |
| 8 | Hdc in each stitch. | 132 |
| 9 | Hdc in each stitch. | 132 |
| 10 | Hdc in each stitch. | 132 |
| 11 | Hdc in each stitch. | 132 |
| 12 | Hdc in each stitch. | 132 |
| 13 | Hdc in each stitch. | 132 |
| 14 | Hdc in each stitch. | 132 |
| 15 | Hdc in each stitch. | 132 |
| 16 | Hdc in each stitch. | 132 |
| 17 | Hdc in each stitch. | 132 |
| 18 | Hdc in each stitch. | 132 |
Fasten off.
Checkpoint: the rectangle should be approximately 69.5 cm long and 12.9 cm wide at the assumed gauge. Check it against the actual ring before sewing.
Curve the rectangle around the ring so its long dimension follows the ring’s circumference. Wrap its width around the round cross-section.
Pin the foundation edge and Row 18 together along the inner back of the ring. Sew corresponding stitches together, easing excess fabric toward the inner curve. Use separate green sewing lengths of approximately 60 cm rather than one very long strand.
Join the two short row-end edges at the top of the wreath. Match all 18 row ends. Keep both seams on the back and spread the fabric evenly around the form.
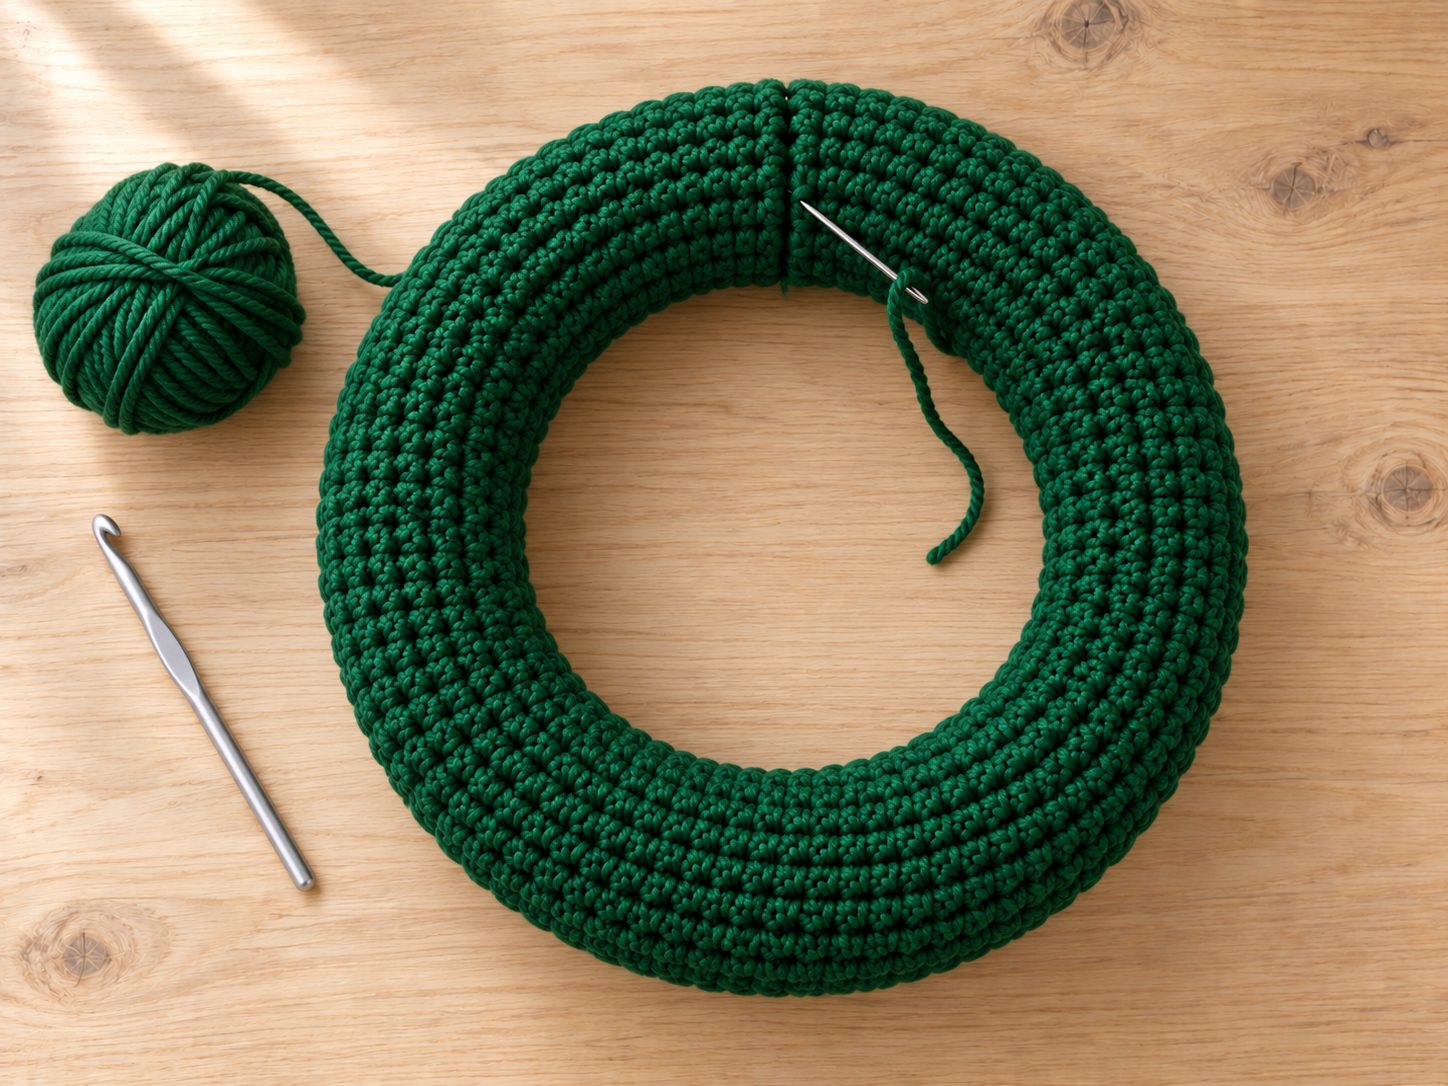
Green ring cover during the final seaming stage
Step 2
Make the Bow and Hanging Loop
Use red and the 3.5 mm hook.
Make:
- One bow rectangle: ch 33; Row 1 begins in the second chain.
- Two matching tails: ch 9 for each; Row 1 begins in the second chain.
- One center band: ch 5; Row 1 begins in the second chain.
Each tail uses the same instructions; no mirrored shaping is required.
| Row | Bow rectangle | Each tail — make 2 | Center band |
|---|---|---|---|
| 1 | 32 sc. (32) | 8 sc. (8) | 4 sc. (4) |
| 2 | 32 sc. (32) | 8 sc. (8) | 4 sc. (4) |
| 3 | 32 sc. (32) | 8 sc. (8) | 4 sc. (4) |
| 4 | 32 sc. (32) | 8 sc. (8) | 4 sc. (4) |
| 5 | 32 sc. (32) | 8 sc. (8) | 4 sc. (4) |
| 6 | 32 sc. (32) | 8 sc. (8) | 4 sc. (4) |
| 7 | 32 sc. (32) | 8 sc. (8) | 4 sc. (4) |
| 8 | 32 sc. (32) | 8 sc. (8) | 4 sc. (4) |
| 9 | 32 sc. (32) | 8 sc. (8) | Finished after Row 8 |
| 10 | 32 sc. (32) | 8 sc. (8) | — |
| 11 | 32 sc. (32) | Sc2tog, 4 sc, sc2tog. (6) | — |
| 12 | 32 sc. (32) | Sc2tog, 2 sc, sc2tog. (4) | — |
| 13 | 32 sc. (32) | Sc2tog × 2. (2) | — |
| 14 | 32 sc. (32) | Sc2tog. (1) | — |
Fasten off each piece. Leave a 30 cm tail on the center band.
For the main hanging loop, ch 26. Starting in the second chain, work 1 sl st in each of the next 25 chains. (25 sl sts) Fasten off with a 30 cm sewing tail.
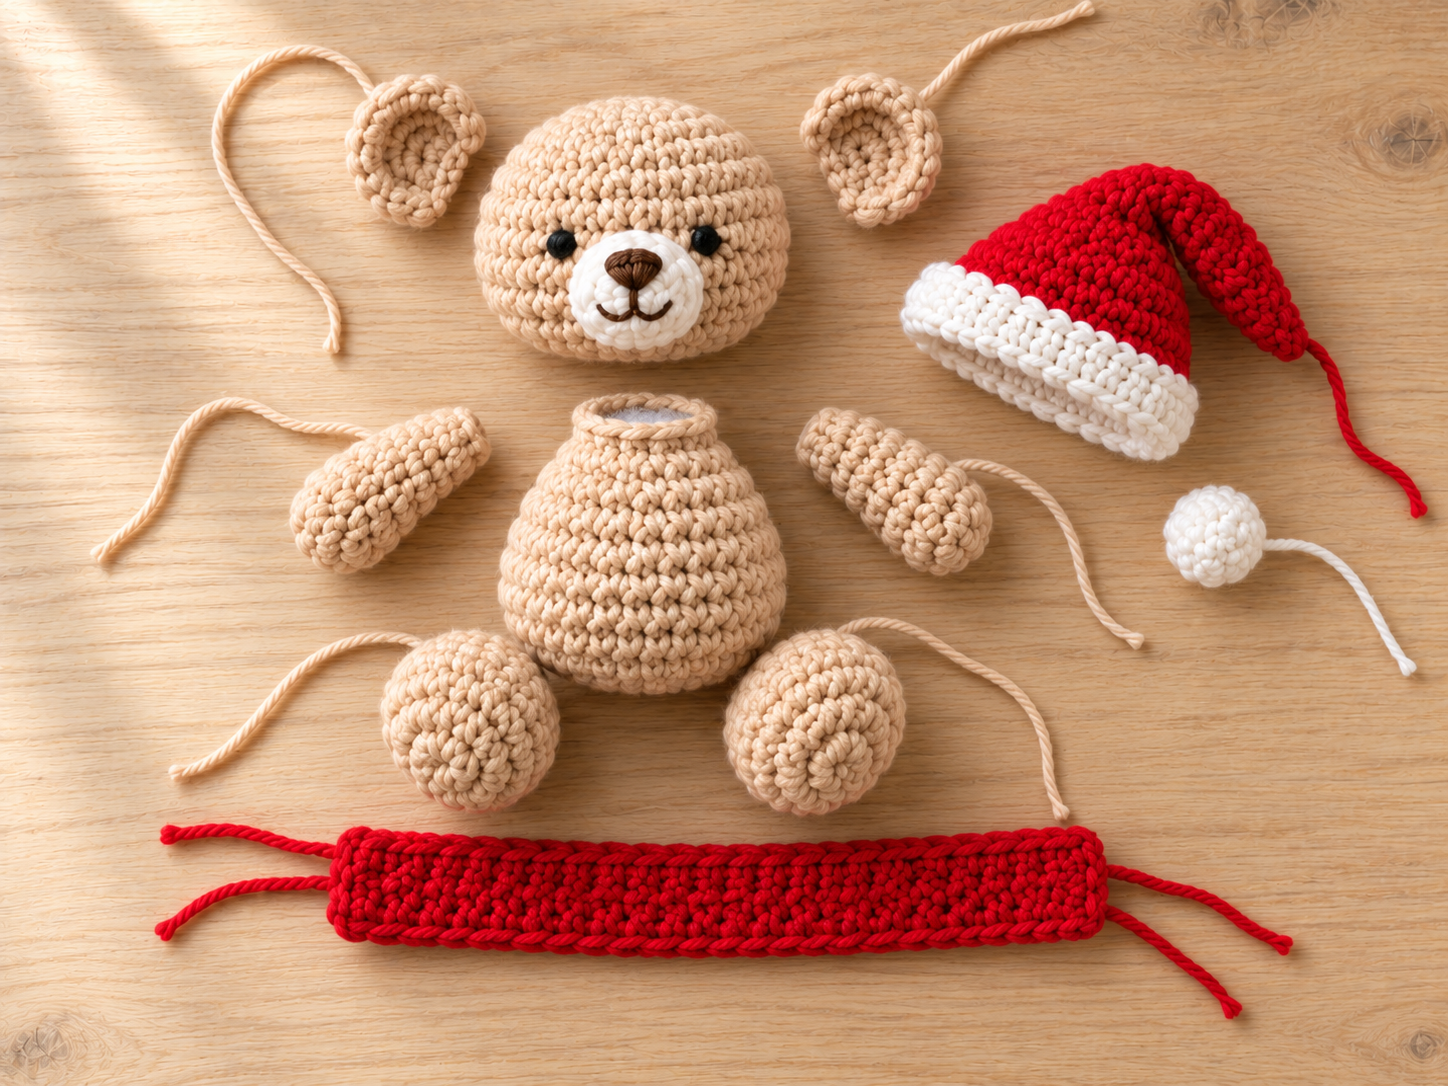
Separate teddy pieces, Santa hat, pompom and scarf before assembly
Lay the bow rectangle horizontally. Run a gathering strand through Rows 1–14 along the center line between stitches 16 and 17. Pull gently to pinch the middle.
Overlap the wide Row 1 ends of the two tails behind the gathered center and angle their pointed ends outward. Sew the wide ends securely to the back of the bow.
Wrap the center band around the gathered middle. Sew its Row 1 and Row 8 ends together at the back. Reserve the hanging cord for wreath assembly.
Checkpoint: the bow should have two broad gathered sides and two distinct tapered tails.
Step 3
Make the Santa Teddy Bear
Use beige and the 3.5 mm hook unless another color is stated.
Head and Body — Make One of Each
Start each piece separately with an MR.
| Round | Head | Body |
|---|---|---|
| 1 | 6 sc in MR. (6) | 6 sc in MR. (6) |
| 2 | Inc × 6. (12) | Inc × 6. (12) |
| 3 | (1 sc, inc) × 6. (18) | (1 sc, inc) × 6. (18) |
| 4 | (2 sc, inc) × 6. (24) | (2 sc, inc) × 6. (24) |
| 5 | (3 sc, inc) × 6. (30) | (3 sc, inc) × 6. (30) |
| 6 | (4 sc, inc) × 6. (36) | 30 sc. (30) |
| 7 | 36 sc. (36) | 30 sc. (30) |
| 8 | 36 sc. (36) | (3 sc, sc2tog) × 6. (24) |
| 9 | 36 sc. (36) | 24 sc. (24) |
| 10 | (4 sc, sc2tog) × 6. (30) | (2 sc, sc2tog) × 6. (18) |
| 11 | (3 sc, sc2tog) × 6. (24) | (1 sc, sc2tog) × 6. (12) |
| 12 | (2 sc, sc2tog) × 6. (18) | Finished after Round 11 |
| 13 | (1 sc, sc2tog) × 6. (12) | — |
| 14 | Sc2tog × 6. (6) | — |
On the head, pause after Round 9. Mark stitches 14 and 21 of Round 8 for the eyes, leaving six stitches between them. Embroider a small black eye at each position and secure the ends inside.
Stuff the head after Round 12. Complete Rounds 13–14, then pass the tail through the front loops of the final six stitches and draw closed.
Stuff the body after Round 9. Complete Rounds 10–11, leaving the 12-stitch neck open. Fasten off with a 30 cm tail.
Ears, Arms and Legs
Start each piece with an MR. Make two of each.
| Round | Each ear | Each arm | Each leg |
|---|---|---|---|
| 1 | 6 sc in MR. (6) | 6 sc in MR. (6) | 6 sc in MR. (6) |
| 2 | Inc × 6. (12) | Inc × 6. (12) | Inc × 6. (12) |
| 3 | 12 sc. (12) | 12 sc. (12) | (1 sc, inc) × 6. (18) |
| 4 | (2 sc, sc2tog) × 3. (9) | 12 sc. (12) | 18 sc. (18) |
| 5 | Finished after Round 4 | 12 sc. (12) | 18 sc. (18) |
| 6 | — | (2 sc, sc2tog) × 3. (9) | (1 sc, sc2tog) × 6. (12) |
| 7 | — | 9 sc. (9) | 12 sc. (12) |
| 8 | — | (1 sc, sc2tog) × 3. (6) | Finished after Round 7 |
Do not stuff the ears.
Lightly stuff the lower arms after Round 5 and the feet after Round 5. Keep the upper attachment edges flexible. Flatten each opening and sew its two layers together using its sewing tail.
Muzzle — Make One
Use ivory white.
| Round | Instructions | Count |
|---|---|---|
| 1 | 6 sc in MR. | 6 |
| 2 | Inc × 6. | 12 |
| 3 | Sc in each stitch. | 12 |
Fasten off. Embroider a small brown triangular nose on the upper half, followed by a short vertical stitch and two curved mouth stitches.
Add a tiny amount of stuffing behind the muzzle. Sew its open rim to the head over Rounds 9–12, centered beneath the eyes.
Santa Hat — Make One
Start in red.
| Round | Instructions | Count |
|---|---|---|
| 1 | 6 sc in MR. | 6 |
| 2 | 6 sc. | 6 |
| 3 | (1 sc, inc) × 3. | 9 |
| 4 | 9 sc. | 9 |
| 5 | (2 sc, inc) × 3. | 12 |
| 6 | 12 sc. | 12 |
| 7 | (1 sc, inc) × 6. | 18 |
| 8 | 18 sc. | 18 |
| 9 | (2 sc, inc) × 6. | 24 |
| 10 | (3 sc, inc) × 6. | 30 |
| 11 | (4 sc, inc) × 6. | 36 |
| 12 | Change to ivory white; 36 sc. | 36 |
| 13 | 36 sc in ivory white. | 36 |
Change color on the final pull-through of Round 11’s last stitch. Fasten off after Round 13 with a 30 cm white tail. Leave the hat unstuffed.
For the pompom, use ivory white:
| Round | Instructions | Count |
|---|---|---|
| 1 | 6 sc in MR. | 6 |
| 2 | Inc × 6. | 12 |
| 3 | 12 sc. | 12 |
| 4 | Sc2tog × 6. | 6 |
Add a little stuffing after Round 3. After Round 4, draw the remaining six stitches closed.
Scarf — Make One
Use red. Ch 31.
| Row | Instructions | Count |
|---|---|---|
| 1 | Starting in the second chain, 30 sc. | 30 |
| 2 | 30 sc. | 30 |
Fasten off.
Separate teddy pieces, Santa hat, pompom and scarf before assembly
Assemble the Teddy
- Sew the body’s 12-stitch neck to the underside of the head around Head Round 13. Keep the eyes facing forward.
- Pin the ears over Head Rounds 5–7, with their centers near stitches 8 and 27 of Round 6. Sew their flattened bases.
- Attach the arms over Body Rounds 8–10, one on each side. With the body front centered between stitches 15 and 16 of Round 7, position the arms toward the corresponding side areas.
- Attach the flattened leg openings to the lower front over Body Rounds 3–5. Center them near stitches 11 and 20 of Round 5.
- Sew the pompom to the hat’s Round 1 tip. Place the white brim around Head Round 7 and tack it down with the white tail.
- Bend the hat tip gently to one side and secure it with a small red stitch.
- Wrap the scarf around the neck, cross its ends at the front and secure them with two small stitches.
Checkpoint: the head should sit upright, both feet should face forward and the embroidered face should remain visible below the hat.
Step 4
Make the Layered Tree
Use forest green and the 3.5 mm hook.
Make three separate triangles:
- Large: ch 16.
- Medium: ch 12.
- Small: ch 8.
For each Row 1, start in the second chain.
| Row | Large triangle | Medium triangle | Small triangle |
|---|---|---|---|
| 1 | 15 sc. (15) | 11 sc. (11) | 7 sc. (7) |
| 2 | 15 sc. (15) | 11 sc. (11) | 7 sc. (7) |
| 3 | Sc2tog, 11 sc, sc2tog. (13) | Sc2tog, 7 sc, sc2tog. (9) | Sc2tog, 3 sc, sc2tog. (5) |
| 4 | 13 sc. (13) | 9 sc. (9) | 5 sc. (5) |
| 5 | Sc2tog, 9 sc, sc2tog. (11) | Sc2tog, 5 sc, sc2tog. (7) | Sc2tog, 1 sc, sc2tog. (3) |
| 6 | 11 sc. (11) | 7 sc. (7) | 3 sc. (3) |
| 7 | Sc2tog, 7 sc, sc2tog. (9) | Sc2tog, 3 sc, sc2tog. (5) | Sc3tog. (1) |
| 8 | 9 sc. (9) | 5 sc. (5) | Finished after Row 7 |
| 9 | Sc2tog, 5 sc, sc2tog. (7) | Sc2tog, 1 sc, sc2tog. (3) | — |
| 10 | 7 sc. (7) | 3 sc. (3) | — |
| 11 | Sc2tog, 3 sc, sc2tog. (5) | Sc3tog. (1) | — |
| 12 | 5 sc. (5) | Finished after Row 11 | — |
| 13 | Sc2tog, 1 sc, sc2tog. (3) | — | — |
| 14 | 3 sc. (3) | — | — |
| 15 | Sc3tog. (1) | — | — |
Fasten off each triangle.
Add the Scalloped Branch Edges
Work into the unused loops along each triangle’s foundation chain.
Join green with a sl st in the first foundation loop. Then work:
[(1 sc, 1 hdc, 1 dc, 1 hdc, 1 sc) all in the next loop, sl st in the next loop]
| Triangle | Repeat quantity | Foundation loops used | Result |
|---|---|---|---|
| Large | 7 | 15 | 7 scallops; 43 worked stitches |
| Medium | 5 | 11 | 5 scallops; 31 worked stitches |
| Small | 3 | 7 | 3 scallops; 19 worked stitches |
The initial joining sl st is included in these totals. Do not add another joining stitch at the end. Fasten off.
Trunk — Make One
Use brown. Ch 4.
| Row | Instructions | Count |
|---|---|---|
| 1 | Starting in the second chain, 3 sc. | 3 |
| 2 | 3 sc. | 3 |
| 3 | 3 sc. | 3 |
Fasten off.
Star — Make One
Use golden yellow.
Round 1: 5 sc in MR. (5 sts) Close the ring.
Round 2:
(Sl st in the next ring stitch, ch 3, sl st in the second chain from the hook, sc in the next chain, sl st back into the same ring stitch) × 5.
Result: 5 points, using all 5 ring stitches. This round contains 15 sl sts, 5 sc and 15 chains; the skipped chain at each point forms its tip. Do not add a final joining stitch. Fasten off.
Assemble and Decorate the Tree
Lay the large triangle down with its point upward. Place the medium triangle on it, then the small triangle, aligning all three pointed tops.
Sew Medium Rows 9–11 to Large Rows 13–15. Sew Small Rows 5–7 to Medium Rows 9–11. Leave the scalloped lower edges free.
Sew Trunk Row 3 behind the center of the large triangle’s foundation edge, beneath foundation stitches 7–9. Sew the star over the shared pointed tops.
Add small embroidered knots:
- Top tier: one golden-yellow knot and one red knot near Small Row 3.
- Middle tier: one ivory knot and one golden-yellow knot near Medium Row 3.
- Bottom tier: two red knots near Large Row 3 and three golden-yellow knots spaced along Large Row 1.
To make each knot, bring the needle to the front, wrap the yarn twice around it and insert it immediately beside the exit point. Hold the wraps gently while drawing the needle through.
Checkpoint: three scalloped branch levels should be visible, with the trunk extending below the widest tier.
Step 5
Make the Miniature Stocking
Use the 3.5 mm hook. Make two matching flat panels. The fabric is reversible; no different shaping is needed for the back.
Start each panel in red. Ch 16.
Use a small ivory bobbin for the toe section. Drop the unused color at the boundary rather than carrying it across the entire row.
| Row | Instructions | Count |
|---|---|---|
| 1 | Starting in the second chain: 11 sc red, 4 sc ivory. | 15 |
| 2 | 4 sc ivory, 11 sc red. | 15 |
| 3 | 11 sc red, 4 sc ivory. | 15 |
| 4 | 4 sc ivory, 11 sc red. | 15 |
| 5 | 8 sc red; leave the remaining 7 stitches unworked, then turn. | 8 |
| 6 | 8 sc red. | 8 |
| 7 | 8 sc red. | 8 |
| 8 | 8 sc red. | 8 |
| 9 | 8 sc red. | 8 |
| 10 | 8 sc red. | 8 |
| 11 | 8 sc red. | 8 |
| 12 | 8 sc red. | 8 |
| 13 | 8 sc red. | 8 |
| 14 | 8 sc red. | 8 |
| 15 | 8 sc red. | 8 |
| 16 | 8 sc red. | 8 |
| 17 | 8 sc red. | 8 |
| 18 | 8 sc red. | 8 |
| 19 | Change to ivory; 8 sc. | 8 |
| 20 | 8 sc ivory. | 8 |
For the foot color changes, switch on the final pull-through of the last stitch before the new color. Cut the toe’s ivory strand after Row 4, leaving a tail for weaving in.
Join a new ivory strand on the final pull-through of Row 18’s last stitch for the cuff. Fasten off after Row 20.
Heel Patches — Make Two
Use ivory.
| Round | Instructions | Count |
|---|---|---|
| 1 | 6 sc in MR. | 6 |
| 2 | Inc × 6. | 12 |
Fasten off. Sew one patch to the outer face of each panel at the heel corner, centered between Rows 2 and 3 and approximately two stitches inward from the heel edge.
Holly Leaves — Make Six
Use green. Two leaves decorate the stocking; reserve four for the wreath’s berry clusters.
For each leaf, ch 5.
Round 1: starting in the second chain, work 1 sc, 1 hdc, 1 dc, then 3 sc in the last chain. Rotate the chain and work along its opposite side: 1 dc, 1 hdc, 1 sc. (9 sts)
Join with a sl st to the first sc; this joining stitch does not count. Fasten off.
Stocking Berries — Make Three
Use red. These berries are separate from the six wreath berries made in Step 7.
| Round | Instructions | Count |
|---|---|---|
| 1 | 6 sc in MR. | 6 |
| 2 | 6 sc. | 6 |
| 3 | Sc2tog × 3. | 3 |
Do not add stuffing. Draw the last three stitches closed.
Stocking Loop and Assembly
For the small stocking loop, use red. Ch 9, then work 8 sl sts starting in the second chain. (8 sl sts) Fasten off.
Stack the two panels with their outlines aligned. Position the stocking with the leg upright and the ivory toe pointing left.
Sew the perimeter with matching colors, including the lower foot edge, toe, instep and both sides of the leg. Leave the two Row 20 top edges unsewn so the cuff remains open. Do not stuff the stocking.
Fold the small loop and sew its ends to stitches 2 and 7 of the back panel’s Row 20.
Sew two holly leaves to the front near Rows 17–19, with their bases meeting near the center. Sew the three berries over the joined leaf bases.
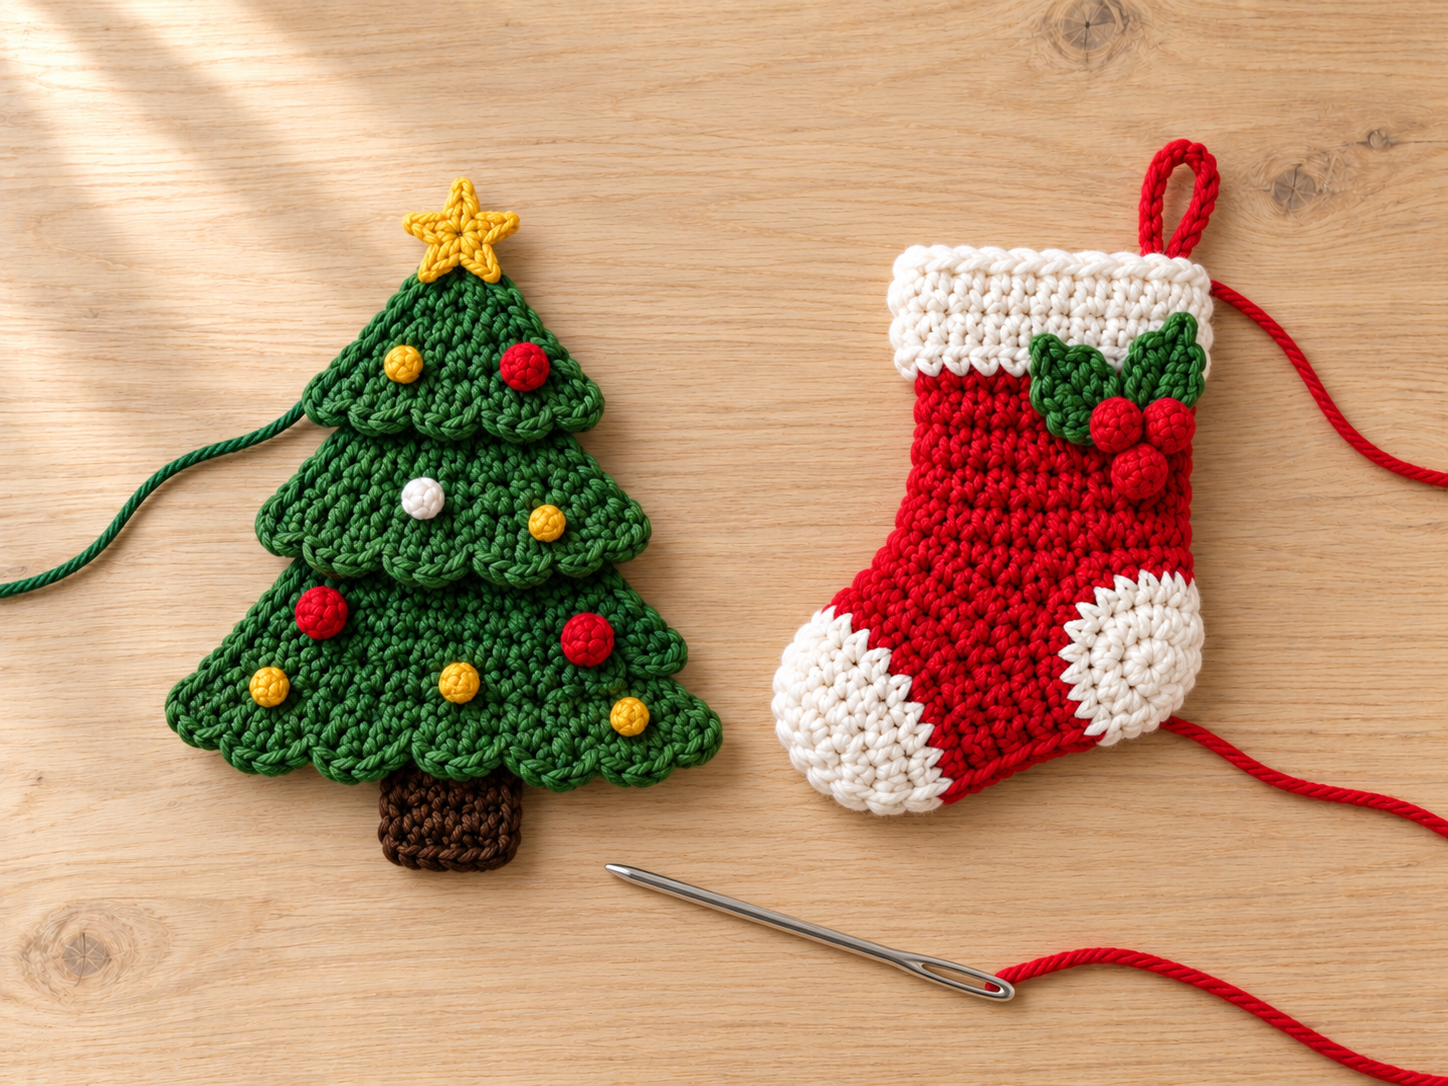
Finished layered tree and miniature stocking before wreath attachment
Step 6
Make the Poinsettia
Use the 3.5 mm hook.
Make:
- Six large red petals.
- Six small red petals.
- Three green leaves, using the large-petal instructions.
For every piece, ch 2. Row 1 begins in the second chain.
| Row | Large red petal or green leaf | Small red petal |
|---|---|---|
| 1 | 1 sc. (1) | 1 sc. (1) |
| 2 | 3 sc in the stitch. (3) | 3 sc in the stitch. (3) |
| 3 | Inc, 1 sc, inc. (5) | Inc, 1 sc, inc. (5) |
| 4 | Inc, 3 sc, inc. (7) | 5 sc. (5) |
| 5 | 7 sc. (7) | 5 sc. (5) |
| 6 | 7 sc. (7) | 5 sc. (5) |
| 7 | 7 sc. (7) | Sc2tog, 1 sc, sc2tog. (3) |
| 8 | Sc2tog, 3 sc, sc2tog. (5) | Sc3tog. (1) |
| 9 | Sc2tog, 1 sc, sc2tog. (3) | Finished after Row 8 |
| 10 | Sc3tog. (1) | — |
Fasten off. In the flower, the Row 1 end is the attachment base and the final row is the outward-pointing tip.
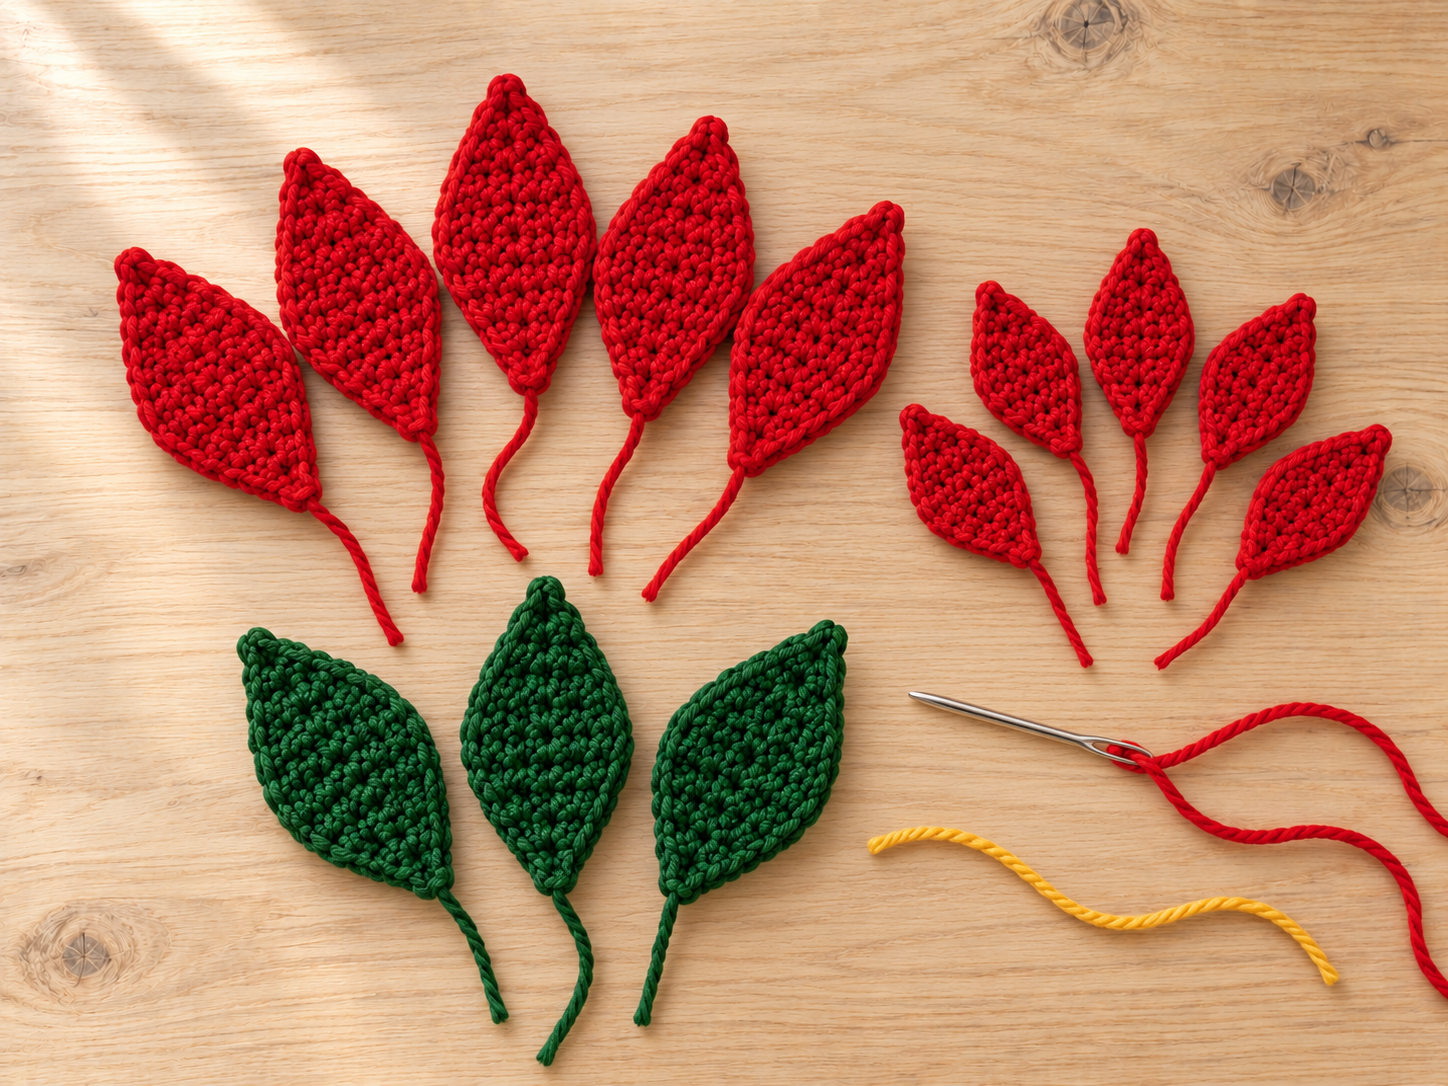
Separate large petals, small petals and green leaves
Assemble the Flower
Arrange the six large red petals in a circle, with their Row 1 bases touching around a small central opening of approximately 5 mm. Space their outward tips evenly.
Sew the bases together through Rows 1–2. Keep the remaining petal lengths free.
Place the six small petals above the first layer, rotating them so their tips fall between the large-petal tips. Sew their Row 1 bases securely to the center.
Position the three green leaves behind the flower, spaced around its back at approximately 12, 4 and 8 o’clock. Sew each leaf’s Rows 1–2 to the underside of the central join.
Embroider six golden-yellow knots close together in the flower center, using the knot method from Step 4.
Checkpoint: both red petal layers should be visible, with three green leaves extending behind them. The flower should rest against the ring without forming a tight cup.
Step 7
Make the Wreath Berries and White Dots
Make six red balls for two berry clusters and six ivory-white balls for the wreath’s white dots.
Use the 3.5 mm hook. Work each ball separately in its designated color.
| Round | Instructions | Count |
|---|---|---|
| 1 | 6 sc in MR. | 6 |
| 2 | 6 sc. | 6 |
| 3 | Sc2tog × 3. | 3 |
Do not stuff these small balls. Draw the final three stitches closed and retain the sewing tails.
Group the six red balls into two clusters of three. Keep the six ivory balls separate.
Assembly
Lay the covered ring face up, with its short cover seam at 12 o’clock.
Attach the Hanging Loop
Fold the main red hanging cord in half.
Run a separate red strand around the covered ring’s cross-section twice at 12 o’clock. Secure the hanging-loop ends to this reinforcing strand with several stitches. Hide the attachment beneath the bow.
Position and Sew the Main Motifs
Pin all five main decorations before sewing. Keep the center opening visible.
| Decoration | Position | Attachment points |
|---|---|---|
| Bow | 12 o’clock | Sew the back of the center band and gathered rectangle to the cover; leave the tails free. |
| Tree | Approximately 10 o’clock | Sew the back of the large triangle along its upper sides and behind its trunk; leave scalloped edges free. |
| Teddy | Approximately 7:30 | Sew the body’s back over Rounds 6–9 and add separate head support stitches over Head Rounds 6–9. |
| Stocking | Approximately 2 o’clock | Keep the toe facing the opening; sew the back along the leg and heel area. |
| Poinsettia | Approximately 4:30 | Sew through the back of the central petal join and the bases of the three leaves. |
For each decoration, spread attachment stitches across several stitches and at least three rows of the ring cover. Catch the crochet fabric without driving the needle through the foam.
Support the teddy’s head separately from its body so it does not lean forward. Attach the flower through its central layers rather than only through one loose petal.
Main motifs positioned during sewing, with berries and white dots still loose
Attach the Small Decorations
Sew one pair of reserved holly leaves beneath each red berry trio. Attach the two clusters near 4 o’clock and 6 o’clock, adjusting slightly to avoid covering the flower or teddy.
Pin the six ivory dots into visible green gaps near:
- 10:45
- 1:15
- 3:15
- 9:00
- 8:30
- 6:15
Sew each dot through its closed underside. Keep the white dots on the ring cover rather than on the bow or teddy.
Finishing
Remove every sewing pin.
Weave each tail through the back of its own crochet component, changing direction once before trimming. Hide cover-seam ends beneath the green fabric.
Lightly moisten and shape the bow tails, tree edges and flower petals on a towel if needed, following the yarn’s care instructions. Let them dry fully. Keep the stuffed teddy rounded.
Hang the wreath briefly and check that:
- The hanging loop sits behind the bow.
- The teddy’s head remains supported.
- The stocking toe faces the opening.
- The flower’s center lies against the ring.
- All six white dots and both berry trios are secure.
- No sewing tails or pins remain visible.
Tips
| Issue | Likely cause | Practical correction |
|---|---|---|
| Foam shows through the cover seam | The rectangle is too narrow or its edges were unevenly aligned. | Re-pin the seam and distribute the fabric evenly. If the edges still cannot meet without heavy stretching, rework the cover with a hook that produces the proposed dimensions. |
| Teddy tilts forward | The body is attached, but the head has no separate support. | Add concealed stitches between the back of Head Rounds 6–9 and the ring cover. |
| Tree edges curl sharply | Scallop stitches are tight or the layers were pulled during sewing. | Relax the edging tension and tack only the upper areas of the triangles together, keeping the lower scallops free. |
| Poinsettia forms a deep cup | Petals overlap too far or the central seam is pulled tightly. | Loosen the center seam, spread the six bases evenly and resew only Rows 1–2. |
| Stocking points away from the opening | Its orientation was not checked before attachment. | Pin it with the leg upright and the ivory toe toward the wreath center before sewing its back to the cover. |
Questions about a step?
If a stitch count or assembly detail is unclear, send us the post link and step number. For more practice with small projects, explore our crochet accessories patterns.