
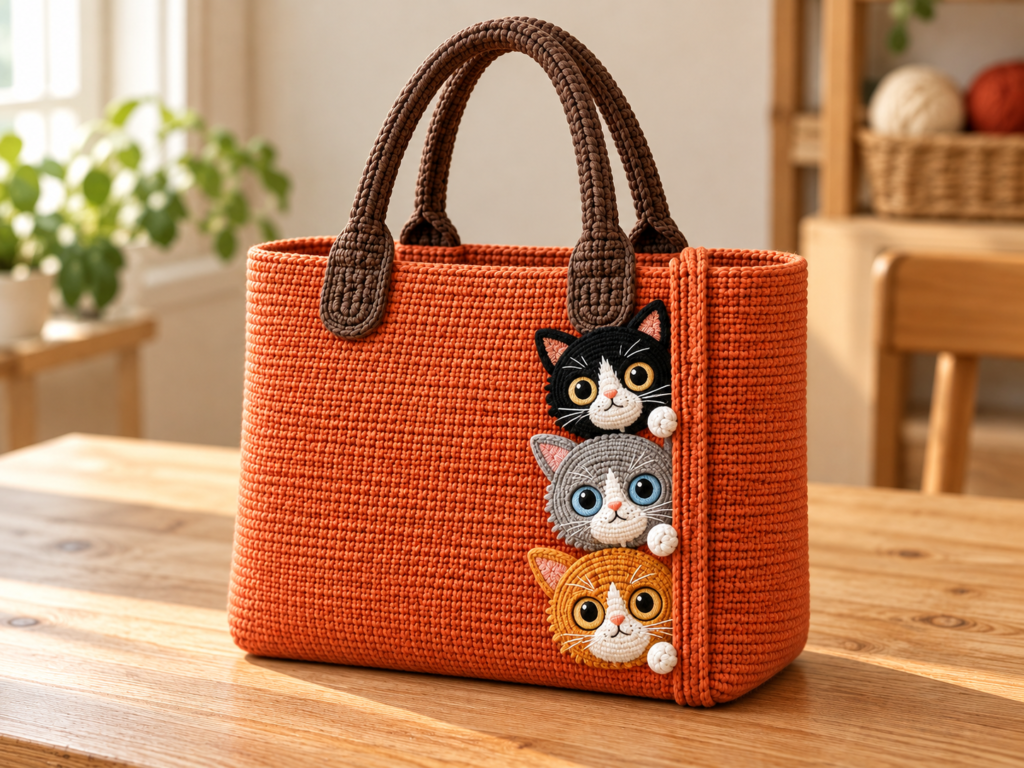
This crochet cat tote combines a burnt-orange body, chocolate-brown handles, and three cat faces stacked beside a decorative orange edge. The following original pattern draft is inspired by the visible product and has not been physically tested. The AI-generated illustrations show the proposed construction; they are not real process photographs or evidence of exact stitch counts.
Project at a Glance
| Detail | Proposed specification |
|---|---|
| Skill level | Intermediate: picking up stitches around a rectangle, spiral rounds, oval shaping, embroidery, and reinforced handle attachment |
| Bag dimensions | Approximately 30 cm wide × 25 cm high × 10 cm deep; 11.8 × 9.8 × 3.9 in, excluding handles |
| Handle strips | Approximately 46 × 3.3 cm; 18.1 × 1.3 in |
| Handle drop | Approximately 14–16 cm; 5.5–6.3 in after attachment |
| Cat faces | Approximately 6.5–7 cm across the circular face; about 8–8.5 cm tall with ears |
| Making time | Estimated 18–26 hours, depending on speed and embroidery detail |
| Construction | Base and handles in turned rows; body and face disks in continuous rounds; muzzles and paws in oval rounds; ears in rows |
| Proposed gauge | 20 sc and 24 rows/rounds per 10 cm/3.9 in in firm cotton fabric |
The gauge, dimensions, time, and yarn quantities are planning estimates, not measured results. Make a single-crochet swatch first and check that the fabric is firm without being difficult to work. Keeping the written counts with a different gauge changes the finished size.
The reference establishes the orange body, brown handles, and black, gray, and golden-orange cats. This draft proposes the hidden base construction, flat appliques, embroidered eyes, and attachment method.
Materials
Use smooth DK cotton, Craft Yarn Council category 3/light. Category 3 includes DK yarn; the Council’s hook and gauge ranges are general guidelines. The 3.5 mm hook and denser gauge here are proposed choices for this bag, not specifications recovered from the image. Craft Yarn Council yarn-weight system. Welcome to the Craft Yarn Council
| Material | Estimated amount or purpose |
|---|---|
| Burnt-orange cotton | 300–350 g for the base, body, and two cords |
| Chocolate-brown cotton | 60–80 g for two handles and their sewing |
| Black cotton | 15 g for one face and two ears |
| Silver-gray cotton | 15 g for one face and two ears |
| Golden-orange cotton | 15 g for one face and two ears |
| White cotton | 25 g for three muzzles, three paws, and facial stitching |
| Embroidery floss | Small amounts of gold, blue, black, white, peach, and dark gray |
| Crochet hook | 3.5 mm starting size; adjust after swatching |
| Other tools | Blunt tapestry needle, embroidery needle, scissors, tape measure, four removable boundary markers, one round-start marker, and sewing pins |
Use the same yarn range and hook for all crocheted parts. Quantities include a working allowance. Check your chosen yarn label when buying; equal ball weights can have different lengths.
This version uses flat sewn pieces without stuffing, plastic eyes, a closure, or a lining.
Crochet Abbreviations
| Abbreviation | Meaning |
|---|---|
| ch | Chain |
| sc | Single crochet |
| sl st | Slip stitch |
| st / sts | Stitch / stitches |
| inc | Work 2 sc into the same stitch |
| sc2tog | Single crochet 2 stitches together |
| BLO | Back loop only |
These abbreviations follow US usage listed by the Craft Yarn Council. Here, an increase specifically means two single crochets in one stitch. Welcome to the Craft Yarn Council
For sc2tog, insert the hook into the next stitch and pull up a loop, then insert it into the following stitch and pull up another loop. Yarn over and draw through all three loops. This consumes two stitches and produces one.
A magic ring means an adjustable yarn loop into which the first round is worked. Pull the starting tail to close its center.
For every turned row, ch 1 does not count as a stitch. Turn only when directed.
For continuous rounds, do not join or turn; move the round-start marker to the first stitch of each new round. Any final slip stitch used to finish a piece is excluded from its stitch count.
Step 1: Crochet the Rectangular Base
With burnt-orange cotton, ch 61.
| Row | Instruction | Count |
|---|---|---|
| 1 | Sc in the second ch from the hook and each remaining ch; turn. | 60 |
| 2 | Ch 1, sc in each st; turn. | 60 |
| 3 | Ch 1, sc in each st; turn. | 60 |
| 4 | Ch 1, sc in each st; turn. | 60 |
| 5 | Ch 1, sc in each st; turn. | 60 |
| 6 | Ch 1, sc in each st; turn. | 60 |
| 7 | Ch 1, sc in each st; turn. | 60 |
| 8 | Ch 1, sc in each st; turn. | 60 |
| 9 | Ch 1, sc in each st; turn. | 60 |
| 10 | Ch 1, sc in each st; turn. | 60 |
| 11 | Ch 1, sc in each st; turn. | 60 |
| 12 | Ch 1, sc in each st; turn. | 60 |
| 13 | Ch 1, sc in each st; turn. | 60 |
| 14 | Ch 1, sc in each st; turn. | 60 |
| 15 | Ch 1, sc in each st; turn. | 60 |
| 16 | Ch 1, sc in each st; turn. | 60 |
| 17 | Ch 1, sc in each st; turn. | 60 |
| 18 | Ch 1, sc in each st; turn. | 60 |
| 19 | Ch 1, sc in each st; turn. | 60 |
| 20 | Ch 1, sc in each st; turn. | 60 |
| 21 | Ch 1, sc in each st; turn. | 60 |
| 22 | Ch 1, sc in each st; turn. | 60 |
| 23 | Ch 1, sc in each st; turn. | 60 |
| 24 | Ch 1, sc in each st; turn. | 60 |
Do not fasten off. You should have a flat rectangle approximately 30 × 10 cm, with 60 stitches along each long edge and 24 row ends along each short edge.

flat burnt-orange rectangular base
Step 2: Build the Tote Body
Keep the burnt-orange yarn attached. Work around all four edges of the base.
Body Round 1: Pick Up 160 Stitches
Ch 1, then:
- Sc in all 60 stitches of Row 24. This is the front width edge. Mark the last stitch of this segment.
- Rotate the rectangle to work along the first short edge. Number its row ends 1–24 in the order encountered. Work one sc into each of ends 1–5, skip end 6; one sc into ends 7–11, skip end 12; one sc into ends 13–17, skip end 18; one sc into ends 19–23, skip end 24. 20 sc.
- Work one sc into each of the 60 unused foundation-chain positions opposite Row 1, without working into the original skipped turning chain. Mark the segment end.
- Along the second short edge, again number row ends 1–24 in the order encountered. Work one sc into ends 1–5, skip 6; one sc into ends 7–11, skip 12; one sc into ends 13–17, skip 18; one sc into ends 19–23, skip 24. 20 sc.
There are 60 + 20 + 60 + 20 = 160 stitches.
Do not add extra corner stitches or work into turning chains. The row-end stitches sit beside the long-edge corner stitches; they are separate insertion points.
Place boundary markers after stitches 60, 80, 140, and 160, and a round-start marker in stitch 1. Move these markers upward at the same stitch numbers each round.
For placement:
| Segment | Stitch numbers |
|---|---|
| Front | 1–60 |
| First side | 61–80 |
| Back | 81–140 |
| Other side | 141–160 |
Body Rounds 2–60
Round 2 is worked in BLO to encourage the wall to fold upward. All later rounds use both loops. Work continuously without turning or joining.
| Round | Instruction | Count |
|---|---|---|
| 2 | Sc in BLO of each st. | 160 |
| 3 | Sc in each st. | 160 |
| 4 | Sc in each st. | 160 |
| 5 | Sc in each st. | 160 |
| 6 | Sc in each st. | 160 |
| 7 | Sc in each st. | 160 |
| 8 | Sc in each st. | 160 |
| 9 | Sc in each st. | 160 |
| 10 | Sc in each st. | 160 |
| 11 | Sc in each st. | 160 |
| 12 | Sc in each st. | 160 |
| 13 | Sc in each st. | 160 |
| 14 | Sc in each st. | 160 |
| 15 | Sc in each st. | 160 |
| 16 | Sc in each st. | 160 |
| 17 | Sc in each st. | 160 |
| 18 | Sc in each st. | 160 |
| 19 | Sc in each st. | 160 |
| 20 | Sc in each st. | 160 |
| 21 | Sc in each st. | 160 |
| 22 | Sc in each st. | 160 |
| 23 | Sc in each st. | 160 |
| 24 | Sc in each st. | 160 |
| 25 | Sc in each st. | 160 |
| 26 | Sc in each st. | 160 |
| 27 | Sc in each st. | 160 |
| 28 | Sc in each st. | 160 |
| 29 | Sc in each st. | 160 |
| 30 | Sc in each st. | 160 |
| 31 | Sc in each st. | 160 |
| 32 | Sc in each st. | 160 |
| 33 | Sc in each st. | 160 |
| 34 | Sc in each st. | 160 |
| 35 | Sc in each st. | 160 |
| 36 | Sc in each st. | 160 |
| 37 | Sc in each st. | 160 |
| 38 | Sc in each st. | 160 |
| 39 | Sc in each st. | 160 |
| 40 | Sc in each st. | 160 |
| 41 | Sc in each st. | 160 |
| 42 | Sc in each st. | 160 |
| 43 | Sc in each st. | 160 |
| 44 | Sc in each st. | 160 |
| 45 | Sc in each st. | 160 |
| 46 | Sc in each st. | 160 |
| 47 | Sc in each st. | 160 |
| 48 | Sc in each st. | 160 |
| 49 | Sc in each st. | 160 |
| 50 | Sc in each st. | 160 |
| 51 | Sc in each st. | 160 |
| 52 | Sc in each st. | 160 |
| 53 | Sc in each st. | 160 |
| 54 | Sc in each st. | 160 |
| 55 | Sc in each st. | 160 |
| 56 | Sc in each st. | 160 |
| 57 | Sc in each st. | 160 |
| 58 | Sc in each st. | 160 |
| 59 | Sc in each st. | 160 |
| 60 | Sc in each st. | 160 |
After Round 60, sl st in the next stitch to soften the spiral step. Fasten off with a 20 cm tail.
At Round 24, the walls should be approximately 10 cm high; after Round 60, approximately 25 cm. Check that the base remains rectangular and the opening is even. This body has no sewn vertical seam.

open orange tote body before handles or appliques
Step 3: Crochet Two Brown Handles
Make 2 identical strips in chocolate brown. Work each strip along its length, beginning with ch 93.
| Row | Instruction | Count |
|---|---|---|
| 1 | Sc in the second ch from the hook and each remaining ch; turn. | 92 |
| 2 | Ch 1, sc in each st; turn. | 92 |
| 3 | Ch 1, sc in each st; turn. | 92 |
| 4 | Ch 1, sc in each st; turn. | 92 |
| 5 | Ch 1, sc in each st; turn. | 92 |
| 6 | Ch 1, sc in each st; turn. | 92 |
| 7 | Ch 1, sc in each st; turn. | 92 |
| 8 | Ch 1, sc in each st; do not turn. | 92 |
Fasten off each strip with an 80 cm sewing tail. Each should measure approximately 46 × 3.3 cm.
Keep the strips flat; there is no stuffing or folded tube. Their end tabs are formed by overlapping the existing strip ends onto the bag during assembly.
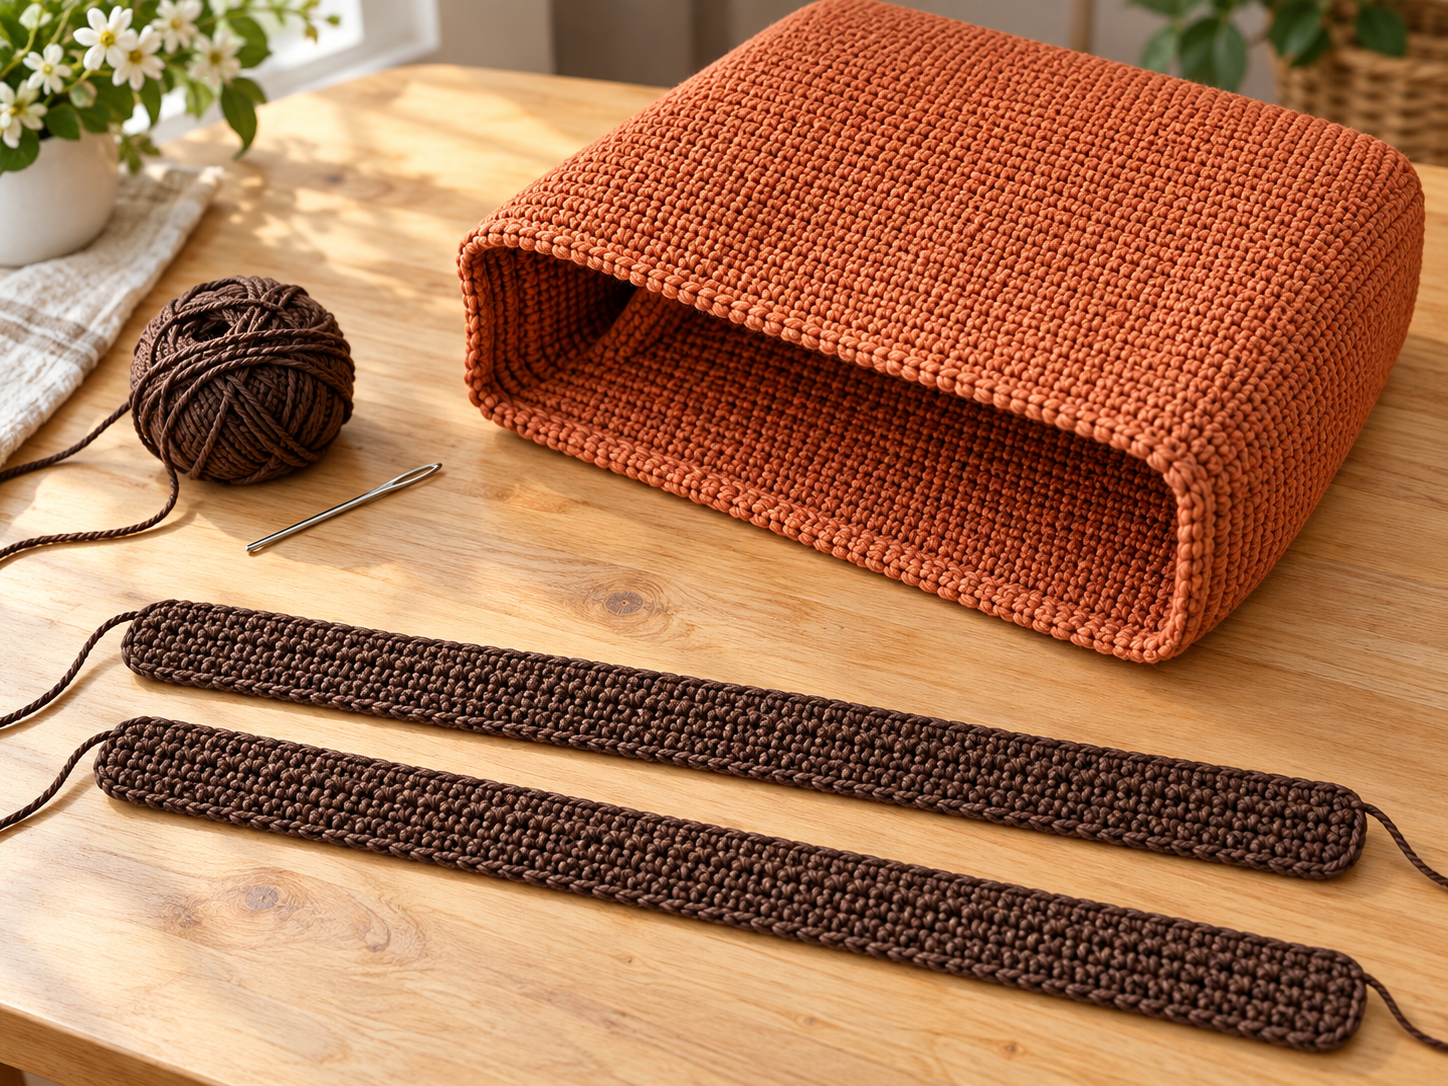
two separate brown handle strips beside the plain tote
Step 4: Crochet the Cat Components
Make three face disks, six ears, three white muzzles, and three white paws. Keep every piece flat.
Face Disks — Make 3
Make one black, one silver gray, and one golden orange. Use the same instructions for each, working continuously in the round.
| Round | Instruction | Count |
|---|---|---|
| 1 | Work 6 sc into a magic ring; close the ring. | 6 |
| 2 | Inc in each st. | 12 |
| 3 | (1 sc, inc) × 6. | 18 |
| 4 | (2 sc, inc) × 6. | 24 |
| 5 | (3 sc, inc) × 6. | 30 |
| 6 | (4 sc, inc) × 6. | 36 |
| 7 | (5 sc, inc) × 6. | 42 |
Sl st in the next stitch and fasten off with a 60 cm tail for sewing. Each disk should be approximately 6.5–7 cm wide. Do not add another layer or stuffing.
Triangular Ears — Make 6
Make two black, two gray, and two golden orange. For each ear, ch 8 in its matching face color.
| Row | Instruction | Count |
|---|---|---|
| 1 | Sc in the second ch from the hook and each remaining ch; turn. | 7 |
| 2 | Ch 1, sc2tog, 3 sc, sc2tog; turn. | 5 |
| 3 | Ch 1, sc2tog, 1 sc, sc2tog; turn. | 3 |
| 4 | Ch 1, skip the first st, sc in the middle st, skip the last st; do not turn. | 1 |
Fasten off with a 25 cm tail. Row 4 deliberately accounts for all three previous stitches by skipping both outer stitches.
The seven-stitch foundation edge is the ear’s sewing base. Make identical triangles and mirror them through placement, with the points facing upward and outward.
White Oval Muzzles — Make 3
For each muzzle, ch 4 in white. Work around both sides of the foundation chain without turning.
| Round | Instruction | Count |
|---|---|---|
| 1 | Starting in the second ch, sc in the next 2 ch; work 3 sc in the last ch. Along the unused underside, sc in the next ch and work 2 sc in the final ch, which already contains the first sc of the round. | 8 |
| 2 | Inc in the first st, 1 sc, inc in each of the next 3 sts, 1 sc, inc in each of the last 2 sts. | 14 |
Round 1 has 2 + 3 + 1 + 2 = 8 stitches. Round 2 consumes all 8 and produces 2 + 1 + 6 + 1 + 4 = 14.
Sl st in the next stitch. Fasten off with a 30 cm sewing tail. The intended result is one small, flat horizontal oval, approximately 3 × 1.5–2 cm.
White Oval Paws — Make 3
For each paw, ch 3 in white. Work around the chain without turning.
| Round | Instruction | Count |
|---|---|---|
| 1 | Sc in the second ch, work 3 sc in the last ch, then work 2 sc in the unused underside of the first worked ch. | 6 |
| 2 | Inc in each st. | 12 |
Sl st in the next stitch. Fasten off with a 30 cm tail. These are small, flat oval accents, approximately 2 × 1.5 cm, with no stuffing.
Step 5: Embroider the Cat Faces
Finish each face before attaching it to the bag.
- Position the ears. Lay the disk front upward with stitch 1 of its final round at 12 o’clock. Number the perimeter clockwise. Sew one ear’s seven-stitch foundation edge to perimeter stitches 2–8 and the other to 36–42. Pin first, then sew one ear-base stitch to each corresponding disk stitch. Keep the points mirrored upward and outward.
- Add ear centers. Use peach floss and short satin stitches to fill a small triangle inside each ear, leaving the outer crochet visible.
- Attach the muzzle. Center one white oval on the lower half of each disk, with its center approximately 1 cm below the disk center. Sew around its edge without pulling the face into a cup.
- Mark two eyes. Position their centers approximately 1.3 cm to either side of the disk’s vertical centerline and 0.5 cm above its center. Mark circles about 1.2 cm in diameter.
- Embroider the irises. Outline each circle in gold for the black and golden cats, or blue for the gray cat. Fill the circle with short radial satin stitches.
- Add pupils and highlights. Fill a centered black pupil approximately 0.7 cm wide, then add one tiny white stitched highlight near its upper-left edge. Use short black outline stitches around each iris. All eyes are embroidery.
- Add the forehead blaze. With white yarn or floss, work close satin stitches in a narrow triangle along the centerline above the muzzle: approximately 0.6 cm wide at its base and 1.5 cm tall, tapering upward between the eyes.
- Add the nose and mouth. Embroider a peach triangle about 0.5 cm wide at the upper center of the white muzzle. From its point, stitch a short black vertical line and two small curved mouth lines.
- Add whiskers and markings. Make three white straight stitches per cheek, about 1–1.5 cm long, extending outward from the muzzle. Add two short dark-gray brow stripes on the gray and golden-orange faces.
- Finish the paws. Embroider two short dark-gray toe lines near one end of each white oval. Leave the paws separate for assembly.
Use modest embroidery tension and secure all floss ends on the backs of the pieces. Keep the faces flat.

three embroidered cat appliques and three separate white paws
Step 6: Make the Decorative Cords
Make 2 in burnt orange.
For each cord, leave a 25 cm starting tail, work ch 75, then fasten off with a 25 cm ending tail. Each cord contains 75 chains and no return row.
The proposed chain gauge is 30 ch per 10 cm, giving a cord approximately 25 cm long. Chain gauge can differ from single-crochet gauge: measure a sample first.
If needed, calculate the chain count as:
Measured chains per 10 cm × 2.5, rounded to a whole chain.
Make both cords with that same count and record the adjustment.
The cords lie vertically beside the cats. They are decorative chains, not a zipper or a structural seam.
Assembly
Attach the Handles
Keep the body markers until all placement is complete. Set the bag upright with the front segment, stitches 1–60, facing you.
- Curve one brown strip into a handle without twisting it.
- Place one end across front stitches 13–19, and the other across 38–44. Each end overlaps body Rounds 51–60, approximately 4 cm.
- The first 8 stitch columns at one strip end and last 8 stitch columns at the other form the overlapping tabs. The strip’s eight worked rows span each tab’s width.
- Pin the ends, check the handle is centered, and sew a rectangle around each overlap, catching both the handle and bag fabric. Add two diagonal stitching passes across each rectangle.
- Attach the second handle to back stitches 97–103 and 122–128, again across body Rounds 51–60. These positions mirror the front attachment points because the back segment runs in the opposite direction.
- Use the long brown tails and additional matching yarn as needed. Secure the sewing ends inside the bag.
Position the Cats, Paws, and Cords
Use the following starting positions on the front segment. Allow small pinning adjustments if your gauge changes the component sizes.
| Piece | Position |
|---|---|
| Golden-orange face | Disk center near front stitch 50, body Round 10 |
| Gray face | Disk center near front stitch 50, body Round 28 |
| Black face | Disk center near front stitch 50, body Round 46 |
| Golden cat’s paw | Center near front stitch 57, body Round 7 |
| Gray cat’s paw | Center near front stitch 57, body Round 25 |
| Black cat’s paw | Center near front stitch 57, body Round 43 |
| Two orange cords | Follow front stitch columns 59 and 60, from body Round 1 to Round 60 |
Pin the cats with all faces upright. Keep them clear of the handle-sewing rectangles and the top opening. The lower cats’ ear tips may sit just behind the disk above.
Arrange one white paw beside the lower-right edge of each face, clear of its muzzle.
Pin the two cords parallel beside the cats. Check that they reach both ends without pulling the body shorter.
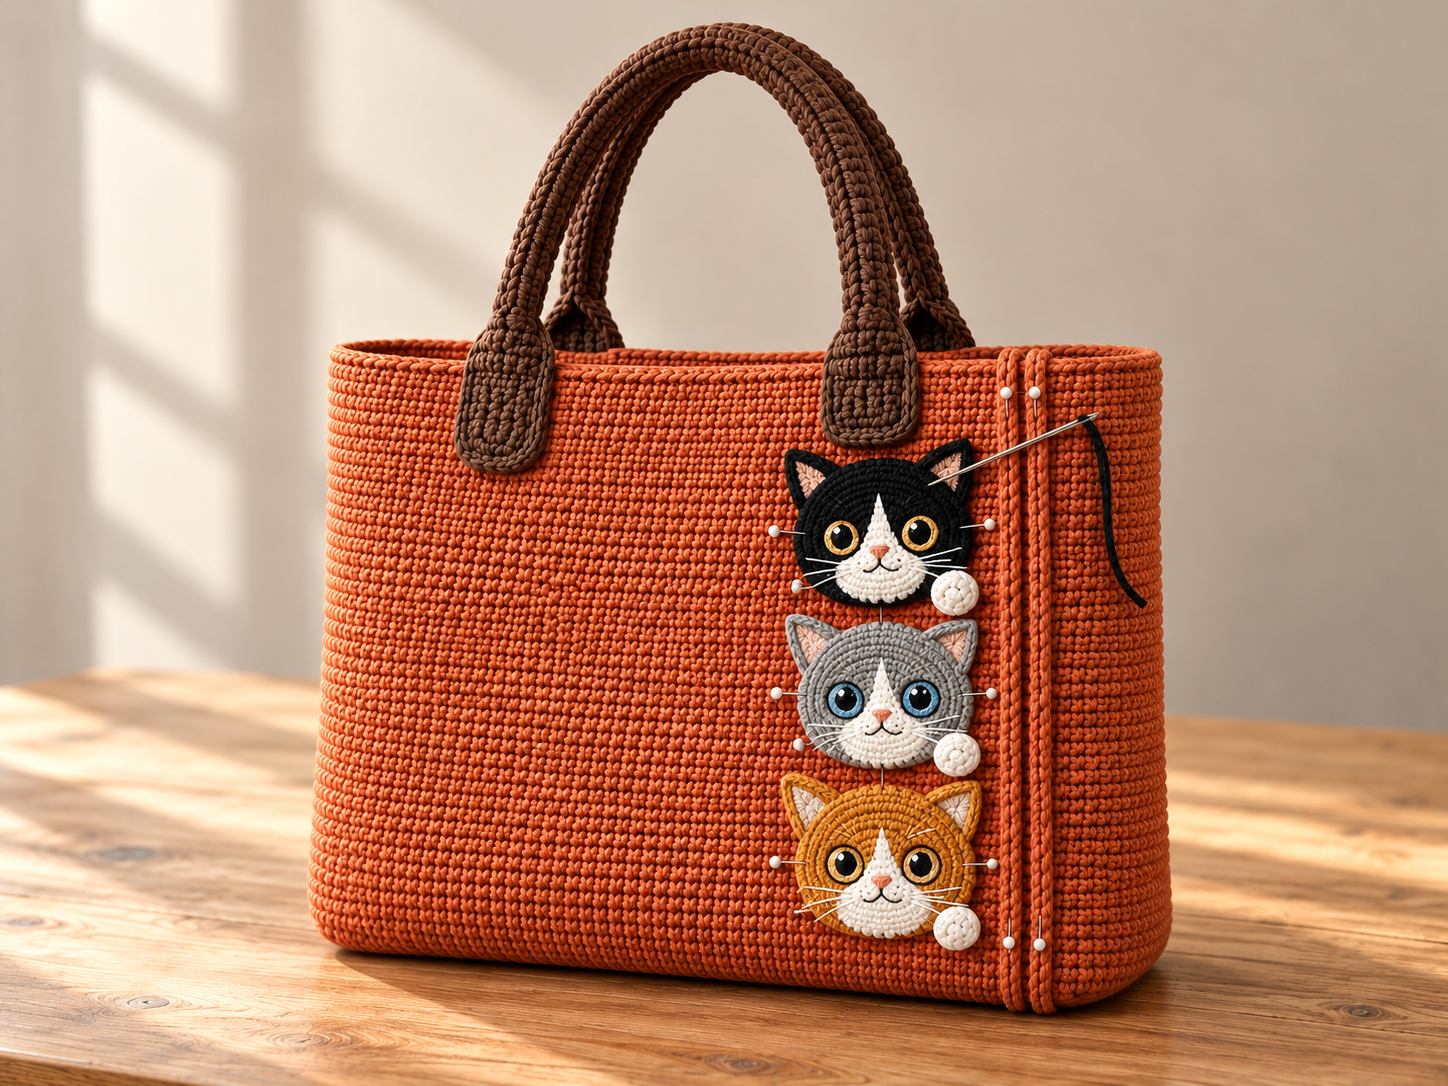
handles attached, with cat appliques and cords pinned for sewing
Sew the cords first with matching orange yarn, catching each chain and the bag fabric with small stitches along their length. Use their tails to secure the top and bottom ends.
Sew the cat faces bottom to top: golden orange, gray, then black. Use matching yarn and small stitches around each disk.
Where an ear tip overlaps beneath the next face, stitch the ear down first, then place the upper disk over it. Secure exposed ear edges so they cannot lift easily.
Sew each white paw around its edge with white yarn. Catch only the front bag wall while attaching appliques; check inside frequently so the front and back are not sewn together.
Finishing
Remove every sewing pin and marker. Weave in crochet and sewing tails on the inside, running them through several stitches in two directions.
Shape the base and side corners by hand. If the yarn label allows damp blocking, dampen lightly, shape the bag over a towel-covered rectangular form, and let it dry completely. Smooth the appliques separately without stretching the embroidered eyes.
Check the four handle tabs for loose stitches and make sure every muzzle, ear, paw, and cord is secured. Crochet fabric can stretch under weight; this draft has no tested load rating.
Tips and Fixes
| Issue | Likely cause | Practical correction |
|---|---|---|
| The base bows or twists | An uneven foundation chain or missed end stitches | Count all 60 stitches in each base row; remake an overly tight starting chain with a slightly larger hook, then return to the main hook. |
| The body puckers at the bottom | Row-end pickups were placed unevenly or pulled tight | Check the first body round has exactly 60/20/60/20 stitches, with the skipped row ends distributed as written. |
| A cat face cups or ripples | Missing increases, uneven tension, or overly tight embroidery | Check the disk counts 6/12/18/24/30/36/42. Correct missed increases before sewing and loosen embroidery that draws the fabric inward. |
| The cat stack covers a handle tab | Appliques are larger than the assumed gauge | Pin every piece before sewing; shift the column slightly right or lower while keeping the cats inside the front panel. |
| A handle stretches or its tab lifts | Loose handle fabric or insufficient attachment stitching | Use firm handle tension and reinforce the existing sewing rectangles; support heavy contents from below. |
Questions about a step?
If a stitch count or assembly detail is unclear, send us the post link and step number. For more practice with small projects, explore our beginner crochet accessories guide.