

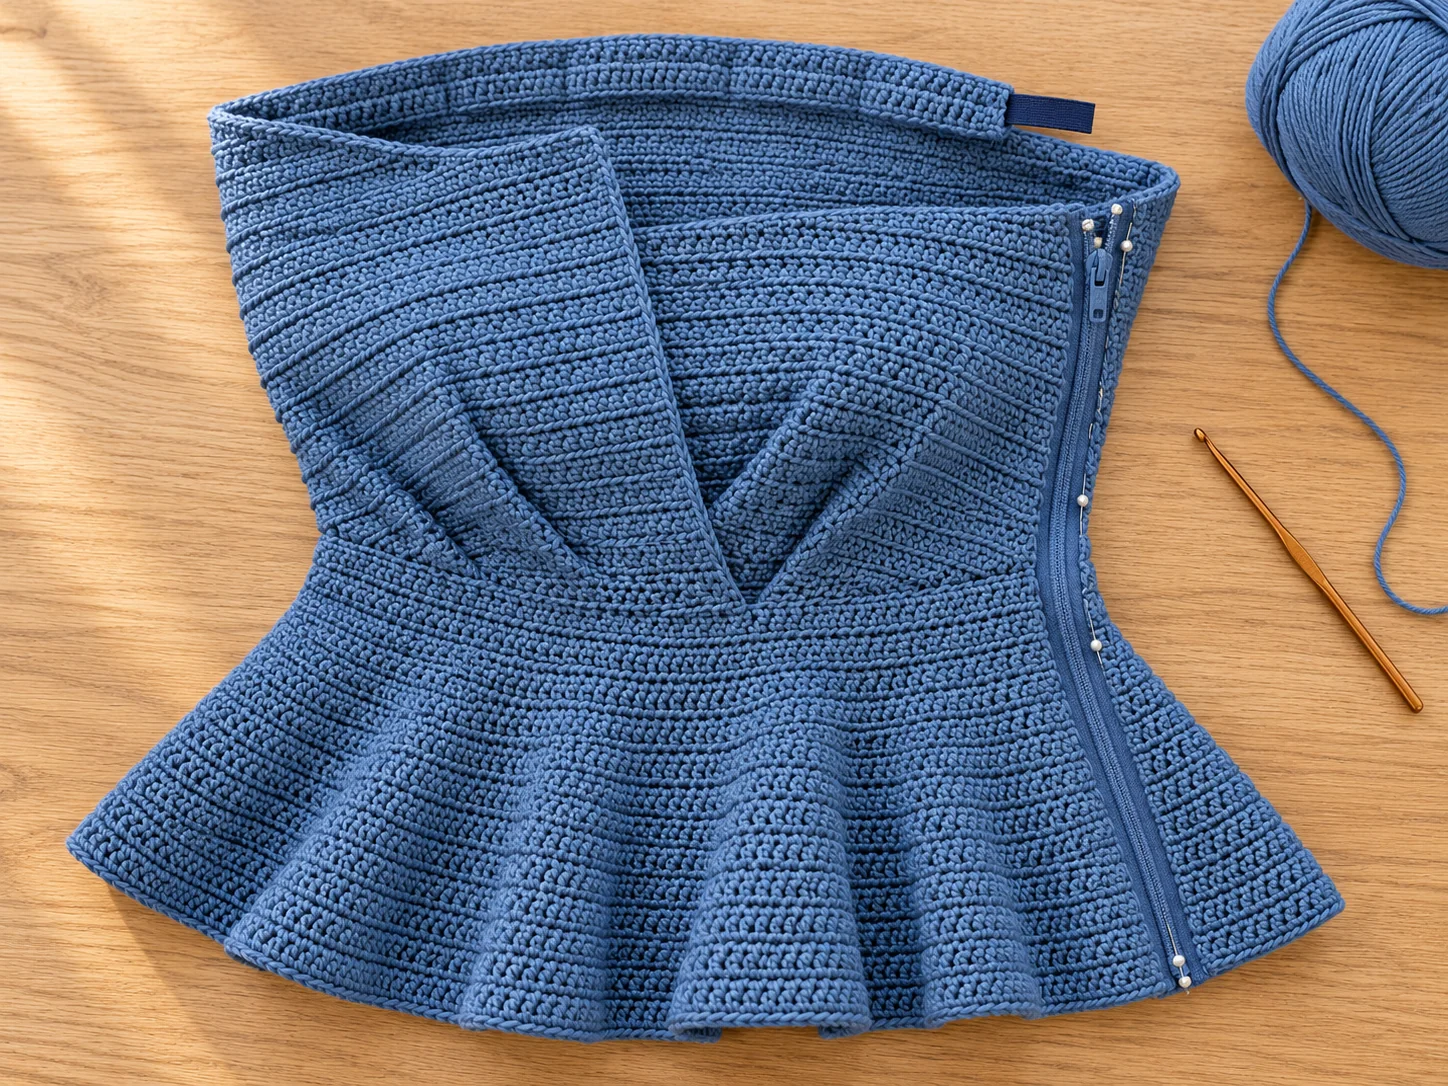
This denim-blue strapless crochet top combines a fitted bodice, folded front overlays, a flared peplum and a long matching sash. This original, image-inspired pattern draft has not been physically tested and does not reproduce the photographed maker’s pattern. The AI-generated illustrations show the proposed construction; they are not real process photographs or proof of stitch counts.
In this guide
- Project at a glance
- Materials
- Crochet abbreviations
- Step 1: Crochet the bodice panels
- Step 2: Join one side and check the fit
- Step 3: Crochet the peplum
- Step 4: Crochet the folded front overlays
- Step 5: Crochet the sash
- Assembly
- Finishing
- Tips and fixes
Project at a glance
| Detail | Proposed specification |
|---|---|
| Skill level | Intermediate: shaped garment panels, fitting, attaching overlays, sewing a zipper and making an elastic casing |
| Sizing | One draft size, based on approximately 86 cm / 33.9 in bust and 72 cm / 28.3 in waist measurements |
| Finished upper bodice circumference | Approximately 84 cm / 33.1 in, before elastic gathering |
| Finished waist circumference | Approximately 72 cm / 28.3 in |
| Main bodice depth | Approximately 20 cm / 7.9 in |
| Peplum depth | Approximately 13 cm / 5.1 in, including the hem row |
| Overall depth | Approximately 33 cm / 13 in; the folded front rises about 2 cm / 0.8 in above the main bodice |
| Sash | Approximately 150 × 4.2 cm / 59.1 × 1.7 in |
| Making time | Estimated 20–30 hours, including sewing and fitting |
| Construction | Two shaped bodice panels; one side seam; a peplum worked flat onto the waist; two separate front overlays; a separate sash; a left-side zipper |
Gauge assumptions: 20 sc × 24 rows = 10 × 10 cm / approximately 4 × 4 in. For the peplum, assume 20 hdc × 16 rows = 10 × 10 cm. These are drafting targets, not measured results.
Make separate sc and hdc swatches at least 15 cm / 6 in square. Wash and dry them according to your yarn label before measuring the central 10 cm. Select the hook that gives firm, flexible fabric near the targets.
The proposed upper circumference provides 2 cm of negative ease against an 86 cm bust. Check whether your washed fabric stretches comfortably that far before committing to this size. Try the bodice over the underlayer you intend to wear. This construction is not a graded pattern or a shaped bra cup.
The photograph suggests a blue strapless silhouette, folded front details, a waist tie and a flared lower section. Yarn, gauge, measurements, hidden closure and neckline support are proposed choices. This draft uses a side zipper because a fitted, nonstretch waist should not be assumed to pull over the bust or hips.
Materials
- Yarn: smooth cotton or a cotton blend in DK / light category 3, in one consistent denim-blue shade.
- Estimated quantity: 450–550 g total. Allow approximately 190–220 g for the bodice and facing, 100–130 g for the peplum, 70–90 g for the overlays and 90–110 g for the sash and sewing. These are purchasing estimates.
- Example label calculation: if your chosen yarn is labeled 50 g / 110 m, 11 balls provide 550 g / 1,210 m, approximately 1,323 yd. Use your actual label; other yarns have different lengths per gram.
- Hook: begin with 3.5 mm and adjust after swatching.
- Yarn needle, sewing needle, matching blue sewing thread, scissors, measuring tape, stitch markers and sewing clips.
- Approximately 1 m / 1.1 yd of 7 mm-wide soft elastic; trim after fitting.
- One color-matched, closed-end coil zipper whose usable opening matches the completed left side, approximately 33 cm / 13 in. Measure the finished opening before buying; a longer coil zipper may be professionally shortened.
- Approximately 75 cm / 29.5 in of narrow, lightweight woven tape, split between the two zipper edges, to stabilize the crochet.
DK belongs to category 3 in the Craft Yarn Council system, whose general crochet hook guidance is 3.5–4.5 mm. Those are guidelines; this garment’s swatches determine the working hook. Source: Craft Yarn Council yarn-weight system.
Crochet abbreviations
US terminology is used throughout.
| Abbreviation | Meaning |
|---|---|
| ch | Chain |
| sc | Single crochet |
| hdc | Half double crochet |
| st / sts | Stitch / stitches |
| x | Repeat the preceding parenthesized group the stated number of times |
The standard stitch names were checked against the Craft Yarn Council abbreviation list. That source defines terminology; it does not validate this original garment pattern.
Increase used here: “2 sc in next st” or “2 hdc in next st” means place both stitches into the same previous stitch. It consumes one stitch and produces two.
Working rules: use both loops unless stated otherwise. All components are worked in rows. At the end of each sc row except the final row, ch 1 and turn; before the next row, work into the first actual stitch. For hdc rows, ch 2 and turn. Turning chains never count as stitches, and no row is joined into a round. All pieces remain blue; there are no color changes.
Step 1: Crochet the bodice panels
Make 2 identical panels: one front and one back. Work from waist to neckline.
Using blue yarn, ch 73. Row 1 uses 72 foundation chains; the skipped first chain is the turning chain. Apply the sc turning rule above to every row.
| Row | Instruction | Count |
|---|---|---|
| 1 | Sc in second ch from hook and each remaining ch. | 72 sts |
| 2 | Sc in each of the 72 sts. | 72 sts |
| 3 | 2 sc in first st, sc in next 70 sts, 2 sc in last st. | 74 sts |
| 4 | Sc in each of the 74 sts. | 74 sts |
| 5 | Sc in each of the 74 sts. | 74 sts |
| 6 | Sc in each of the 74 sts. | 74 sts |
| 7 | 2 sc in first st, sc in next 72 sts, 2 sc in last st. | 76 sts |
| 8 | Sc in each of the 76 sts. | 76 sts |
| 9 | Sc in each of the 76 sts. | 76 sts |
| 10 | Sc in each of the 76 sts. | 76 sts |
| 11 | 2 sc in first st, sc in next 74 sts, 2 sc in last st. | 78 sts |
| 12 | Sc in each of the 78 sts. | 78 sts |
| 13 | Sc in each of the 78 sts. | 78 sts |
| 14 | Sc in each of the 78 sts. | 78 sts |
| 15 | 2 sc in first st, sc in next 76 sts, 2 sc in last st. | 80 sts |
| 16 | Sc in each of the 80 sts. | 80 sts |
| 17 | Sc in each of the 80 sts. | 80 sts |
| 18 | Sc in each of the 80 sts. | 80 sts |
| 19 | 2 sc in first st, sc in next 78 sts, 2 sc in last st. | 82 sts |
| 20 | Sc in each of the 82 sts. | 82 sts |
| 21 | Sc in each of the 82 sts. | 82 sts |
| 22 | Sc in each of the 82 sts. | 82 sts |
| 23 | 2 sc in first st, sc in next 80 sts, 2 sc in last st. | 84 sts |
| 24 | Sc in each of the 84 sts. | 84 sts |
| 25 | Sc in each of the 84 sts. | 84 sts |
| 26 | Sc in each of the 84 sts. | 84 sts |
| 27 | Sc in each of the 84 sts. | 84 sts |
| 28 | Sc in each of the 84 sts. | 84 sts |
| 29 | Sc in each of the 84 sts. | 84 sts |
| 30 | Sc in each of the 84 sts. | 84 sts |
| 31 | Sc in each of the 84 sts. | 84 sts |
| 32 | Sc in each of the 84 sts. | 84 sts |
| 33 | Sc in each of the 84 sts. | 84 sts |
| 34 | Sc in each of the 84 sts. | 84 sts |
| 35 | Sc in each of the 84 sts. | 84 sts |
| 36 | Sc in each of the 84 sts. | 84 sts |
| 37 | Sc in each of the 84 sts. | 84 sts |
| 38 | Sc in each of the 84 sts. | 84 sts |
| 39 | Sc in each of the 84 sts. | 84 sts |
| 40 | Sc in each of the 84 sts. | 84 sts |
| 41 | Sc in each of the 84 sts. | 84 sts |
| 42 | Sc in each of the 84 sts. | 84 sts |
| 43 | Sc in each of the 84 sts. | 84 sts |
| 44 | Sc in each of the 84 sts. | 84 sts |
| 45 | Sc in each of the 84 sts. | 84 sts |
| 46 | Sc in each of the 84 sts. | 84 sts |
| 47 | Sc in each of the 84 sts. | 84 sts |
| 48 | Sc in each of the 84 sts. | 84 sts |
Fasten off each panel, leaving a 60 cm / 24 in sewing tail. Mark the face you prefer as the outside, consistently on both pieces.
Checkpoint: each panel should be approximately 36 cm / 14.2 in wide at the foundation edge, 42 cm / 16.5 in wide at the top and 20 cm / 7.9 in high. The lower sides slope outward toward the bust; the upper portion has straight sides. The panels do not include the peplum.
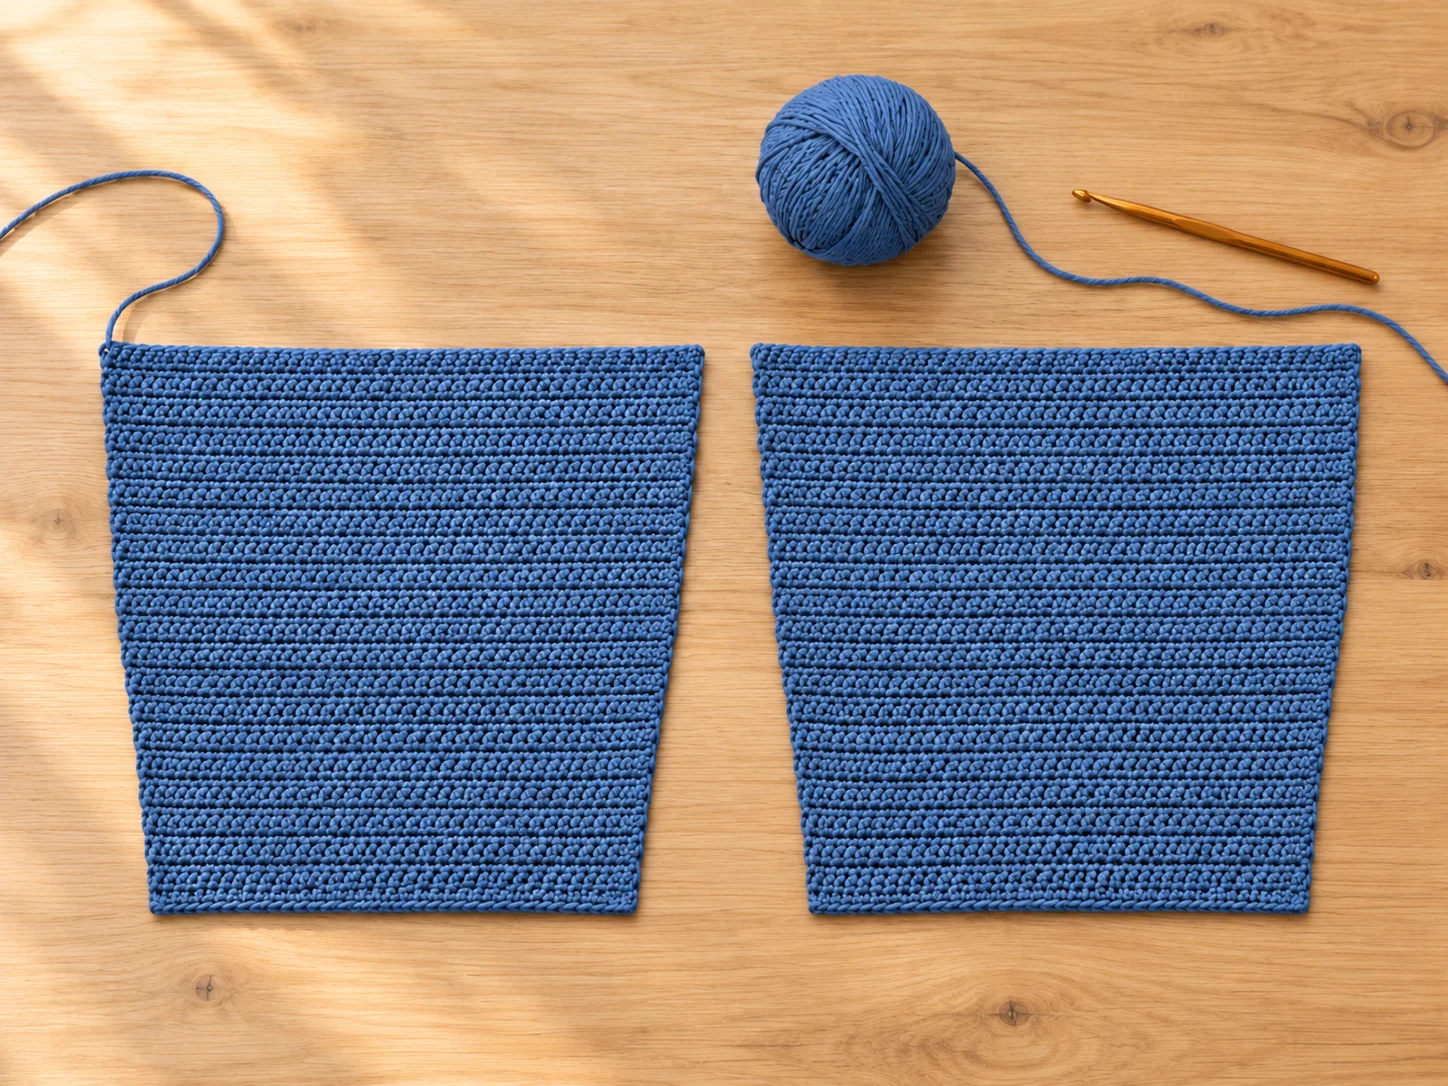
AI-generated illustration of the two shaped bodice panels.
Step 2: Join one side and check the fit
Place the panels with their chosen outside faces together. Align their Row 1 waist edges and Row 48 neckline edges.
Sew only the wearer’s right side, matching the end of each front row to the corresponding back row, from Row 1 through Row 48. Use a flat edge-to-edge seam that does not take a full stitch from the panel widths. Secure the tail.
Turn the joined work outside out. The wearer’s left side remains open from neckline to waist. Clip that opening temporarily edge to edge and check the fit without stretching the clips or yarn.
The waist should sit at the intended sash position, the neckline should provide coverage, and the fabric should allow comfortable breathing and movement. If those checks fail, revise the bodice sizing before adding the peplum. Changing the foundation count also changes the peplum math; the written counts apply only to this draft size.
Remove the temporary clips before the next step.
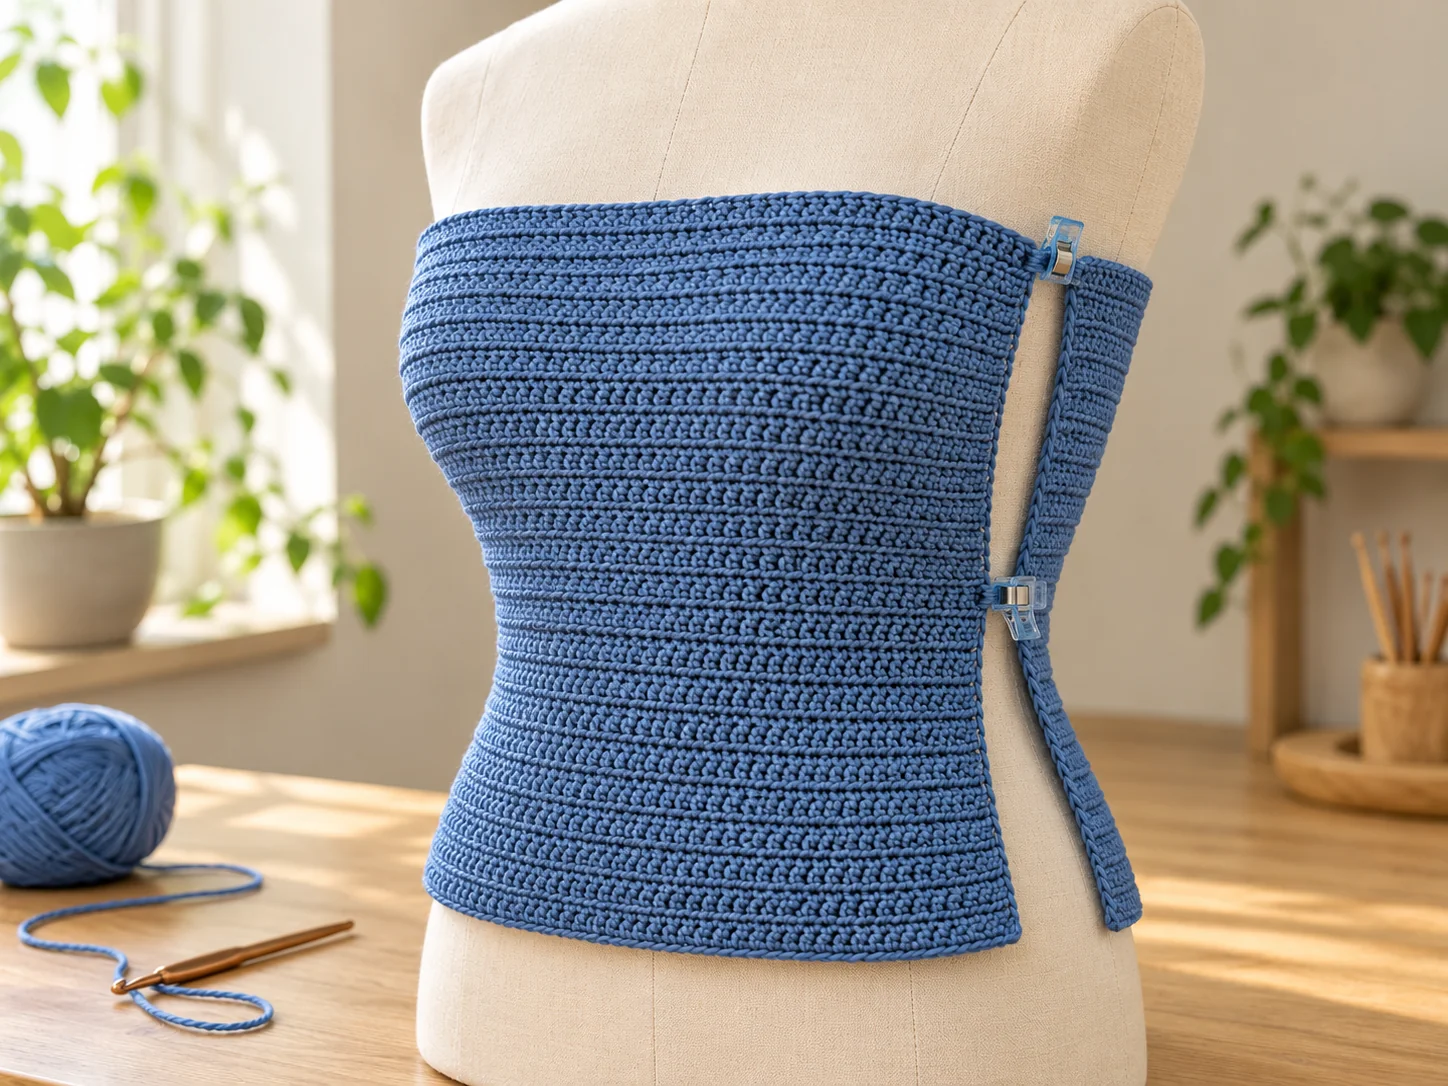
AI-generated illustration of the bodice during fitting.
Step 3: Crochet the peplum
Keep the left side open. Turn the garment upside down so its two waist foundation edges are accessible.
Starting at the front’s left waist corner, join blue yarn to the first unused foundation-chain loop. Work across all 72 front foundation loops, pass across the sewn right seam without adding a seam stitch, then work across all 72 back foundation loops. There are 144 available loops.
Ch 2; it does not count. The first row below is worked into these loops. Subsequent rows use the hdc turning rule. This peplum remains an open flat piece and is never joined into a ring.
| Row | Instruction | Count |
|---|---|---|
| 1 | (Hdc in next 5 sts, 2 hdc in next st) x 24. | 168 sts |
| 2 | Hdc in each of the 168 sts. | 168 sts |
| 3 | Hdc in each of the 168 sts. | 168 sts |
| 4 | (Hdc in next 6 sts, 2 hdc in next st) x 24. | 192 sts |
| 5 | Hdc in each of the 192 sts. | 192 sts |
| 6 | Hdc in each of the 192 sts. | 192 sts |
| 7 | Hdc in each of the 192 sts. | 192 sts |
| 8 | (Hdc in next 7 sts, 2 hdc in next st) x 24. | 216 sts |
| 9 | Hdc in each of the 216 sts. | 216 sts |
| 10 | Hdc in each of the 216 sts. | 216 sts |
| 11 | Hdc in each of the 216 sts. | 216 sts |
| 12 | (Hdc in next 8 sts, 2 hdc in next st) x 24. | 240 sts |
| 13 | Hdc in each of the 240 sts. | 240 sts |
| 14 | Hdc in each of the 240 sts. | 240 sts |
| 15 | Hdc in each of the 240 sts. | 240 sts |
| 16 | (Hdc in next 9 sts, 2 hdc in next st) x 24. | 264 sts |
| 17 | Hdc in each of the 264 sts. | 264 sts |
| 18 | Hdc in each of the 264 sts. | 264 sts |
| 19 | Hdc in each of the 264 sts. | 264 sts |
| 20 | Hdc in each of the 264 sts. | 264 sts |
Hem row: ch 1, turn and sc once in each of the 264 hdc. (264 sts) Fasten off with a 25 cm / 10 in tail.
The increase rows consume and produce: 144 → 168, 168 → 192, 192 → 216, 216 → 240 and 240 → 264 stitches. All other rows preserve their previous count.
Checkpoint: the peplum is approximately 13 cm / 5.1 in deep, with a waist width of 72 cm / 28.3 in and an open hem width of 132 cm / 52 in at the assumed gauge. The fuller hem forms folds when wrapped around the body. Keep the entire left side opening free for the zipper.
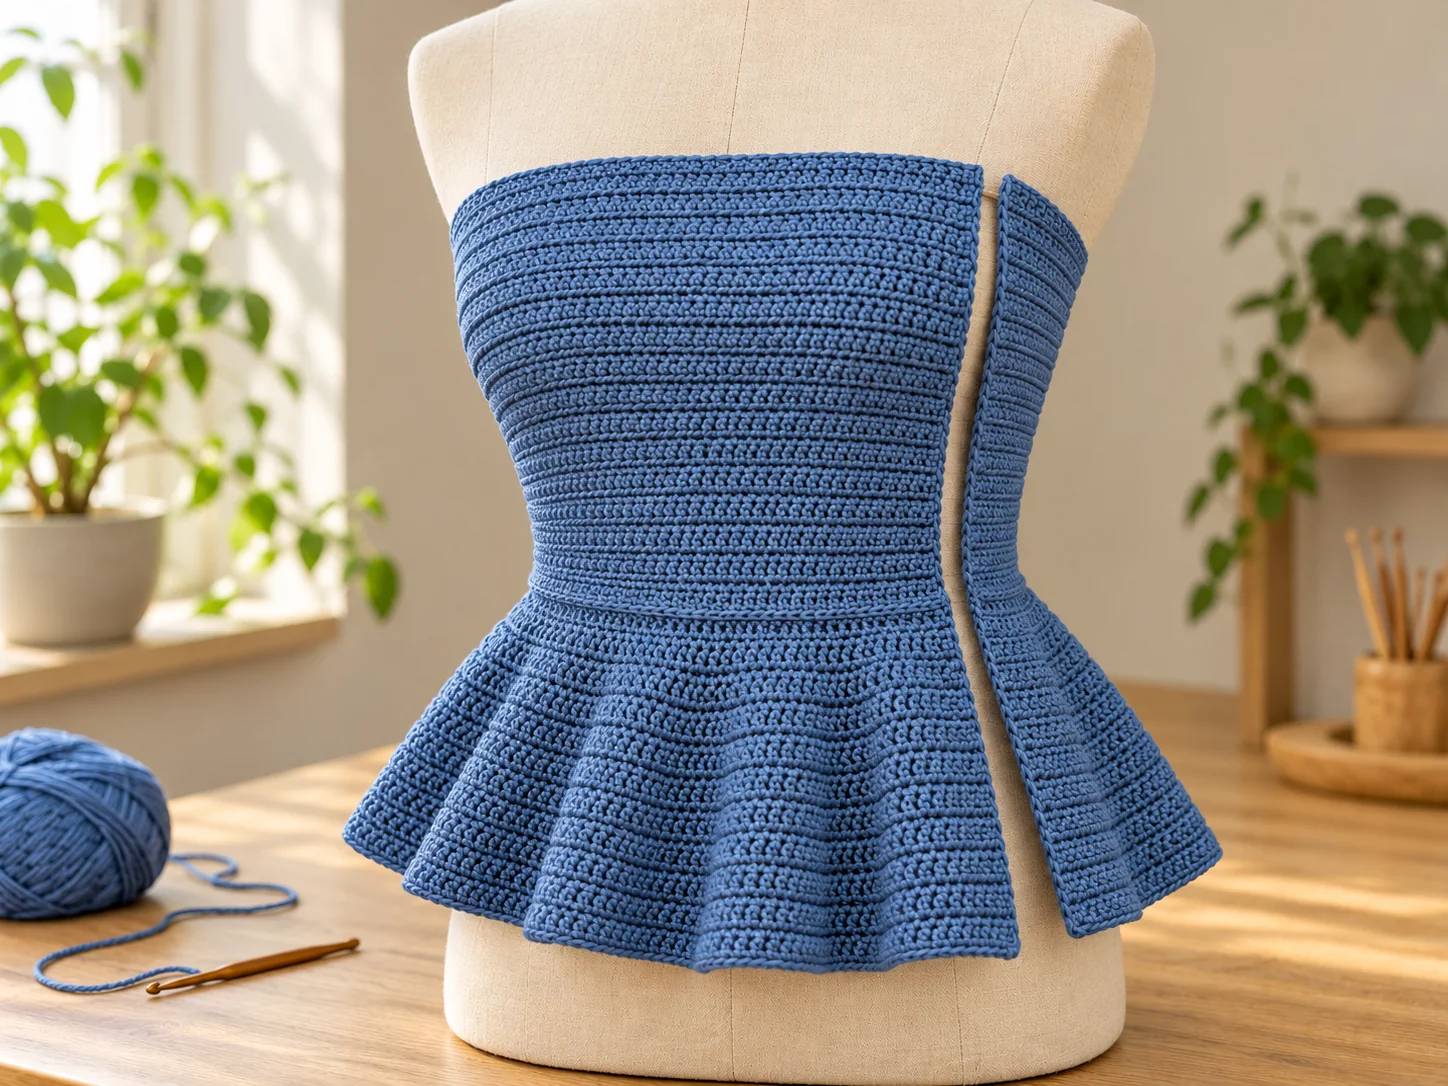
AI-generated illustration of the attached peplum before assembly.
Step 4: Crochet the folded front overlays
Make 2 identical tapered pieces. Mirroring is done during folding and placement, not by changing stitch counts.
Each piece starts at its narrow waist tip and widens toward the bust. Using blue yarn, ch 9. Apply the sc turning rule to every row.
| Row | Instruction | Count |
|---|---|---|
| 1 | Sc in second ch from hook and each remaining ch. | 8 sts |
| 2 | 2 sc in first st, sc in next 6 sts, 2 sc in last st. | 10 sts |
| 3 | Sc in each of the 10 sts. | 10 sts |
| 4 | 2 sc in first st, sc in next 8 sts, 2 sc in last st. | 12 sts |
| 5 | Sc in each of the 12 sts. | 12 sts |
| 6 | 2 sc in first st, sc in next 10 sts, 2 sc in last st. | 14 sts |
| 7 | Sc in each of the 14 sts. | 14 sts |
| 8 | 2 sc in first st, sc in next 12 sts, 2 sc in last st. | 16 sts |
| 9 | Sc in each of the 16 sts. | 16 sts |
| 10 | 2 sc in first st, sc in next 14 sts, 2 sc in last st. | 18 sts |
| 11 | Sc in each of the 18 sts. | 18 sts |
| 12 | 2 sc in first st, sc in next 16 sts, 2 sc in last st. | 20 sts |
| 13 | Sc in each of the 20 sts. | 20 sts |
| 14 | 2 sc in first st, sc in next 18 sts, 2 sc in last st. | 22 sts |
| 15 | Sc in each of the 22 sts. | 22 sts |
| 16 | 2 sc in first st, sc in next 20 sts, 2 sc in last st. | 24 sts |
| 17 | Sc in each of the 24 sts. | 24 sts |
| 18 | 2 sc in first st, sc in next 22 sts, 2 sc in last st. | 26 sts |
| 19 | Sc in each of the 26 sts. | 26 sts |
| 20 | 2 sc in first st, sc in next 24 sts, 2 sc in last st. | 28 sts |
| 21 | Sc in each of the 28 sts. | 28 sts |
| 22 | 2 sc in first st, sc in next 26 sts, 2 sc in last st. | 30 sts |
| 23 | Sc in each of the 30 sts. | 30 sts |
| 24 | 2 sc in first st, sc in next 28 sts, 2 sc in last st. | 32 sts |
| 25 | Sc in each of the 32 sts. | 32 sts |
| 26 | Sc in each of the 32 sts. | 32 sts |
| 27 | Sc in each of the 32 sts. | 32 sts |
| 28 | Sc in each of the 32 sts. | 32 sts |
| 29 | Sc in each of the 32 sts. | 32 sts |
| 30 | Sc in each of the 32 sts. | 32 sts |
| 31 | Sc in each of the 32 sts. | 32 sts |
| 32 | Sc in each of the 32 sts. | 32 sts |
| 33 | Sc in each of the 32 sts. | 32 sts |
| 34 | Sc in each of the 32 sts. | 32 sts |
| 35 | Sc in each of the 32 sts. | 32 sts |
| 36 | Sc in each of the 32 sts. | 32 sts |
| 37 | Sc in each of the 32 sts. | 32 sts |
| 38 | Sc in each of the 32 sts. | 32 sts |
| 39 | Sc in each of the 32 sts. | 32 sts |
| 40 | Sc in each of the 32 sts. | 32 sts |
| 41 | Sc in each of the 32 sts. | 32 sts |
| 42 | Sc in each of the 32 sts. | 32 sts |
| 43 | Sc in each of the 32 sts. | 32 sts |
| 44 | Sc in each of the 32 sts. | 32 sts |
| 45 | Sc in each of the 32 sts. | 32 sts |
| 46 | Sc in each of the 32 sts. | 32 sts |
| 47 | Sc in each of the 32 sts. | 32 sts |
| 48 | Sc in each of the 32 sts. | 32 sts |
| 49 | Sc in each of the 32 sts. | 32 sts |
| 50 | Sc in each of the 32 sts. | 32 sts |
| 51 | Sc in each of the 32 sts. | 32 sts |
| 52 | Sc in each of the 32 sts. | 32 sts |
| 53 | Sc in each of the 32 sts. | 32 sts |
| 54 | Sc in each of the 32 sts. | 32 sts |
| 55 | Sc in each of the 32 sts. | 32 sts |
| 56 | Sc in each of the 32 sts. | 32 sts |
| 57 | Sc in each of the 32 sts. | 32 sts |
| 58 | Sc in each of the 32 sts. | 32 sts |
| 59 | Sc in each of the 32 sts. | 32 sts |
| 60 | Sc in each of the 32 sts. | 32 sts |
Fasten off each piece with a 30 cm / 12 in tail; use additional matching yarn lengths for attachment.
Checkpoint: each overlay is approximately 25 cm / 9.8 in tall, 4 cm / 1.6 in wide at its narrow end and 16 cm / 6.3 in wide across its broad end.
Lay both pieces with their chosen outside faces upward and their narrow ends pointing down. On the left piece, fold its outer left edge inward by approximately 1.5 cm / 0.6 in through Rows 25–60. Taper that fold to zero between Rows 25 and 13. Mirror this fold on the outer right edge of the right piece. Pin the folds and secure them with small stitches on the underside, keeping the main decorative edges soft.
Step 5: Crochet the sash
Using blue yarn, ch 301. This sash is worked along its full length, not in hundreds of short rows. Apply the sc turning rule to every row.
| Row | Instruction | Count |
|---|---|---|
| 1 | Sc in second ch from hook and each remaining ch. | 300 sts |
| 2 | Sc in each of the 300 sts. | 300 sts |
| 3 | Sc in each of the 300 sts. | 300 sts |
| 4 | Sc in each of the 300 sts. | 300 sts |
| 5 | Sc in each of the 300 sts. | 300 sts |
| 6 | Sc in each of the 300 sts. | 300 sts |
| 7 | Sc in each of the 300 sts. | 300 sts |
| 8 | Sc in each of the 300 sts. | 300 sts |
| 9 | Sc in each of the 300 sts. | 300 sts |
| 10 | Sc in each of the 300 sts. | 300 sts |
Fasten off with a 20 cm / 8 in tail. Weave in both ends. No extra edging is added to the sash.
Checkpoint: approximately 150 cm / 59.1 in long and 4.2 cm / 1.7 in wide. The sash remains separate so the zipper can be opened easily.
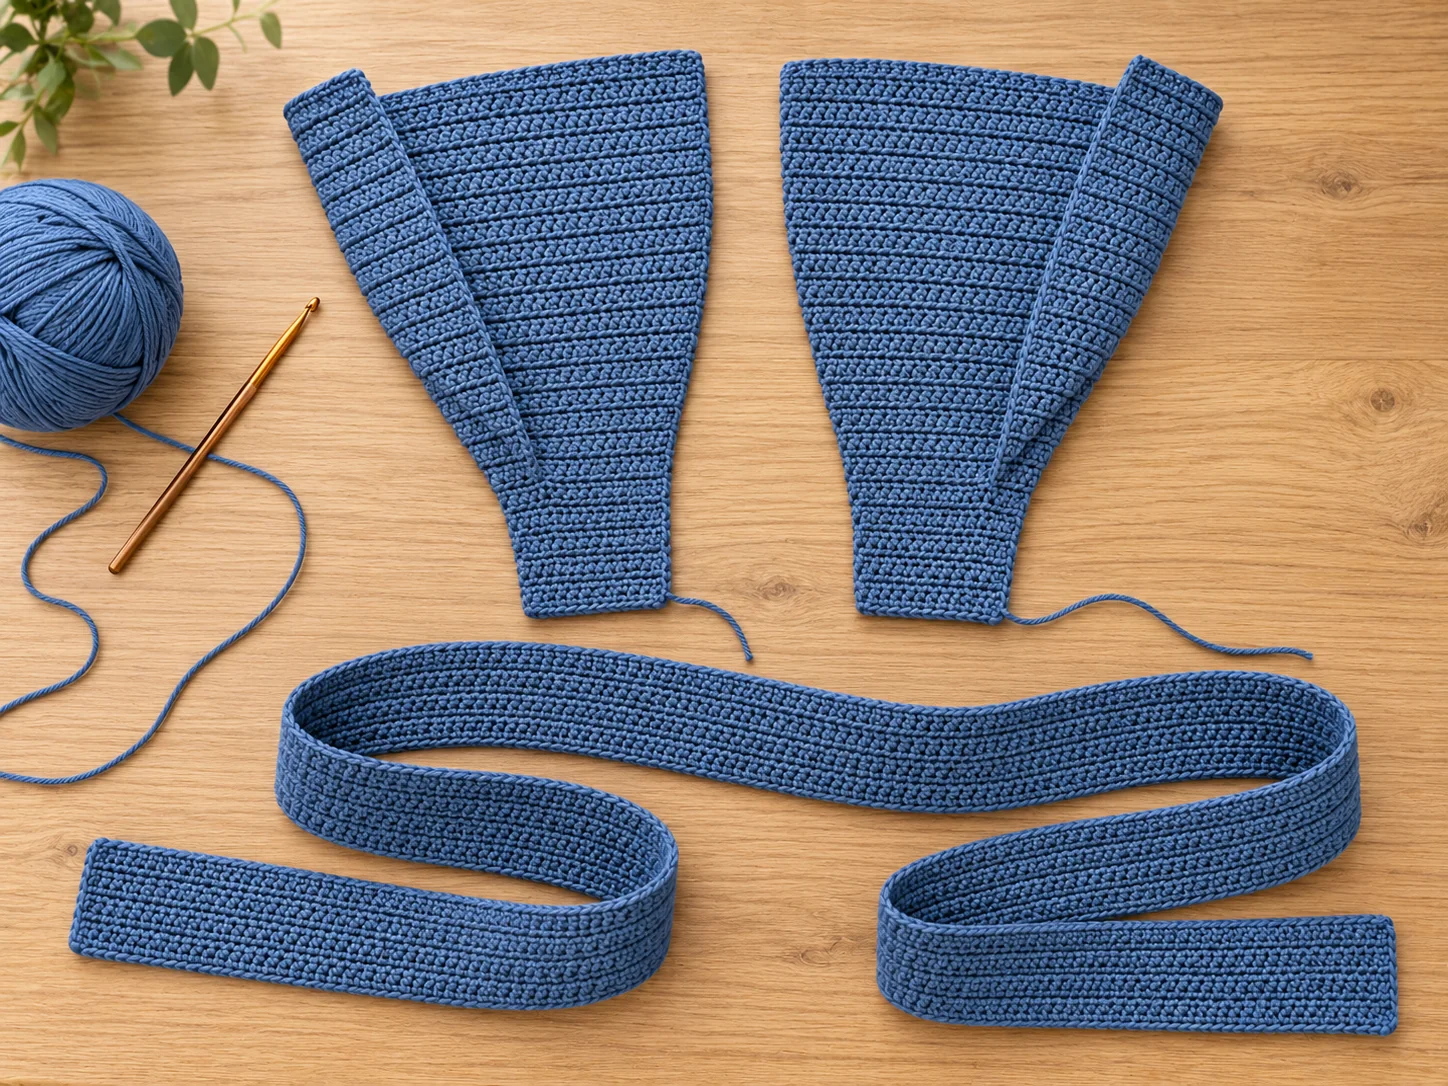
AI-generated illustration of the folded overlays and separate sash.
Assembly
Add the neckline facing
Do this before attaching the overlays. With the garment’s inside facing you, start at one open left neckline corner and join blue yarn.
- Facing Row 1: ch 1, sc in each of the front’s 84 top stitches and each of the back’s 84 top stitches, crossing the right seam without adding a stitch. (168 sts)
- Facing Row 2: ch 1, turn, sc in each st. (168 sts)
- Facing Row 3: ch 1, turn, sc in each st. (168 sts)
Fasten off with a 25 cm / 10 in tail.
Fold this facing down onto the garment’s inside along the original Row 48 neckline. Its three rows form a channel approximately 1.25 cm / 0.5 in deep. Using matching sewing thread, stitch the facing’s free long edge to the inside, keeping the original neckline stitches free and leaving both short channel ends open.
Position and attach the front overlays
Place the top outside up, with the front facing you. For the following placement references, count front-panel stitches from the wearer’s right toward the wearer’s left, separately on each numbered bodice row.
- Position the right overlay’s narrow Row 1 over bodice Row 1, stitches 33–40. Position the left overlay’s narrow Row 1 over bodice Row 1, stitches 35–42. These tips overlap at the center waist; put the left overlay on top.
- On bodice Row 48, position the right overlay across approximately stitches 7–38 and the left overlay across approximately stitches 47–78. Align approximately overlay Row 54 with bodice Row 48, allowing the remaining six overlay rows to rise above the main neckline.
- Fan the panels outward at their broad ends and keep their narrow ends near the center waist. Maintain the mirrored outer folds. The full underlying bodice remains behind the decorative V.
- Pin every 3–4 cm / 1–1.5 in along each panel. Try on before sewing; these positions are starting points, and bust fullness may require modest repositioning.
- Sew each narrow bottom edge to the waist. Sew the inner long edges to the bodice through small hidden stitches, stopping where the overlay rises above the main neckline. Add underside attachment tacks along the folded outer edges at overlay Rows 13, 25, 37 and 54. Tack overlay Row 54 to bodice Row 48 at the upper corners.
- Secure all attachment yarn ends on the inside. Keep the folded upper extension free above the neckline.
Fit the elastic and install the zipper
Thread the 7 mm elastic through the facing channel. Clip its ends temporarily at the two open left neckline corners. Start with a working length around 80 cm / 31.5 in, then adjust on the wearer; this is a fitting starting point, not a universal elastic formula.
The neckline should remain comfortably in place without digging in or making the bodice buckle. Leave enough at both ends to turn under approximately 1 cm / 0.4 in and anchor firmly to the inside beside the zipper tape. Secure the ends without stitching across the zipper teeth.
Measure the full left opening from the neckline to the peplum hem. Place lightweight woven tape behind each crochet edge, trimming it to the opening length. Baste the zipper tape behind these stabilized edges, with its top at the neckline and its lower stop just above the hem. Match bodice Row 1, the peplum increase rows and both hem corners across the opening.
Try the zipper before sewing permanently. The edges should meet with a small clearance beside the teeth and no gathered or stretched crochet. Sew both zipper tapes to the stabilized edges with matching thread. Secure the short facing ends beside the zipper; do not close the elastic channel through the elastic’s moving length.
AI-generated illustration of the neckline facing and side zipper placement.
Finishing
Weave in every remaining tail on the inside, including the peplum hem, side seam, facing and overlay attachments. Remove all pins, clips and temporary basting.
Dampen and shape the garment only as permitted by the yarn label. Lay it flat, supporting the peplum folds without stretching the neckline or waist. Dry the sash flat separately.
Once completely dry, close the zipper and check the neckline, waist and side opening on the wearer. Wrap the sash once around the waist, centered over the bodice-to-peplum join. Tie a flat front knot, slightly to the wearer’s left of center, with the two ends hanging down. The sash is not sewn to the garment.
Tips and fixes
| Issue | Likely cause | Practical correction |
|---|---|---|
| The neckline slides down | Elastic is too loose, or the washed bodice is larger than planned | Refit the elastic; if the fabric itself is too loose, revise the bodice rather than tightening the sash |
| The folded front pulls the bodice sideways | Overlay tips or upper anchors were sewn under tension | Release the attachment stitches, repin on the wearer and resew without stretching either layer |
| The peplum has a sharp point near its opening | Row-end tension differs between the two sides | Check turning chains and row counts, then reshape gently during permitted blocking |
| The zipper ripples or catches yarn | Crochet was stretched during sewing, or fabric sits too close to the teeth | Remove the affected seam, rebaste to the woven tape at its relaxed length and leave tooth clearance |
| The sash curls or feels too stiff | Foundation chain or stitch tension is too tight | Remake the sash with a looser foundation or slightly larger hook, checking its final length |