

This cheerful hanging Santa combines a small stuffed crochet head with a long red ribbon body that is wrapped into a loose spiral. White edging, a curly beard, a pointed hat, miniature holly details, and two bells give it the layered Christmas look visible in the reference.
This is an image-inspired, untested pattern draft. Dimensions, yarn quantities, gauge, and construction choices below are proposed rather than measured from the photographed item. The stage visuals supplied with this post are AI-generated illustrations intended to show the proposed construction; they are not real process photographs and should not be used as proof of exact stitch counts.
Project at a Glance
Skill level: Intermediate.
The project uses continuous amigurumi rounds, increases and decreases, flat rows, decorative edging, small appliqués, light stuffing, embroidery, and multi-part assembly.
Proposed finished size: approximately 31–34 cm / 12–13.5 in from the top of the hanging loop to the lowest bell.
Approximate head diameter: 6–7 cm / 2.4–2.8 in.
Approximate spiral ribbon before wrapping: 52–56 cm / 20.5–22 in long and about 4 cm / 1.6 in wide before the white edging.
Approximate making time: 5–7 hours.
Construction: a combination of continuous rounds, flat rows, separate decorative pieces, and hand assembly.
Proposed gauge: approximately 24 sc and 26 rows per 10 cm / 4 in in firm single crochet with the suggested yarn and hook. This gauge has not been physically measured or tested. Exact gauge is less important than keeping the head fabric dense enough that stuffing does not show.
For the ribbon, a working assumption of roughly 20 hdc per 10 cm / 4 in gives a finished strip in the intended length range. If your strip is much shorter or longer, adjust the foundation chain before adding the white edging.
Materials
For this design, use a smooth Fine / #2 sport-weight yarn so the facial details and edging stay crisp without making the ornament too heavy.
The Craft Yarn Council classifies Sport/Baby yarn within the Fine weight family and notes that its hook-size tables are only general guidelines; a smaller hook can be deliberately chosen when a firmer fabric is required.
Yarn
The quantity estimates below assume yarn labeled approximately 50 g = 160 m / 175 yd.
- Red: about 30 g / 96 m / 105 yd
- White: about 16 g / 51 m / 56 yd
- Skin tone: about 10 g / 32 m / 35 yd
- Green: about 5 g / 16 m / 18 yd
- Black: small scrap for eyes and glasses
- Pink or rose: tiny scrap for cheeks
Tools and Notions
- 3.0 mm crochet hook
- Polyester fiberfill
- Yarn needle
- Stitch marker
- Scissors
- Straight pins or sewing clips
- Black embroidery thread for glasses, optional
- 2 small jingle bells, approximately 18–20 mm
- Optional sewing thread for securely attaching bells
A 3.0 mm hook is intentionally smaller than the general hook guidance for many yarns in this weight range because a compact ornament benefits from firmer fabric. Adjust if your yarn behaves differently.
Crochet Abbreviations
The standard US crochet abbreviations below follow Craft Yarn Council terminology. Its master list defines abbreviations including ch, sc, hdc, dc, inc, dec, rnd, sl st, st, and sts.
| ABBREVIATION | MEANING |
|---|---|
| MR | Magic ring |
| ch | Chain |
| sl st | Slip stitch |
| sc | Single crochet |
| hdc | Half double crochet |
| dc | Double crochet |
| inc | 2 sc in the same stitch |
| dec | Single-crochet decrease over 2 stitches |
| rnd | Round |
| st / sts | Stitch / stitches |
| rep | Repeat |
Special stitch: Picot
Picot: ch 3, then sl st into the first ch of that ch-3.
Working notes
For the head, hat, nose, and pom-pom, work in continuous rounds without joining unless stated otherwise. Place a marker in the first stitch of every round.
For flat rows, ch 1 to turn; the turning chain does not count as a stitch.
Step 1 — Crochet the Head
Use skin-tone yarn.
Head
Rnd 1: 6 sc in MR. (6 sts)
Rnd 2: inc in each st around. (12 sts)
Rnd 3: (1 sc, inc) × 6. (18 sts)
Rnd 4: (2 sc, inc) × 6. (24 sts)
Rnd 5: (3 sc, inc) × 6. (30 sts)
Rnd 6: (4 sc, inc) × 6. (36 sts)
Rnd 7: sc around. (36 sts)
Rnd 8: sc around. (36 sts)
Rnd 9: sc around. (36 sts)
Rnd 10: sc around. (36 sts)
Rnd 11: sc around. (36 sts)
Rnd 12: sc around. (36 sts)
Rnd 13: (4 sc, dec) × 6. (30 sts)
Rnd 14: (3 sc, dec) × 6. (24 sts)
Begin stuffing firmly but evenly.
Rnd 15: (2 sc, dec) × 6. (18 sts)
Add more stuffing, shaping the head into a rounded ball.
Rnd 16: (1 sc, dec) × 6. (12 sts)
Rnd 17: dec × 6. (6 sts)
Fasten off, thread the tail through the remaining stitches, pull closed, and secure.
Checkpoint: the head should be firm and round, approximately 6–7 cm / 2.4–2.8 in across with the proposed yarn and gauge.
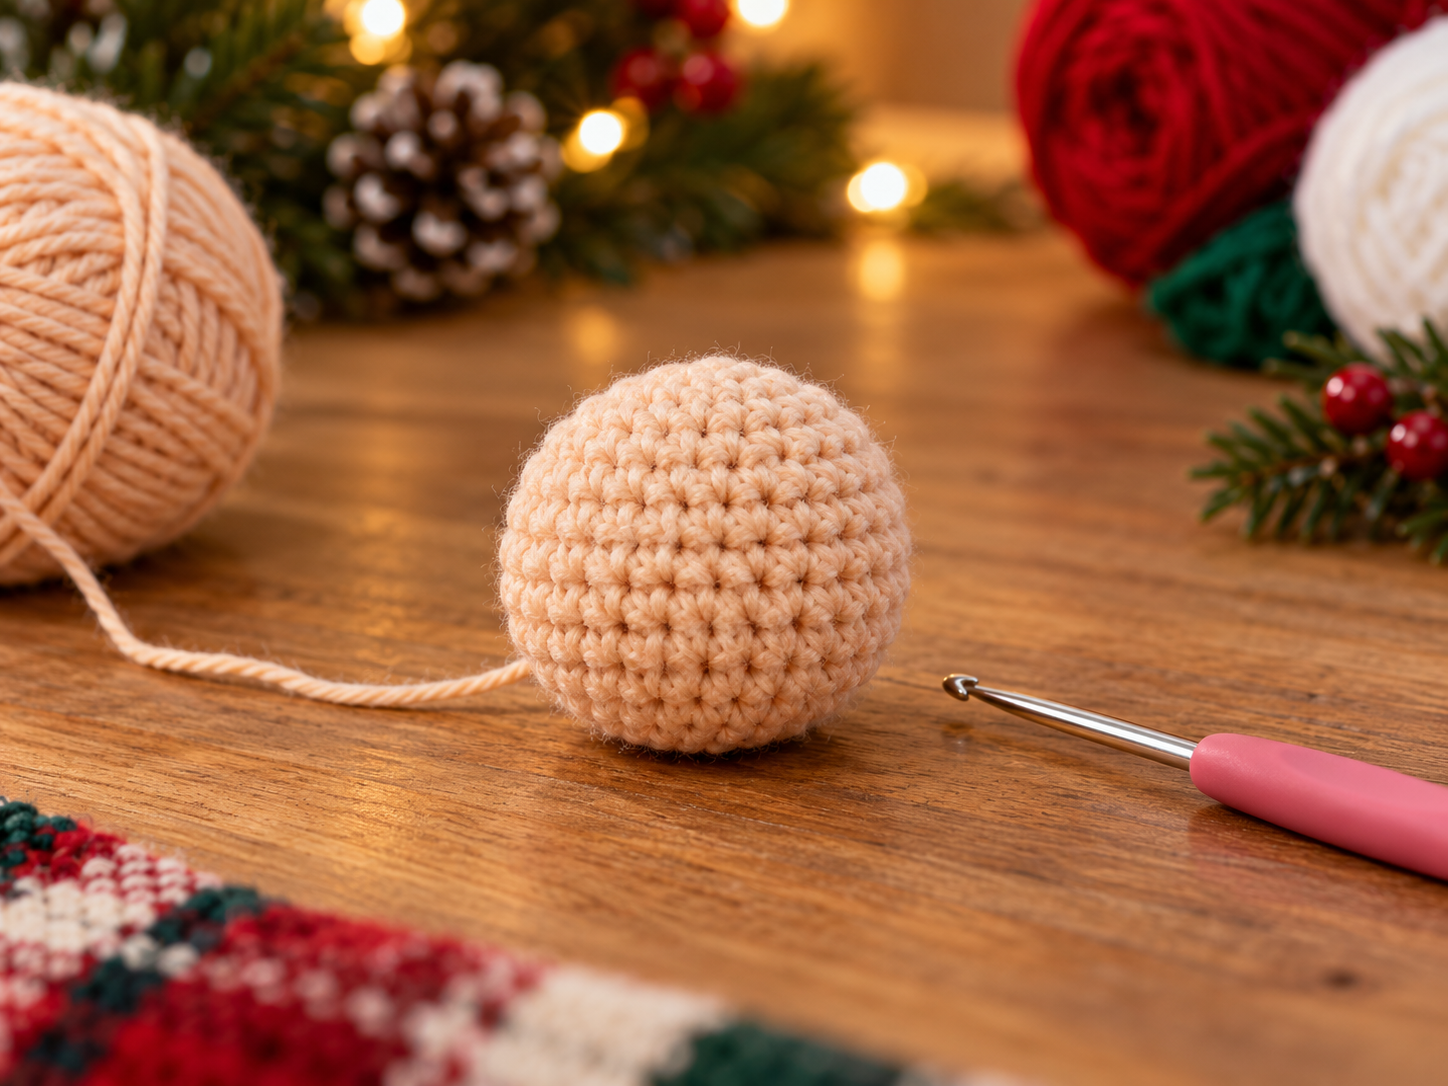
stuffed skin-tone crochet head before facial details
Step 2 — Make the Santa Hat and Pom-Pom
Red Hat
Use red yarn.
Rnd 1: 6 sc in MR. (6 sts)
Rnd 2: sc around. (6 sts)
Rnd 3: (1 sc, inc) × 3. (9 sts)
Rnd 4: sc around. (9 sts)
Rnd 5: (2 sc, inc) × 3. (12 sts)
Rnd 6: sc around. (12 sts)
Rnd 7: (3 sc, inc) × 3. (15 sts)
Rnd 8: sc around. (15 sts)
Rnd 9: (4 sc, inc) × 3. (18 sts)
Rnd 10: sc around. (18 sts)
Rnd 11: (5 sc, inc) × 3. (21 sts)
Rnd 12: sc around. (21 sts)
Rnd 13: (6 sc, inc) × 3. (24 sts)
Rnd 14: sc around. (24 sts)
Rnd 15: (7 sc, inc) × 3. (27 sts)
Rnd 16: sc around. (27 sts)
Rnd 17: (8 sc, inc) × 3. (30 sts)
Rnd 18: sc around. (30 sts)
Rnd 19: (9 sc, inc) × 3. (33 sts)
Rnd 20: sc around. (33 sts)
Rnd 21: (10 sc, inc) × 3. (36 sts)
Rnd 22: sc around. (36 sts)
Do not fasten off yet.
White Hat Brim
Change to white.
Rnd 23: sc in each st around. Join with sl st to first sc. (36 sts)
Rnd 24: (sl st in next st, 5 dc in next st, sl st in next st) × 12. (12 shells)
Fasten off and weave in ends.
Pom-Pom
Use white yarn.
Rnd 1: 6 sc in MR. (6 sts)
Rnd 2: inc around. (12 sts)
Rnd 3: sc around. (12 sts)
Add a tiny amount of stuffing.
Rnd 4: dec × 6. (6 sts)
Fasten off, close the opening, and leave a sewing tail.
Sew the pom-pom firmly to the tip of the hat.
Step 3 — Add the Face, Beard and Collar
Nose
Use skin-tone yarn.
Rnd 1: 6 sc in MR. (6 sts)
Rnd 2: inc around. (12 sts)
Rnd 3: sc around. (12 sts)
Stuff very lightly.
Rnd 4: dec × 6. (6 sts)
Fasten off, close, and leave a sewing tail.
Beard Base
Use white yarn.
Ch 9.
Row 1: sc in 2nd ch from hook and across. (8 sts)
Row 2: ch 1, turn, inc, 6 sc, inc. (10 sts)
Row 3: ch 1, turn, inc, 8 sc, inc. (12 sts)
Row 4: ch 1, turn, inc, 10 sc, inc. (14 sts)
Do not fasten off.
Curly Beard Edge
Working across the 14 stitches of Row 4:
sl st in next st, ch 4, then work 3 sc back down the chain starting in the 2nd ch from hook.
Repeat the sequence once in each of the 14 base stitches. (14 curls)
Fasten off, leaving a long sewing tail.
Moustache
Make 2 in white.
Ch 5.
Work 2 sc in each of the 4 chains, beginning in the 2nd ch from hook. (8 sc)
The piece will curl naturally. Fasten off, leaving a sewing tail.
Green Collar
Use green.
Ch 31.
Row 1: sc in 2nd ch from hook and across. (30 sts)
Fasten off green.
Attach white to one long edge.
White edging: (sl st in next st, 3 dc in next st, sl st in next st) × 10. (10 shells across 30 base sts)
Fasten off.
Position the Face
Place the eyes between Rounds 8 and 9, about 6 stitches apart, using black yarn or embroidery thread.
Sew the nose centered between the eyes, around Rounds 9–10.
Add two short pink stitches on either side of the nose for cheeks.
For the glasses, couch or embroider two small black circles around the eyes and add a short bridge across the nose. Keep the thread tension light so the crochet fabric does not pucker.
Pin the beard below the nose. Sew the narrow upper edge of the beard across the lower front of the head, approximately over Rounds 10–13.
Sew one moustache curl on each side directly below the nose.
Place the red hat over the top of the head. The white brim should sit across the upper forehead. Pin first, then sew the brim to the head with small hidden stitches.
Wrap the green collar around the lower head, overlap the ends slightly at the back, and sew them together.
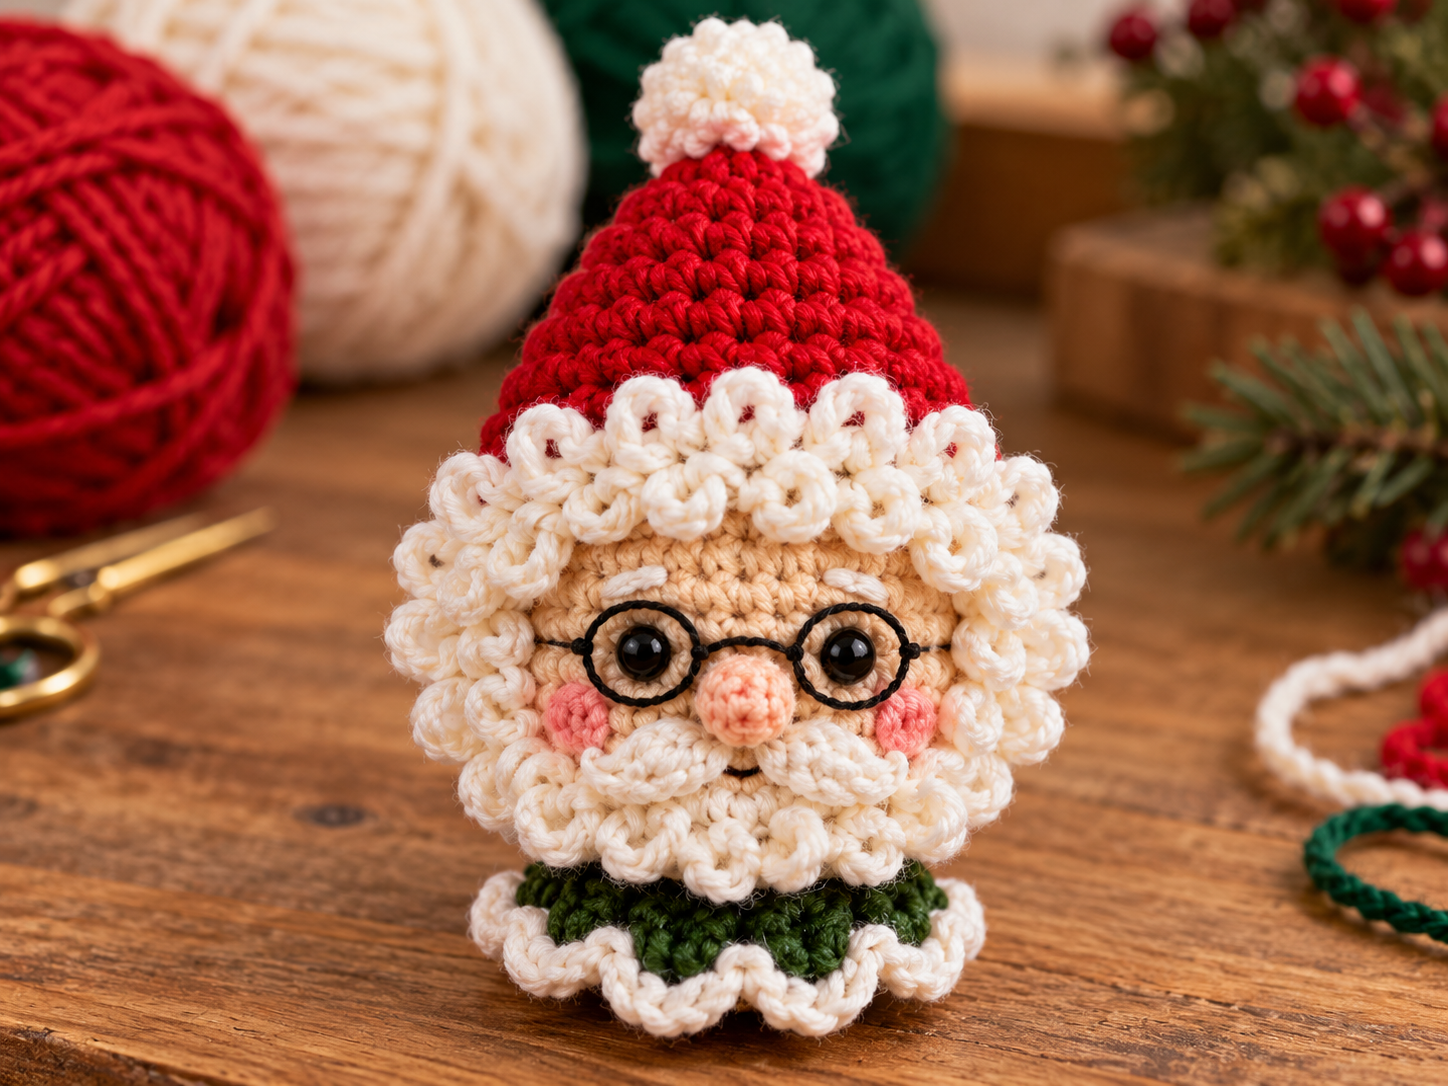
Santa head with red hat, white beard, embroidered glasses and green collar
Step 4 — Crochet the Spiral Ribbon Body
Use red yarn.
Ch 111.
Ribbon
Row 1: hdc in 2nd ch from hook and in every ch across. (110 sts)
Row 2: ch 1, turn, hdc across. (110 sts)
Row 3: ch 1, turn, hdc across. (110 sts)
Row 4: ch 1, turn, hdc across. (110 sts)
Row 5: ch 1, turn, hdc across. (110 sts)
Fasten off red.
The strip should be roughly 52–56 cm / 20.5–22 in long with the proposed gauge.
White Picot Edging — First Long Side
Attach white at one end of a long edge.
Repeat across the 110 base stitches:
(sc in next st, picot, sc in next st) × 55.
This produces 110 sc and 55 picots along the edge.
Fasten off.
White Picot Edging — Second Long Side
Repeat the same edging along the opposite long edge:
(sc in next st, picot, sc in next st) × 55.
Fasten off and weave in ends.
Leave the two short red ends unedged because one will sit beneath the head and the other will finish above the bells.
Checkpoint: the strip should lie flat before assembly. Do not try to permanently curl it yet.
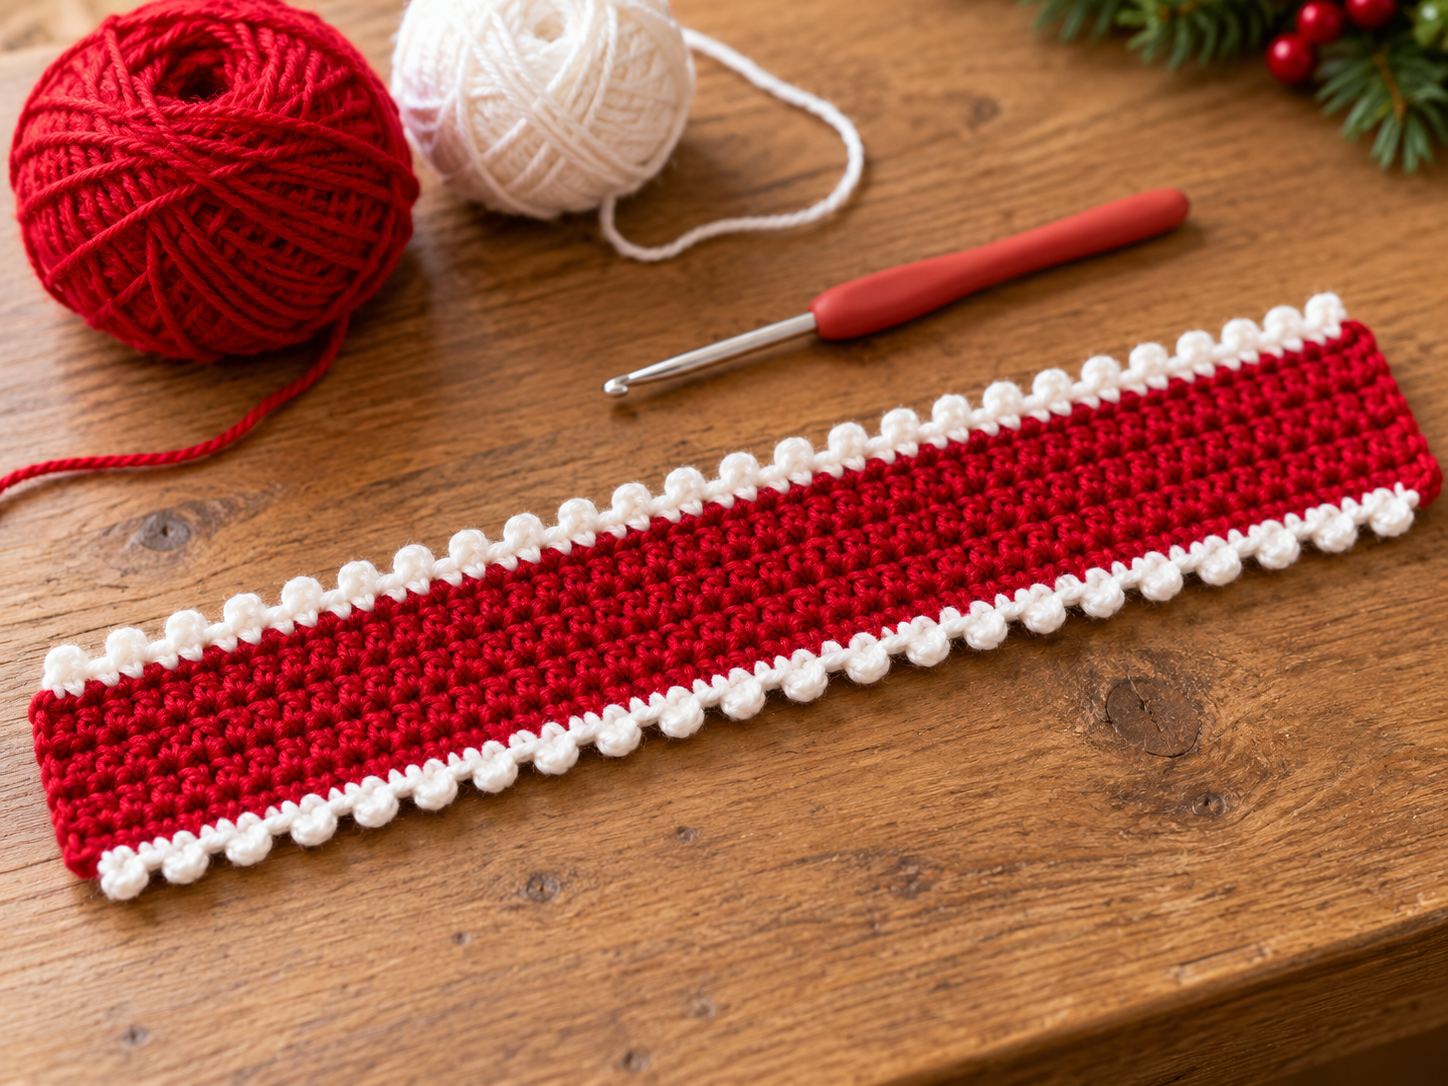
long red crochet ribbon with white picot edging laid flat
Step 5 — Make the Core Cord and Shape the Spiral
Use red yarn.
Ch 81.
Starting in the 2nd ch from the hook, sl st in each chain across. (80 sl sts)
Fasten off, leaving at least 20 cm / 8 in of yarn at each end.
This creates a narrow, relatively firm crocheted cord.
Shape the Spiral
Lay the core cord vertically.
Position the top of the red ribbon approximately 1.5 cm / 0.6 in below the upper end of the cord.
Wrap the ribbon around the cord in a loose downward spiral, aiming for approximately four full turns.
Keep the turns evenly spaced. The white edging should remain visible on the outer edges.
Use pins or clips to hold the shape temporarily.
With red yarn and a yarn needle, tack the ribbon to the core cord at approximately one point per turn. Pass the needle through only the back of the ribbon where possible so the stitches remain hidden from the front.
Leave approximately 2–3 cm / 0.8–1.2 in of core cord visible below the final turn for attaching the bells.

red edged ribbon wrapped into four loose turns around the crochet core cord
Step 6 — Crochet the Holly and Snowflake Details
Holly Leaf
Make 6 leaves in green.
Ch 7.
Starting in the 2nd ch from hook, work:
sl st, sc, hdc, dc, hdc, sc.
Ch 2 at the tip.
Continue down the unused loops on the opposite side of the foundation chain:
sc, hdc, dc, hdc, sc, sl st.
Total: 12 worked stitches around the foundation chain, plus the ch-2 tip.
Fasten off, leaving a sewing tail.
Holly Clusters
Arrange the leaves in 3 pairs.
Sew one pair onto the upper spiral turn, one pair near the middle, and one pair near the lower turn.
At the base of each leaf pair, embroider 3 small red French knots or compact red yarn knots to represent berries.
Mini Snowflake Appliqué
Make 3 in white.
Rnd 1: In MR, repeat
(sc in ring, ch 3, sl st in 2nd ch from hook, sl st in next ch) × 6.
Join with sl st to the first sc. (6 sc, 6 points)
Pull the ring tight and fasten off.
Sew the snowflakes onto open areas of the red ribbon, keeping them clear of the holly clusters.
Assembly and Finishing
1. Join the Head to the Cord
Place the upper end of the core cord against the center underside of the head.
Using the long cord tail, sew through the lower head several times, passing through firm crochet fabric rather than only through stuffing.
The head should sit directly above the first spiral turn.
2. Secure the Ribbon
Check the spacing of all four turns.
Add one or two extra hidden tacking stitches wherever the ribbon shifts or rotates.
Avoid over-tightening the tacks; the spiral should keep an open, dimensional shape.
3. Attach the Bells
Thread one bell onto each of the two lower yarn tails.
Secure each bell with several strong knots and additional sewing stitches through the lower end of the core cord.
Position one bell slightly lower than the other for a balanced finish.
For décor that will be handled frequently, reinforce the attachment with sewing thread.
4. Add the Hanging Loop
Use red or white yarn.
Ch 40.
Join with sl st to the first chain to form a loop.
Fasten off, leaving two long tails.
Sew the loop securely to the back of the hat near the pom-pom and pass the sewing tails through the top of the head for extra support.
5. Final Shaping
Hold the ornament upright.
Rotate any spiral turns that hide the white edging.
Straighten the beard curls with your fingers.
Check that the hat brim, collar, holly, snowflakes, bells, and hanging loop are all firmly attached.
Weave in all remaining ends.
Assembly and Finishing
1. Join the Head to the Cord
Place the upper end of the core cord against the center underside of the head.
Using the long cord tail, sew through the lower head several times, passing through firm crochet fabric rather than only through stuffing.
The head should sit directly above the first spiral turn.
2. Secure the Ribbon
Check the spacing of all four turns.
Add one or two extra hidden tacking stitches wherever the ribbon shifts or rotates.
Avoid over-tightening the tacks; the spiral should keep an open, dimensional shape.
3. Attach the Bells
Thread one bell onto each of the two lower yarn tails.
Secure each bell with several strong knots and additional sewing stitches through the lower end of the core cord.
Position one bell slightly lower than the other for a balanced finish.
For décor that will be handled frequently, reinforce the attachment with sewing thread.
4. Add the Hanging Loop
Use red or white yarn.
Ch 40.
Join with sl st to the first chain to form a loop.
Fasten off, leaving two long tails.
Sew the loop securely to the back of the hat near the pom-pom and pass the sewing tails through the top of the head for extra support.
5. Final Shaping
Hold the ornament upright.
Rotate any spiral turns that hide the white edging.
Straighten the beard curls with your fingers.
Check that the hat brim, collar, holly, snowflakes, bells, and hanging loop are all firmly attached.
Weave in all remaining ends.
nearly finished Spiral Santa ornament during final assembly with holly details and bells attached
Tips and Fixes
The spiral hangs too straight
Likely cause: the ribbon is tacked too tightly to the core cord.
Fix: remove the tightest tacking stitches, rotate the ribbon back into a broader helix, then reattach it with looser hidden stitches.
The head tilts forward
Likely cause: the cord was sewn only to the bottom surface of the head.
Fix: run the attachment yarn deeper through the stuffed head and anchor it closer to the top center beneath the hat.
Stuffing shows through the face
Likely cause: the hook is too large for the chosen yarn or the fabric is under-stuffed in some areas.
Fix: use a smaller hook for the head or remake it with firmer tension. Do not add excessive stuffing to compensate for very open stitches.
The beard looks flat
Likely cause: the curl chains were pulled too tightly during assembly.
Fix: gently twist each crochet curl around a yarn needle or hook shaft, then release it and separate the curls with your fingers.
The ribbon twists unpredictably
Likely cause: the white edging was worked at very different tensions on the two long sides.
Fix: lightly reshape the strip before wrapping. If one edge is dramatically shorter, redo that edge with looser tension so both sides lie closer to the same length.
Questions about a step?
If a stitch count or assembly detail is unclear, send us the post link and step number. For more practice with small projects, explore our crochet accessories patterns.