
This lightweight crochet top is built around a dramatic cream spiderweb motif, with open mesh sleeves and a wide boat neckline. The construction below is an original pattern draft inspired only by the visible garment in the supplied image; it is not the original creator’s pattern and has not been physically tested. The generated visuals are AI-generated illustrations of the proposed construction, not process photographs or proof of exact stitch counts.
Project at a Glance
Skill level: Intermediate. The project uses center-out lace, large chain spaces, marked corner shaping, joined rounds, garment assembly, and open-mesh sleeves.
Proposed sample size: S/M.
Approximate finished measurements after blocking:
- Bust circumference: 94 cm / 37 in
- Body length: 47 cm / 18.5 in
- Boat-neck width laid flat: about 28 cm / 11 in
- Armhole depth: about 19 cm / 7.5 in
- Sleeve length from armhole: about 50 cm / 19.75 in
The open lace has considerable give. This draft is intended for an approximate body bust of 86–92 cm / 34–36 in. For a substantially different size, the panel dimensions and assembly counts should be recalculated rather than simply adding random outer rounds.
Approximate making time: 10–14 hours.
Construction: Two identical center-out square web panels are crocheted in joined rounds, blocked, joined at shoulders and side seams, then sleeves are worked directly around each armhole.
Proposed sizing gauge:
- Stabilized outer edge: 20 sc = 10 cm / 4 in
- Sleeve mesh: approximately 6 ch-5 spaces × 6 rounds = 10 cm / 4 in
These are target sizing assumptions for this draft, not measurements taken from a finished test garment.
Materials
For the airy appearance, use a CYC Category 2 Fine cotton or cotton-blend yarn. The Craft Yarn Council lists sport and baby yarns in this weight category and gives a general crochet-hook range of about 3.5–4.5 mm; this project uses a 4.0 mm hook to encourage an open lace fabric.
- 300 g cream or natural cotton/cotton-blend yarn
- Assumed yarn label: approximately 125 m / 137 yd per 50 g ball
- Purchase quantity: 6 × 50 g balls, approximately 750 m / 822 yd total
- 4.0 mm crochet hook
- Yarn needle
- Scissors
- 8 locking stitch markers
- Rustproof blocking pins
- Blocking mats or another suitable blocking surface
- Tape measure
Yardage is an estimate. Actual use changes with yarn construction, personal tension, sleeve length, and final blocking size.
Crochet Abbreviations
The abbreviations below use standard U.S. crochet terminology consistent with the Craft Yarn Council master list.
| Abbreviation | Meaning |
|---|---|
| ch | chain |
| ch-sp | chain space |
| dc | double crochet |
| sc | single crochet |
| sl st | slip stitch |
| st / sts | stitch / stitches |
| tr | treble crochet |
| rnd | round |
Turning chains: This pattern is worked in joined rounds and is not turned unless specifically stated. A beginning ch 1 does not count as a stitch. The beginning ch 3 in Body Panel Round 1 counts as one dc.
Join: Unless stated otherwise, join with a slip stitch to the first sc of the round.
Step 1 — Crochet the Center Web
Make 2 identical body panels in cream.
Round 1
Make a magic ring.
Ch 3, work 15 dc into the ring, then join to the top of the beginning ch 3.
Count: 16 dc.
Round 2
Ch 1, sc in the same stitch, ch 4.
Repeat [sc in next dc, ch 4] 15 times. Join.
Count: 16 sc and 16 ch-4 spaces.
Round 3
Sl st into the first ch-4 space. Ch 1, sc in that space, ch 5.
Repeat [sc in next ch-4 space, ch 5] 15 times. Join.
Count: 16 sc and 16 ch-5 spaces.
Round 4
Sl st into the first ch-space. Ch 1, sc in that space, ch 6.
Repeat [sc in next ch-space, ch 6] 15 times. Join.
Count: 16 sc and 16 ch-6 spaces.
Round 5
Sl st into the first ch-space. Ch 1, sc in that space, ch 7.
Repeat [sc in next ch-space, ch 7] 15 times. Join.
Count: 16 sc and 16 ch-7 spaces.
Place markers in sc numbers 1, 5, 9, and 13. These four positions will form the square corners.
At this point the work should resemble a circular spiderweb with 16 evenly spaced radial anchor points.
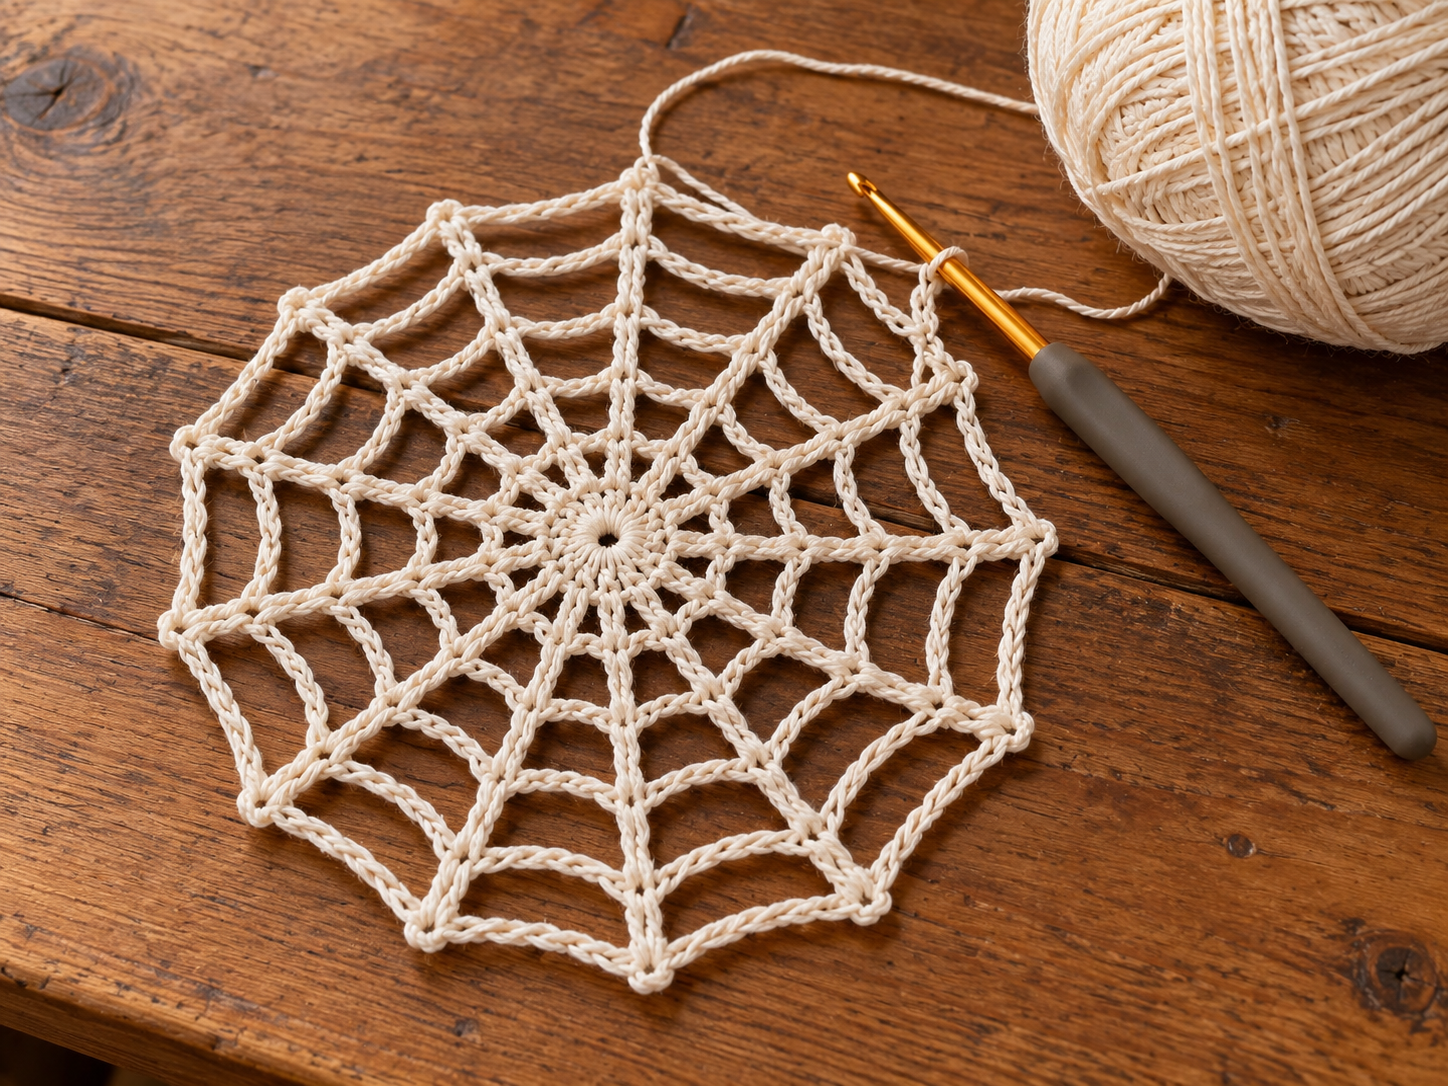
center spiderweb motif after Round 5
Step 2 — Expand and Square the Body Panel
For Rounds 6–17, work one sc into every previous chain space. After each sc, make the listed chain length. The four positions aligned with the marked corner anchors use the corner chain; all other 12 positions use the side chain. Move each marker upward to the new corner sc as you complete the round.
| Round | Side chain | Corner chain | Result |
|---|---|---|---|
| 6 | ch 8 | ch 11 | 16 sc; 12 ch-8 spaces; 4 ch-11 corner spaces |
| 7 | ch 9 | ch 13 | 16 sc; 12 ch-9 spaces; 4 ch-13 corner spaces |
| 8 | ch 10 | ch 15 | 16 sc; 12 ch-10 spaces; 4 ch-15 corner spaces |
| 9 | ch 11 | ch 17 | 16 sc; 12 ch-11 spaces; 4 ch-17 corner spaces |
| 10 | ch 12 | ch 19 | 16 sc; 12 ch-12 spaces; 4 ch-19 corner spaces |
| 11 | ch 13 | ch 21 | 16 sc; 12 ch-13 spaces; 4 ch-21 corner spaces |
| 12 | ch 14 | ch 23 | 16 sc; 12 ch-14 spaces; 4 ch-23 corner spaces |
| 13 | ch 15 | ch 25 | 16 sc; 12 ch-15 spaces; 4 ch-25 corner spaces |
| 14 | ch 16 | ch 27 | 16 sc; 12 ch-16 spaces; 4 ch-27 corner spaces |
| 15 | ch 17 | ch 29 | 16 sc; 12 ch-17 spaces; 4 ch-29 corner spaces |
| 16 | ch 18 | ch 31 | 16 sc; 12 ch-18 spaces; 4 ch-31 corner spaces |
| 17 | ch 19 | ch 33 | 16 sc; 12 ch-19 spaces; 4 ch-33 corner spaces |
Round 18 — Stabilizing Edge
Ch 1.
Work 1 sc into every anchor sc and 1 sc into every chain stitch around the entire outer round. Join.
Round 17 contains:
- 16 anchor sc
- 12 × 19 = 228 side-chain stitches
- 4 × 33 = 132 corner-chain stitches
Total Round 18 count: 376 sc.
Place a marker every 94 sc so the stabilized edge is divided into four equal sides.
Block the panel to approximately 47 × 47 cm / 18.5 × 18.5 in, keeping all four marked corners square.
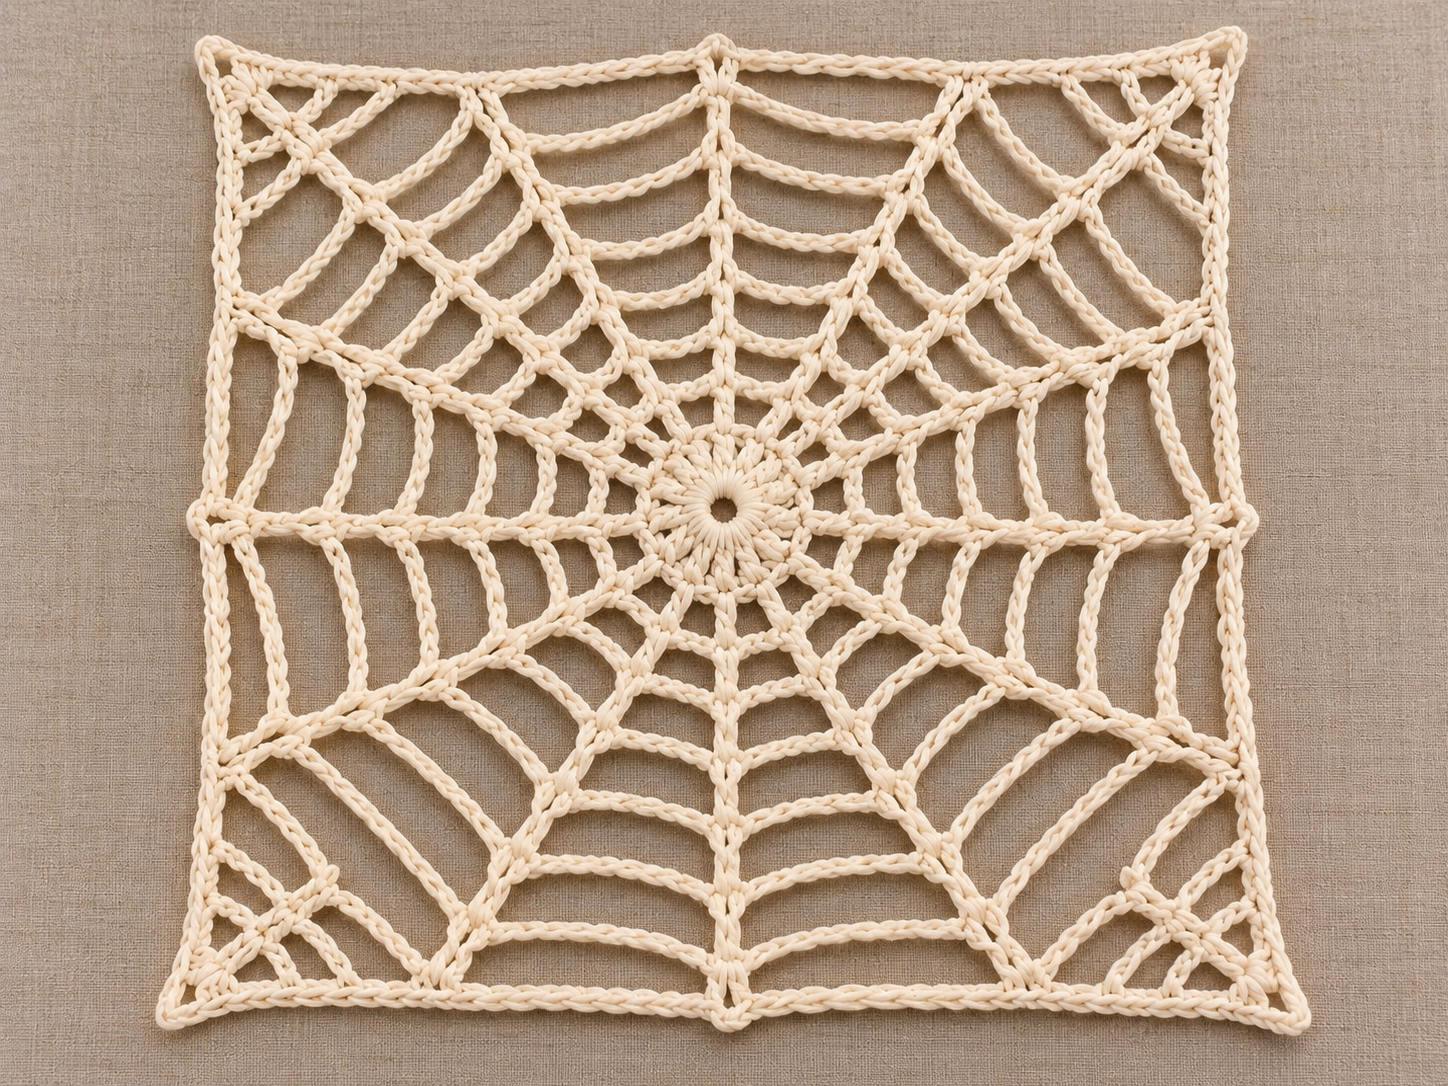
completed square spiderweb body panel after blocking
Step 3 — Make the Second Panel
Repeat Steps 1 and 2 exactly for the second body panel.
Confirm before assembly that both panels have:
- 376 sc around the outer edge
- 94 sc on each side between corner markers
- matching blocked dimensions
Do not join panels that differ substantially in size; re-block first and correct tension if necessary.
Step 4 — Join Shoulders and Sides
Place the two body panels together with wrong sides facing.
Shoulder Seams
Choose one 94-stitch edge on each panel as the top.
At the left shoulder, seam the first 19 sc of front and back together.
Leave the next 56 sc on each panel unseamed for the boat neckline.
At the right shoulder, seam the final 19 sc of front and back together.
Check:
19 shoulder sts + 56 neck sts + 19 shoulder sts = 94 sts.
Side Seams
On each side edge, begin at the bottom corner and seam 56 sc upward.
Leave the upper 38 sc unseamed for the armhole.
Check:
56 side-seam sts + 38 armhole sts = 94 sts.
Each completed armhole therefore contains:
38 front edge sts + 38 back edge sts = 76 edge sts.
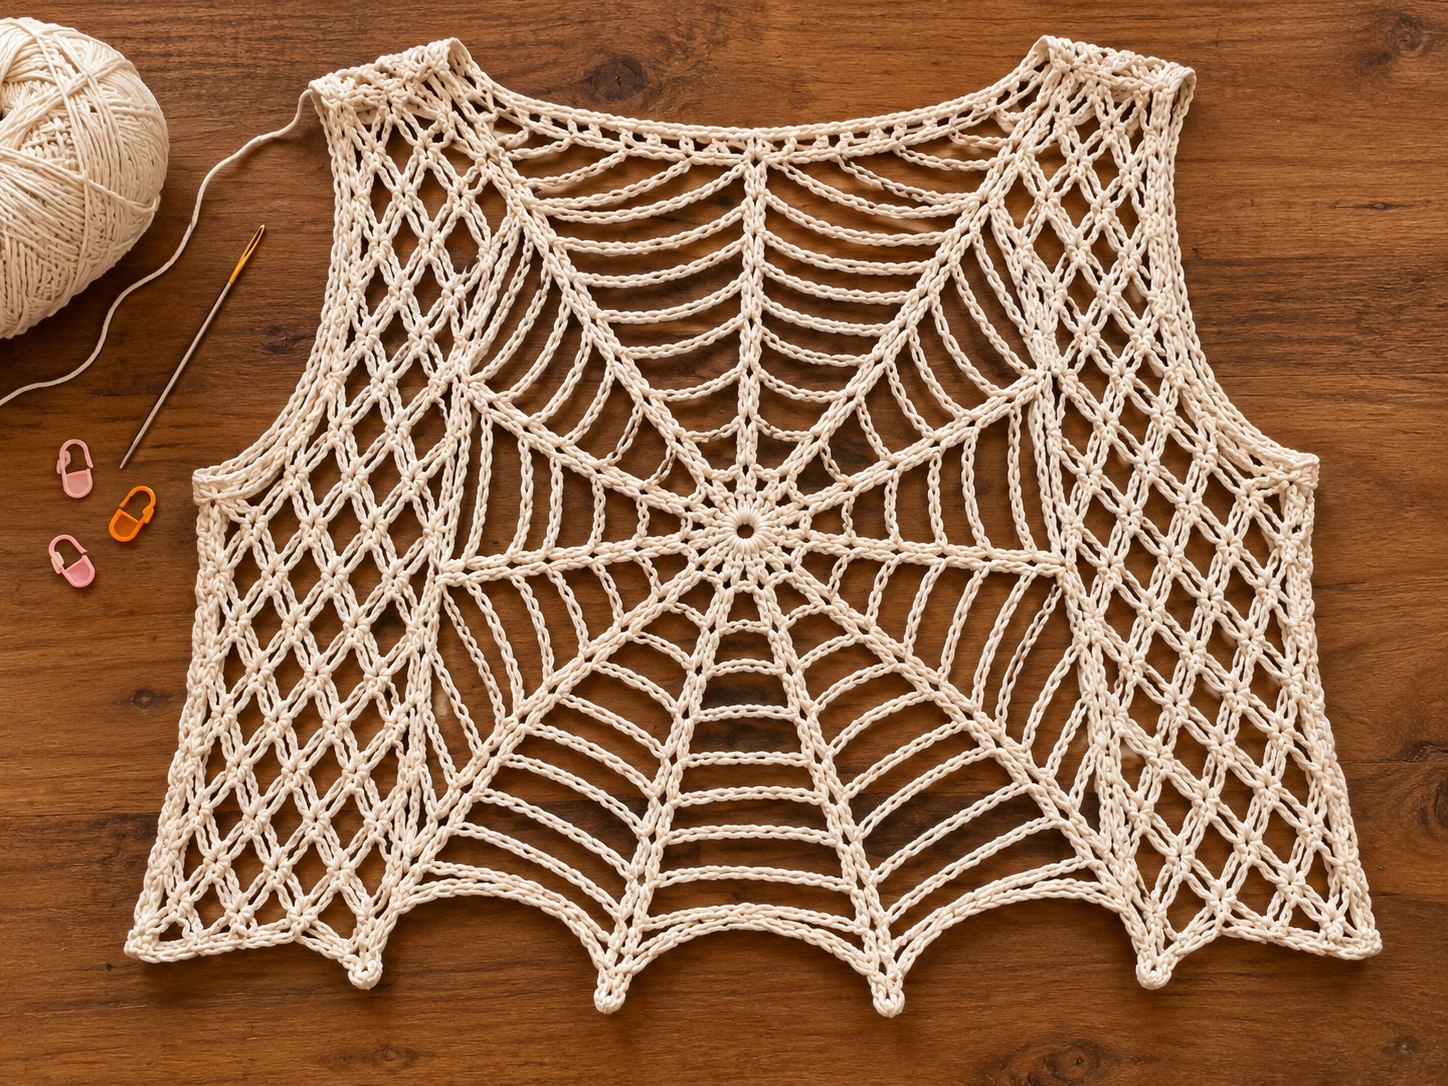
front and back panels joined at shoulders and side seams with armholes open
Step 5 — Crochet the Sleeves
Work each sleeve directly around one 76-stitch armhole.
Sleeve Round 1
Join yarn at the underarm seam. Ch 1.
You will create exactly 24 mesh anchors around the 76 armhole stitches.
Repeat the following distribution 4 times around the armhole:
- Work [sc in next edge st, ch 5, skip next 2 edge sts] 5 times.
- Then work sc in next edge st, ch 5, skip next 3 edge sts once.
Each repeat consumes:
5 × 3 edge sts + 4 edge sts = 19 edge sts.
Four repeats consume:
4 × 19 = 76 edge sts.
Join to the first sc.
Count: 24 sc and 24 ch-5 spaces.
Sleeve Rounds 2–30
Sl st into the first ch-5 space.
Ch 1, sc in the same space, ch 5.
Repeat [sc in next ch-5 space, ch 5] 23 times. Join.
Repeat this round until Round 30 is complete.
Each round: 24 sc and 24 ch-5 spaces.
At the proposed mesh gauge, 30 rounds gives approximately 50 cm / 19.75 in from the armhole.
Sleeve Round 31 — Pointed Cuff
Sl st into the first ch-5 space. Ch 1.
In each of the 24 ch-5 spaces work:
(sc, ch 3, tr, ch 3, sc)
Join to the first sc and fasten off.
Count: 48 sc, 24 tr, and 48 ch-3 sections.
Repeat the complete sleeve instructions for the second armhole.

open mesh sleeve being worked directly from the armhole
Step 6 — Finish the Boat Neckline
Join yarn at one shoulder seam.
Round 1: Ch 1, work 1 sc in each of the 56 front neckline stitches and each of the 56 back neckline stitches. Join.
Count: 112 sc.
Round 2: Ch 1, sc in each stitch around. Join and fasten off.
Count: 112 sc.
The neckline should remain wide and relaxed. Do not tighten the final round.
Step 7 — Finish and Block
Weave in all yarn ends securely on the wrong side.
Wet-block or steam-block according to the yarn manufacturer’s care instructions. Pin the body so that:
- each panel remains about 47 cm / 18.5 in square,
- the spiderweb spokes radiate evenly,
- the boat neckline lies flat,
- both sleeves are the same length,
- cuff points are opened and defined.
Allow the garment to dry completely before removing pins.
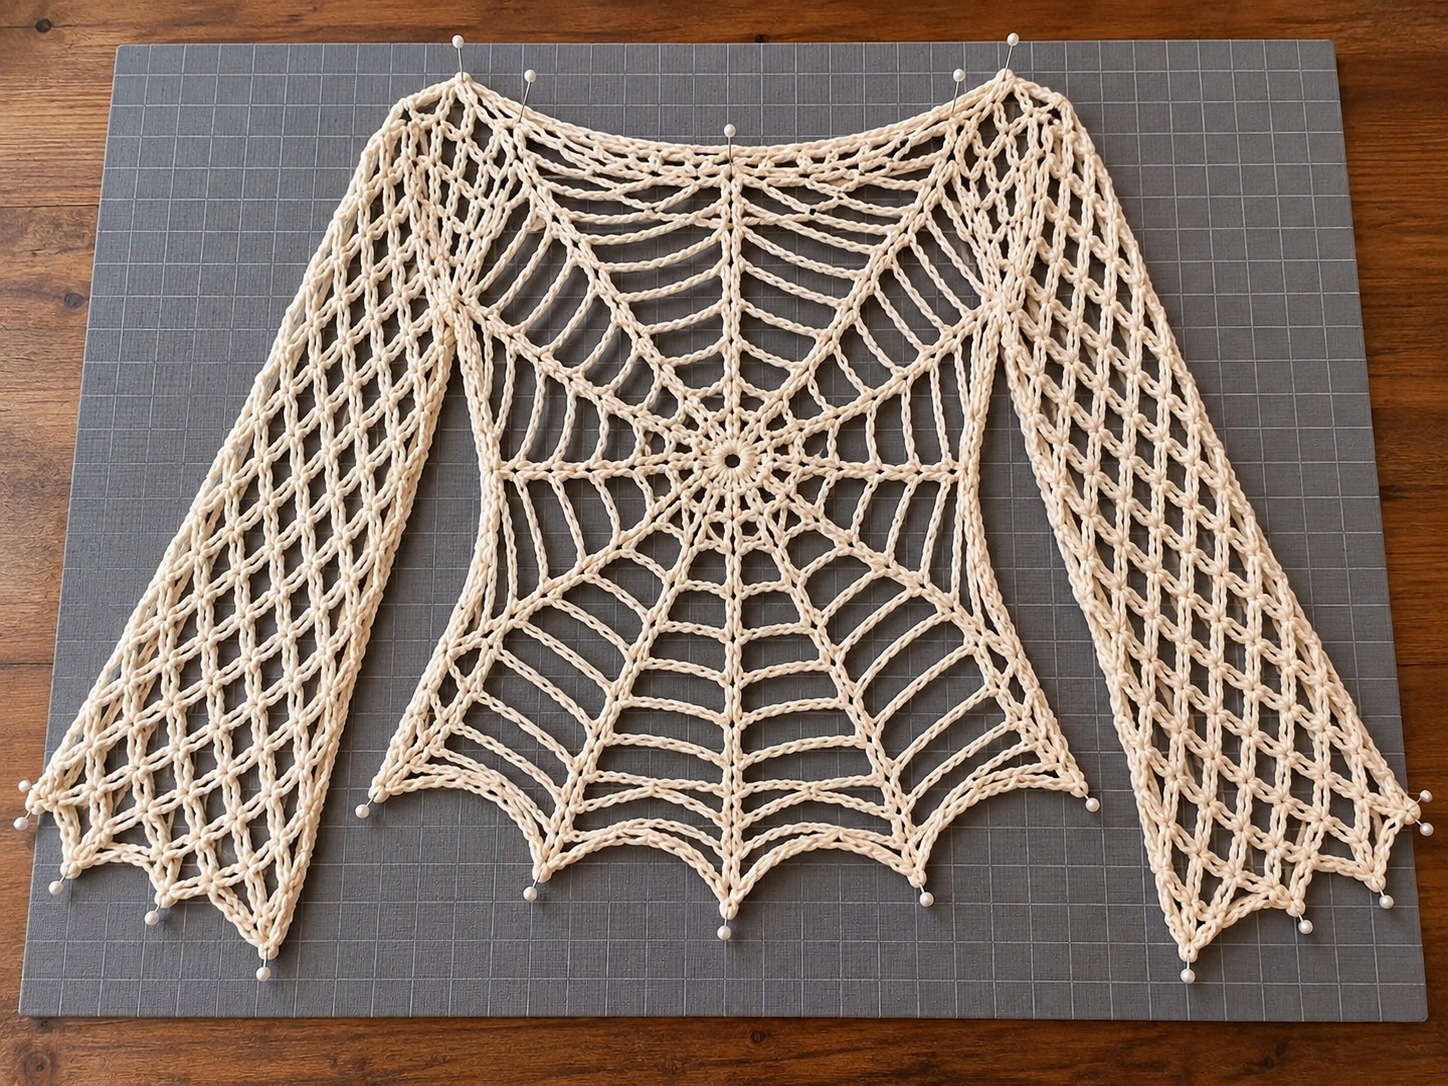
finished cream spiderweb top laid flat during final blocking
Assembly and Finishing
The assembly sequence is:
- Block both body panels.
- Join 19 stitches at each shoulder.
- Join 56 stitches on each side seam.
- Crochet both sleeves directly into the 76-stitch armholes.
- Add the 112-stitch neckline edging.
- Weave in ends.
- Complete final blocking.
No separate sleeve sewing is required because the sleeves are worked directly from the armholes.
Tips and Fixes
The body panel does not reach 47 cm / 18.5 in.
The likely cause is a tighter yarn/hook combination than the proposed sizing gauge. Check the stabilized Round 18 edge. For this draft, changing hook size and reworking the panel is preferable to adding an unplanned extra web round, because the 376-stitch perimeter controls the assembly counts.
The web looks circular instead of square.
Check that the four corner markers stayed at positions 1, 5, 9, and 13 through every expanding round. During blocking, pin those four corners first, then distribute the side sections evenly.
The armhole puckers when Sleeve Round 1 is added.
Verify the anchor distribution exactly: five 3-stitch intervals followed by one 4-stitch interval, repeated four times. This uses all 76 armhole stitches and produces 24 mesh spaces.
The sleeve mesh twists.
Do not turn the sleeve rounds. Slip stitch into the first chain space before beginning the next round so the join advances consistently.
The neckline feels too tight after edging.
The neckline should have 112 sc around before the second edging round. If your sc tension is significantly tighter than the body-edge gauge, use a slightly larger hook for the neckline edging rather than forcing the opening.
Questions about a step?
If a stitch count or assembly detail is unclear, send us the post link and step number. For more practice with small projects, explore our crochet accessories patterns.