

This airy crochet top combines a high ribbed collar with an open lattice upper section, a structured geometric band, floral lace motifs, and a decorative scalloped hem. The proposed construction below is inspired only by the visible garment and is designed as a practical one-size S/M draft.
About this tutorial: The images are AI-generated concept illustrations and may differ from the written construction. No independent test-crochet results or measured gauge swatch are documented for this version. Treat the size, yarn amounts, and row counts as planning estimates; check your pieces and adjust the fit before final assembly.
Project at a Glance
Skill level: Intermediate. The project uses joined motifs, chain-space lace, garment assembly, shoulder and side seams, ribbing worked through the back loop, edging, blocking, and consistent stitch placement across openwork sections.
Proposed finished size: approximately 88 cm / 34.6 in around the bust, approximately 40 cm / 15.7 in from shoulder to scalloped hem, excluding the collar. The collar is approximately 7 cm / 2.75 in tall.
Suggested fit: approximately 84–90 cm / 33–35.5 in bust, depending on yarn elasticity and blocking.
Estimated making time: approximately 10–14 hours.
Construction: Two matching rectangular panels are made from floral motifs, structured openwork, and a lattice upper section. The panels are seamed at the shoulders and sides. A ribbed collar is crocheted separately and sewn around the neckline.
Proposed gauge after blocking: approximately 18 dc × 9 rows = 10 cm / 4 in in a solid dc swatch. Each completed floral motif should block to approximately 10.5 cm / 4.1 in square.
These gauges are construction targets rather than measurements taken from the photographed garment.
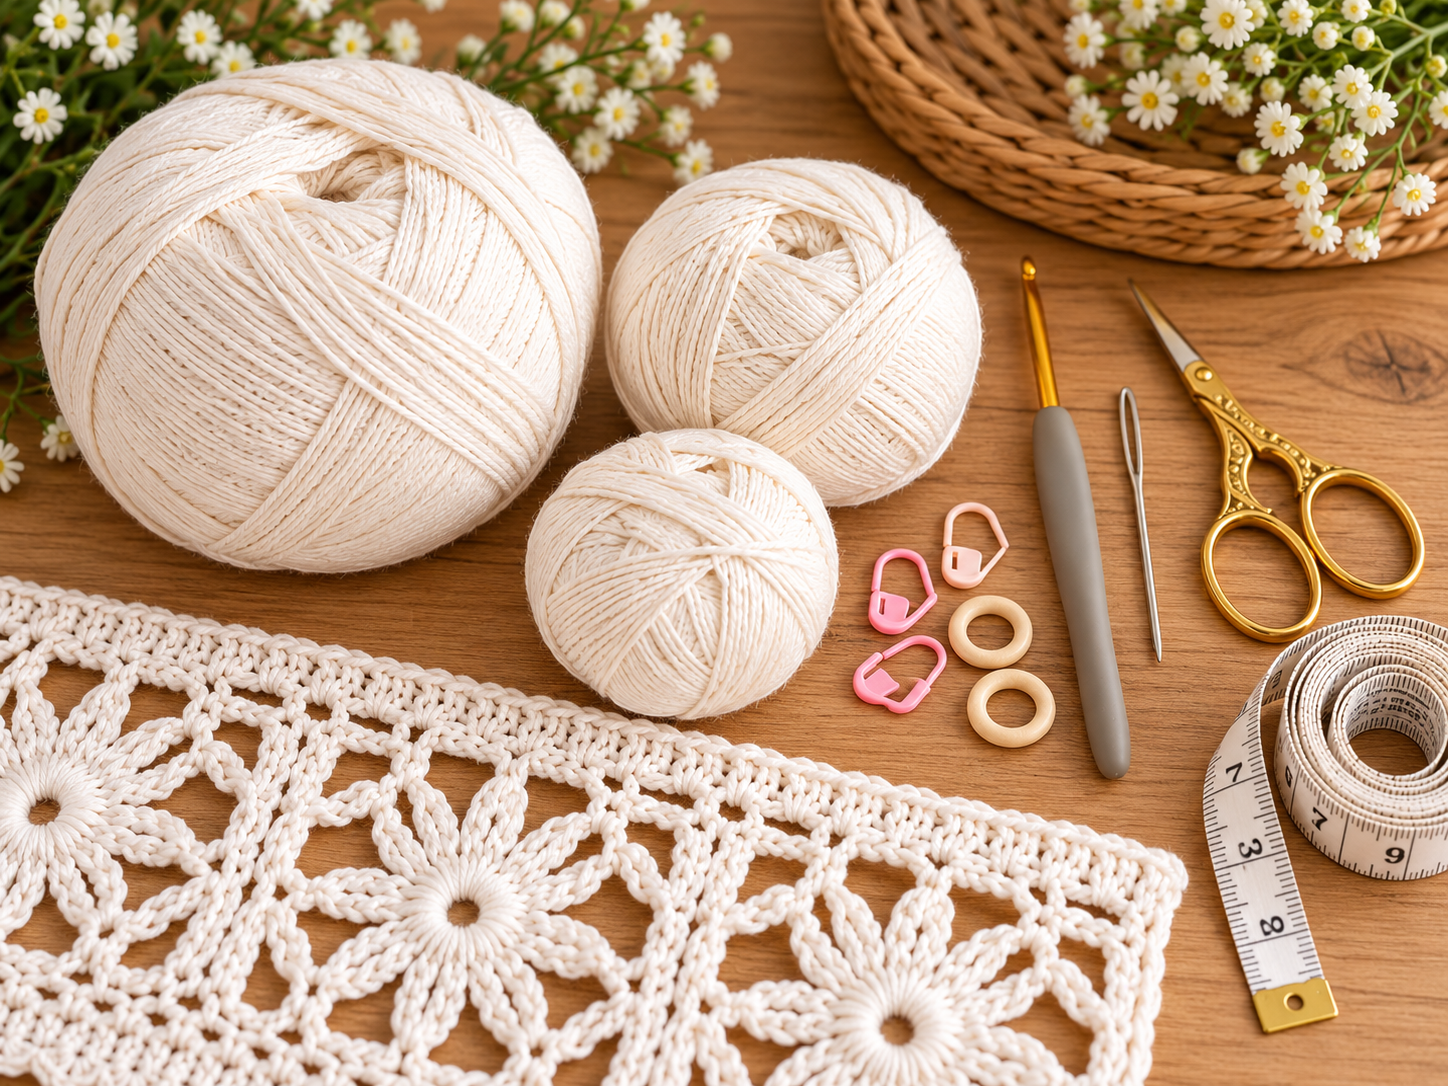
Ivory yarn, hook and tools for the lace top
Materials
Use approximately 300–350 g of DK / Light #3 cotton yarn in ivory, natural white, or cream.
For estimating yardage, this tutorial assumes a yarn label of approximately 125 m / 137 yd per 50 g ball, which gives roughly 750–875 m / 820–957 yd for the proposed size.
The Craft Yarn Council classifies DK/light-worsted-type yarns in the Light #3 category and gives general hook guidance rather than a mandatory pattern hook size. Craft Yarn Council
For this top, start with a 4.0 mm crochet hook. A relatively firm hook/yarn combination helps keep the openwork defined. Adjust the hook if needed to approach the proposed gauge.
Craft Yarn Council – Standard Yarn Weight System
Other Supplies
- 4.0 mm crochet hook
- Yarn needle
- Scissors
- Stitch markers
- Measuring tape
- Rustproof blocking pins
- Blocking mat or clean towel
Crochet Abbreviations
The US crochet abbreviations below follow standard terminology published by the Craft Yarn Council. Craft Yarn Council
| ABBREVIATION | MEANING |
|---|---|
| ch | chain |
| ch-sp | chain space |
| sc | single crochet |
| dc | double crochet |
| sl st | slip stitch |
| BLO | back loop only |
| st / sts | stitch / stitches |
| sk | skip |
| RS | right side |
| WS | wrong side |
Craft Yarn Council – Crochet Abbreviations
Unless specifically stated otherwise, turning chains do not count as stitches.
Step 1: Crochet the Floral Motifs
Make 8 motifs total: four for the front and four for the back.
Use ivory yarn.
Round 1
Make a magic ring.
Ch 3, which counts as the first dc.
Work 15 dc into the ring.
Join with a sl st to the top of the beginning ch-3.
Count: 16 dc.
Round 2
Ch 1.
Sc in next dc, ch 4, sk next dc.
Repeat from * to * 8 times.
Join with a sl st to the first sc.
Count: 8 sc and 8 ch-4 spaces.
Round 3 — Petals
Sl st into the first ch-4 space.
Ch 1.
Work (sc, hdc, 3 dc, hdc, sc) into the same ch-4 space.
Repeat the same 7-stitch petal in each remaining ch-4 space.
Join with a sl st to the first sc.
Count: 8 petals, 56 stitches total.
Round 4 — Outer Framework
Join yarn to the middle dc of one petal.
Ch 1 and sc in the same stitch.
Ch 7.
Sc in the middle dc of the next petal.
Ch 3.
Continue around, alternating a ch-7 corner space and a ch-3 side space between successive petal centers.
Join to the first sc.
Count: 8 sc anchors, 4 ch-7 corner spaces and 4 ch-3 side spaces.
Round 5 — Square the Motif
Sl st into the first ch-7 corner space.
Work (3 dc, ch 2, 3 dc) into that corner.
Work 5 dc into the next ch-3 side space.
Continue around, alternating:
(3 dc, ch 2, 3 dc) in each ch-7 corner space
and
5 dc in each ch-3 side space.
Join to the first dc.
Count: 44 dc and 4 ch-2 corner spaces.
Fasten off.
Block each motif to approximately 10.5 × 10.5 cm / 4.1 × 4.1 in.

Completed floral lace motif band
Step 2: Build the Lower Panels
Arrange four motifs in a horizontal row for the front panel.
Place the RS of the motifs facing upward.
Using the same ivory yarn and a yarn needle, mattress-stitch adjacent motifs together through corresponding border stitches.
Repeat with the remaining four motifs for the back panel.
Both strips should measure approximately 42–44 cm / 16.5–17.3 in wide after blocking.
Bottom Scalloped Border
Work this border separately on the bottom edge of each four-motif strip.
Border Row 1
With RS facing, join yarn at one lower corner.
Ch 1.
Work 79 sc evenly across the entire bottom edge.
Turn.
Count: 79 sc.
Border Row 2
Ch 1, sc in first st.
Sk 2 sts, work 5 dc in next st, sk 2 sts, sc in next st.
Repeat from * to * 13 times.
Fasten off.
Count: 13 five-dc shells and 14 sc anchors.
The hem should form a soft sequence of rounded scallops rather than a tight ruffle.
Step 3: Crochet the Structured Openwork Band
Work upward from the top edge of each four-motif panel.
Join yarn at the upper-right corner.
Foundation Row
Ch 1.
Work 81 sc evenly across, distributing the stitches as consistently as possible over all four motifs.
A practical distribution is approximately 20 sc over each motif plus one additional stitch at the final corner.
Turn.
Count: 81 sc.
Row 1
Ch 3, counting as the first dc.
Dc in each remaining stitch.
Turn.
Count: 81 dc.
Row 2
Ch 3, counting as the first dc.
Ch 3, sk 3 sts, dc in next st.
Repeat 20 times.
Turn.
Count: 21 dc and 20 ch-3 spaces.
Row 3
Ch 3, counting as the first dc.
Work 3 dc in next ch-3 space, dc in next dc.
Repeat 20 times.
Turn.
Count: 81 dc.
Row 4
Repeat Row 2.
Count: 21 dc and 20 ch-3 spaces.
Row 5
Repeat Row 3.
Count: 81 dc.
Row 6
Ch 1.
Sc in every stitch across.
Turn.
Count: 81 sc.
At this stage, the panel should have a floral lower section followed by a stable band with evenly spaced rectangular openings.
Step 4: Crochet the Upper Lattice
This section creates the airy upper chest and back panels.
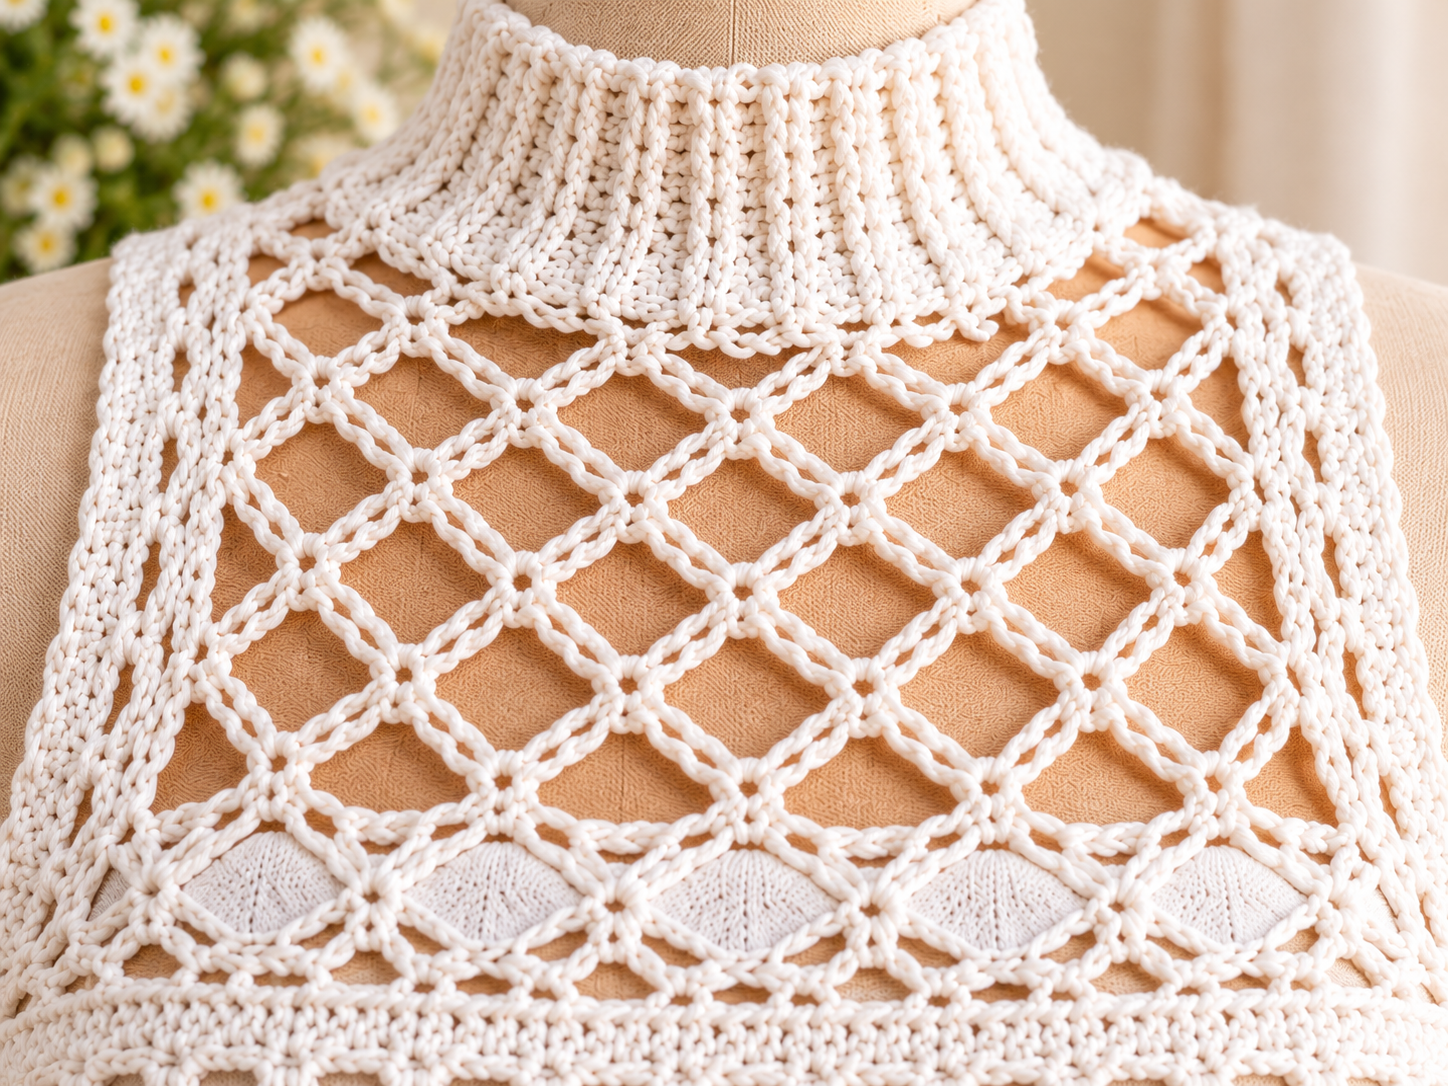
Close-up of the open lattice construction
Row 1
Ch 1.
Sc in first stitch.
Ch 5, sk 3 sts, sc in next st.
Repeat 20 times.
Turn.
Count: 21 sc anchors and 20 ch-5 spaces.
Row 2
Ch 3.
Sc in the first ch-5 space.
Ch 5, sc in the next ch-5 space.
Repeat 19 times.
Ch 3.
Sc in the final sc.
Turn.
Count: 21 sc anchors, 19 ch-5 spaces and 2 edge ch-3 spaces.
Row 3
Ch 1.
Sc in first sc.
Ch 5, sc in next sc.
Repeat 20 times.
Turn.
Count: 21 sc anchors and 20 ch-5 spaces.
Rows 4–11
Repeat Rows 2 and 3 four more times.
After Row 11, the work should finish with 21 sc anchors and 20 ch-5 spaces.
Row 12 — Stabilizing Row
Ch 1.
Sc in first sc.
Work 3 sc in next ch-5 space, sc in next sc.
Repeat 20 times.
Fasten off.
Count: 81 sc.
Repeat Steps 3 and 4 on the second panel.
After blocking, each completed panel should measure approximately 44 cm / 17.3 in wide.
Step 5: Assemble the Top
Place the front and back panels together with RS facing.
The lattice sections should be at the top and the floral motifs at the hem.
Shoulder Seams
Across the top edge of each panel there are 81 stitches.
Count 18 stitches inward from each outer edge and place markers.
Using a yarn needle, seam the first 18 front stitches to the corresponding 18 back stitches at one shoulder.
Repeat on the other shoulder.
Leave the center 45 stitches of each panel unseamed.
This creates the neckline.
The calculation is:
18 shoulder sts + 45 neckline sts + 18 shoulder sts = 81 sts.
Turn the garment RS out.
Side Seams
Align the side edges.
Starting at the bottom of the floral section, seam upward through the floral band and the structured openwork section.
Stop where the upper lattice begins.
Leave the lattice section open at both sides to create the armholes.
Pin both side seams before sewing so the horizontal bands align across the front and back.
Step 6: Crochet and Attach the Ribbed Collar
The visible garment has a substantial high-neck ribbed finish. This proposed collar is worked sideways using BLO sc.

Ribbed crochet collar close-up
Collar Foundation
Ch 13.
Row 1
Sc in second ch from hook and in every remaining chain.
Turn.
Count: 12 sc.
Row 2
Ch 1.
Sc in BLO of every stitch.
Turn.
Count: 12 sc.
Rows 3–60
Repeat Row 2.
Every row contains 12 sc.
The finished strip should measure approximately 44–46 cm / 17.3–18.1 in long before seaming.
If your gauge differs significantly, check the strip around the neckline before sewing. Add or remove rows in pairs while keeping the collar slightly smaller than the neckline so it sits neatly rather than flaring.
Join the Collar
Bring Row 1 and Row 60 together.
Whip-stitch the short edges to form a ring.
Place the collar seam at the center back neckline.
Mark the collar at four equal quarter points.
Mark the neckline at:
- center back;
- right shoulder;
- center front;
- left shoulder.
Match the four collar markers to the four neckline markers.
Pin evenly.
Sew the lower edge of the ribbed collar around the neckline, easing the approximately 60 collar row-ends evenly around the neckline opening.
Do not pull the neckline tighter while sewing.
Step 7: Armhole Edging and Finishing
Join yarn at the bottom of one armhole.
Armhole Round 1
Ch 1.
Work approximately 64 sc evenly around the armhole, distributing stitches consistently over front and back row ends.
Join with a sl st.
Target count: 64 sc.
Check that the armhole lies flat.
If it visibly flares, remove 2–4 stitches. If it puckers, add 2–4 stitches, then repeat exactly the same count on the second armhole.
Armhole Round 2
Ch 1.
Work one sc in each stitch around.
Join with a sl st.
Fasten off.
Count: 64 sc when using the proposed target.
Repeat for the second armhole.
Final Blocking
Weave in all yarn ends.
Wet-block or steam-block according to the yarn manufacturer’s care instructions.
Lay the top flat and square the floral motifs first.
Gently open the chain lattice with your fingers and pins without overstretching it.
Align both side seams and shoulder seams.
Shape the scalloped hem so all shells have approximately equal width.
Allow the garment to dry completely before removing the pins.
Tips and Fixes
The floral motifs are different sizes. This usually comes from tension changes. Block all eight motifs to the same dimensions before joining them. Do not rely on pulling the smaller motif into position during seaming.
The openwork band puckers. Check that Row 2 has exactly 20 ch-3 spaces and that Row 3 returns to 81 dc. An accidentally missed space or extra dc will gradually change the panel width.
The lattice looks uneven. Keep every ch-5 loop relaxed and consistent. Blocking should open the loops, but it will not fully correct large tension differences.
The neckline is too loose. Make the ribbed strip several rows shorter rather than tightening the seam. A slightly stretched ribbed collar usually sits more cleanly around the neck.
The armholes flare outward. Reduce the number of sc in Armhole Round 1 by two stitches at a time until the edging lies flat, then use that same count on both sides.

Side and armhole edging detail
Questions about a step?
If a stitch count or assembly detail is unclear, send us the post link and step number. For more practice with small projects, explore our crochet accessories patterns.